
Do your new photos look too dark? Are they too bright and washed out? Many new camera buyers face this same problem. You might wonder what is exposure triangle in photography. It is the real secret to taking great photos. This guide will help you understand your camera. We will explain aperture, shutter speed, and ISO. You will get clear and simple tips. Let us fix those blurry shots today.
Quick Answer
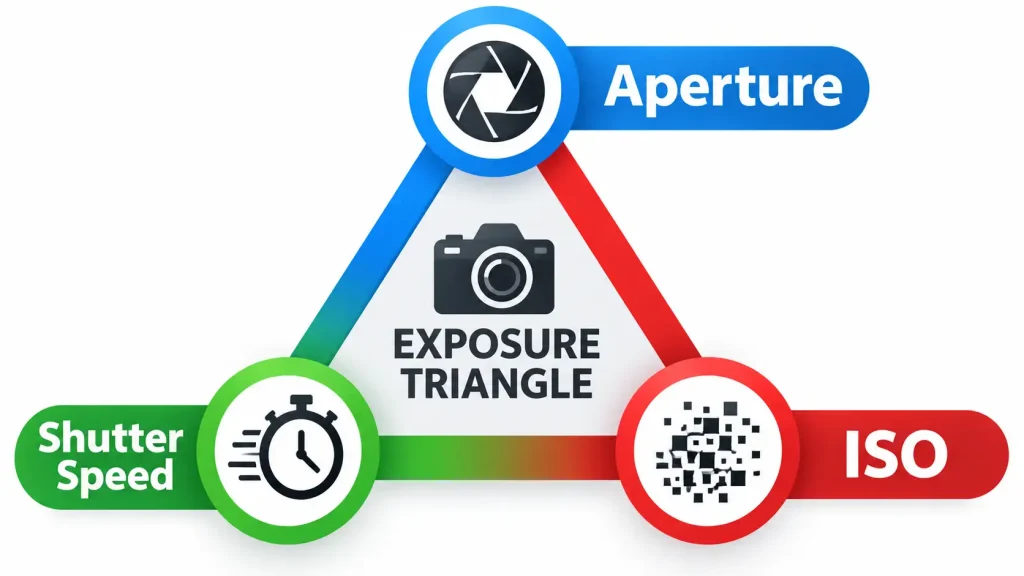
The exposure triangle is how your camera collects light. It uses three main settings. These are aperture, shutter speed, and ISO. They work together. They control how bright or dark your photo is. If you change one setting, you must change another. This balance keeps the light perfect.
What Is Exposure Triangle in Photography Explain
Every time you take a photo, your camera needs light. Think of your camera as a bucket. The light is the water. You need the right amount of water to fill the bucket. If you get too much water, the bucket spills. Your photo gets too bright. If you get too little water, the bucket is empty. Your photo gets too dark.
You control the light with three tools. These tools make up the exposure triangle. You must learn how they work.
1. Aperture (The Eye)
Aperture is the hole inside your camera lens. It works like the pupil in your eye. It gets big to let more light in. It gets small to let less light in.
We measure aperture in f-stops. You will see numbers like f/1.8, f/4, or f/11. Small numbers mean a big hole. A big hole lets in lots of light. Large numbers mean a small hole. A small hole lets in less light.
Aperture also changes your background. Do you want a blurry background? Use a small number like f/1.8. Do you want everything sharp? Use a big number like f/11.
2. Shutter Speed (The Blinking Eyelid)
Shutter speed is how fast your camera blinks. Your camera has a door in front of the sensor. This door opens and closes. Shutter speed tells the door how long to stay open.
We measure this speed in seconds. Most times, it is a fraction of a second. You will see numbers like 1/100, 1/500, or 1/1000.
A fast shutter speed is 1/1000. The door opens and closes very fast. It lets in very little light. It also stops fast action. You use this for sports or flying birds.
A slow shutter speed is 1/10. The door stays open longer. It lets in lots of light. But a slow speed can make things blurry. If your hands shake, the whole photo will blur.
3. ISO (The Sensor’s Sensitivity)
ISO changes how much your camera cares about light. It is a digital boost. We measure it in round numbers. You will see 100, 400, 800, or 3200.
A low ISO like 100 is best. It gives you a clean and sharp photo. You need bright sun to use a low ISO.
A high ISO like 3200 helps in the dark. It makes the camera catch more light. But there is a catch. High ISO makes your photo look grainy. We call this grain “noise.” Too much noise makes a photo look bad. Experts at DPReview test camera sensors to see how well they handle high ISO noise. A good camera handles high ISO better than a cheap one.
Exposure Triangle Formula
The exposure triangle formula is simple. The three settings must balance. They share the workload.
If you change one part, you must change another part. This keeps the light the same.
-
Change one setting to make the photo brighter.
-
Change a second setting to make the photo darker.
-
The total light stays the exact same.
Let us say your photo looks good. But you want a blurry background. You change the aperture to a small number. This makes the hole bigger. Now, too much light comes in. Your photo will be too bright. To fix this, you must change the shutter speed. You make the shutter speed faster. A faster speed lets in less light. The light is balanced again.
How to Use Exposure Triangle in Photography
You can learn how to use exposure triangle in photography with a few steps. Follow these steps when you use your camera.
-
Pick your most important setting. What do you want the photo to look like?
-
Set that important setting first. If you shoot sports, set a fast shutter speed first. If you shoot a portrait, set a wide aperture first.
-
Set your ISO next. Keep it as low as you can. If you are outside, use ISO 100. If you are inside, use ISO 800.
-
Adjust the last setting. Use the last tool to make the light perfect.
-
Check your screen. Look at the photo. Is it too bright? Make a change. Is it too dark? Make a change.
Expert Tip:
Set your camera to “Aperture Priority” mode first. You pick the aperture. The camera picks the shutter speed for you. This is the easiest way to learn how the lens works without getting confused.
Exposure Triangle With Examples
Here is how the exposure triangle works in the real world. Real examples make it easy to learn.
Example 1: The Fast Dog
You want to take a photo of your dog running. The dog moves fast. You need a fast shutter speed.
-
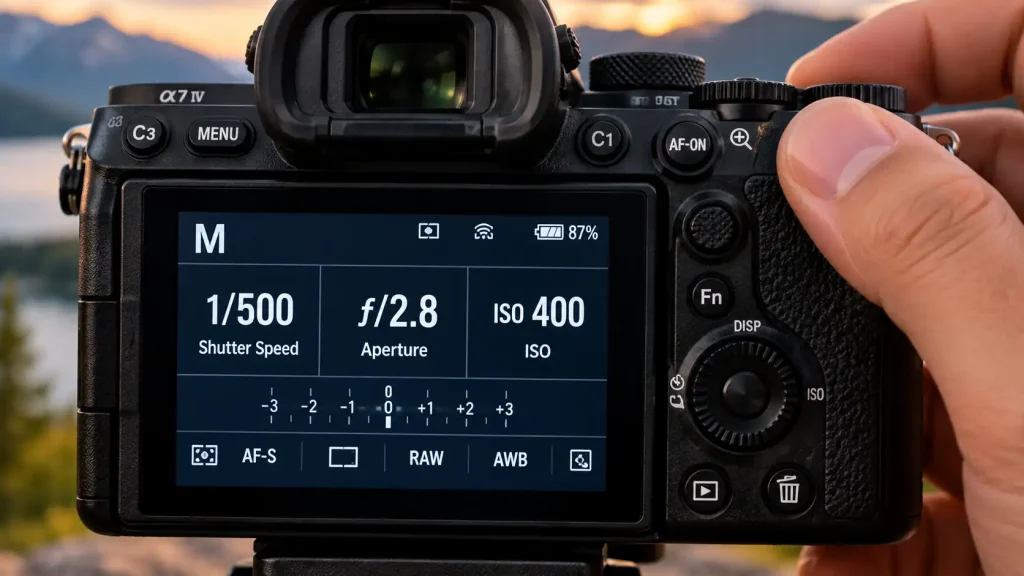
Shutter Speed: 1/1000 (Very fast to freeze the dog).
-
Aperture: f/4 (Lets in lots of light because the fast shutter cuts the light).
-
ISO: 800 (A slight boost to help the fast shutter speed).
Example 2: The Night City
You want to take a photo of city lights at night. It is very dark.
-
Shutter Speed: 2 seconds (Very slow to gather lots of light. You must use a tripod!).
-
Aperture: f/8 (Keeps all the buildings sharp and clear).
-
ISO: 100 (Keeps the dark sky smooth with no grainy noise).
Example 3: The Nice Portrait
You want a nice photo of your friend. You want a blurry background.
-
Aperture: f/1.8 (A huge hole for a very blurry background).
-
Shutter Speed: 1/500 (A fast speed because the huge hole lets in too much light).
-
ISO: 100 (Keeps the skin tones clean).
Exposure Triangle Cheat Sheet
Use this exposure triangle cheat sheet. It will help you remember the rules. Save this helpful table on your phone.
| Camera Setting | What It Mainly Controls | What Happens If You Raise It | What Happens If You Lower It |
| Aperture (f-stop) | Background Blur | Less light, sharp background (f/11) | More light, blurry background (f/1.8) |
| Shutter Speed | Motion Blur | Less light, stops action (1/1000) | More light, blurs motion (1/10) |
| ISO | Digital Brightness | More light, ugly grain/noise (3200) | Less light, clean photo (100) |
Warning Signs of Bad Exposure Settings
You must watch out for bad settings. Your camera will give you warning signs. Look for these signs when you shoot.
-
Blinking Highlights: Your camera screen flashes black and white on bright spots. This means your photo is too bright. You have lost details in the white areas. You must use a faster shutter speed.
-
Extreme Grain: Your photo looks like it has sand all over it. The colors look muddy. This means your ISO is way too high. You need to open your aperture more.
-
Blurry People: The background is sharp, but the people are blurry. This means your shutter speed is too slow. People move slightly when they breathe. You need a faster shutter speed.
-
Dark Shadows: The dark parts of the photo look completely black. You cannot see any details. This means your photo is too dark. You need to use a slower shutter speed.
You can read more about sensor sizes on the official Canon learning hub to see how light works. Big sensors handle bad light much better than small sensors.
When to Get Professional Help or a Second Opinion
Sometimes, dark or blurry photos are not your fault. Sometimes, your gear is broken. You must know when to stop trying to fix it yourself. Do not risk ruining your expensive camera.
Signs your gear needs professional repair:
-
Spots on every photo: Do you see the exact same dark spots on every single photo? This is not bad exposure. This is dirt on your camera sensor. Do not clean the sensor with a shirt or tissue. You will scratch it. Take it to a real camera shop. They will clean it safely.
-
Sticky dials: If your dials do not turn smoothly, do not force them. Sand or dirt might be trapped inside. Forcing a dial can break the main computer board inside.
-
Fungus in the lens: Look inside your lens with a light. Do you see little white spider webs? This is lens fungus. It ruins image quality. You cannot clean this at home. A professional must take the lens apart.
-
Battery heat: Does your camera get very hot near the battery door? Stop using it right away. A bad battery can swell and get stuck. It can even start a fire. Buy a new, brand-name battery.
The CIPA digital camera guidelines state that users should avoid exposing camera sensors directly to lasers. Lasers at concerts can burn a permanent black hole in your sensor. Only a factory repair center can fix a burned sensor.
Common Mistakes Camera Buyers Should Avoid
Camera buyers make many mistakes. These mistakes cost money and ruin photos. Avoid these common traps.
-
Buying a cheap tripod: A cheap tripod shakes in the wind. A shaking tripod ruins your slow shutter speed photos. Always buy a strong, sturdy tripod.
-
Using Auto mode forever: Auto mode tries its best. But it does not know what you want. It might use a slow shutter speed on a fast dog. You must leave Auto mode to get better.
-
Buying a dark lens: Many kit lenses are dark. They have an aperture of f/5.6. This is a very small hole. It makes shooting indoors very hard. Buy at least one bright lens. Look for a lens with an f/1.8 aperture.
-
Ignoring the light: The exposure triangle only grabs the light you have. If the light is ugly, the photo is ugly. Always look for nice, soft light before you press the button.
-
Forgetting to reset settings: Did you shoot at night with ISO 3200? You must change it back to 100 the next morning. If you forget, your daytime photos will be too bright and grainy.
FAQs
What is the exposure triangle?
It is the relationship between three camera settings. These settings are aperture, shutter speed, and ISO. They work together to control how much light hits your camera sensor.
Which part of the exposure triangle is most important?
No single part is the most important. They all rely on each other. However, most people adjust aperture first. Aperture controls background blur, which changes the whole look of the photo.
Why is my photo completely white?
Your photo is overexposed. This means way too much light got in. You need to use a faster shutter speed. You can also use a smaller aperture or lower your ISO.
Can I use the exposure triangle on my phone?
Yes, you can. Many modern phones have a “Pro” or “Manual” mode in the camera app. This mode lets you change the ISO and shutter speed yourself.
What is the best ISO setting?
The best ISO is the lowest number your camera has. For most cameras, this is ISO 100. Always keep the ISO as low as you can. Only raise it when it gets dark.
How do I remember the exposure settings?
Practice is the best way. Take your camera outside. Change only one setting at a time. Take a photo. See what happens. Use our cheat sheet table above to check your work.
Conclusion
Learning what is exposure triangle in photography will change how you shoot forever. It takes away the guesswork. You no longer have to rely on Auto mode. You now know how aperture controls your background blur. You know how shutter speed freezes fast action. You know how ISO boosts light in the dark.
Your camera is a powerful tool. The exposure triangle formula is your map. Keep our cheat sheet handy. Watch out for bad warning signs on your screen. Do not be afraid to change your settings. Go grab your camera today. Change your aperture, adjust your shutter, and see the magic happen. Making a smart choice with your settings leads to beautiful, bright photos every time.
