
Introduction
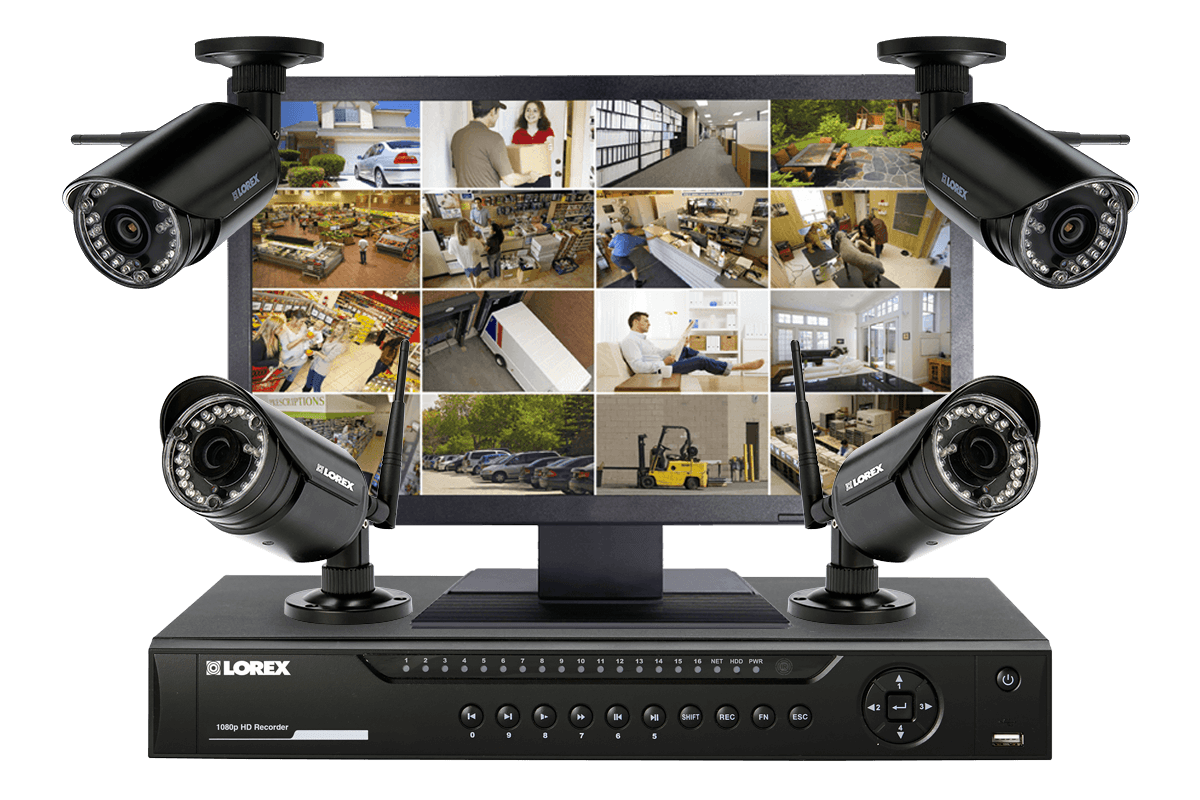
A do-it-yourself camera security system lets homeowners, renters, and small-business operators install and manage security cameras without paying for a professional installation. A typical system includes one or more cameras, a mobile app or recorder, network equipment, storage, power, and optional alerts or professional monitoring.
For most U.S. homes, the best starting point is to decide whether you want cloud storage, local recording, or both. Cloud systems are usually easier to install and access remotely. Local systems can offer greater control over recordings and may reduce recurring fees, but they require more planning, storage management, and network knowledge.
Before buying equipment, identify the areas you need to monitor, check your Wi-Fi coverage, understand how the cameras receive power, and review privacy rules that may apply where you live. A camera can improve awareness, but it cannot guarantee prevention, identify every person, or replace locks, lighting, smoke alarms, or emergency services.
Source: Bing
What Is a DIY Camera Security System?
A DIY camera security system is a surveillance setup that the owner selects, installs, configures, and maintains. It may use wireless cameras, wired Power over Ethernet (PoE) cameras, or a combination of both.
Most systems contain these parts:
- Security cameras: Indoor, outdoor, doorbell, floodlight, pan-tilt-zoom, or specialty cameras.
- Power source: Batteries, USB power adapters, electrical wiring, solar panels, or PoE network cables.
- Network connection: Wi-Fi, Ethernet, or a cellular connection.
- Recording method: Cloud storage, a microSD card, a network video recorder (NVR), or a digital video recorder (DVR).
- Viewing software: A mobile app, web dashboard, smart display, or monitor.
- Detection features: Motion zones, person detection, vehicle detection, package detection, or sound alerts.
- Optional response service: Self-monitoring, professional monitoring, or integration with another alarm system.
The main difference between a DIY and professionally installed system is who performs the design and installation. DIY does not necessarily mean low quality. It means the homeowner is responsible for choosing compatible equipment, mounting cameras correctly, testing coverage, updating software, and replacing failed components.
DIY cameras versus professionally installed systems
A DIY system may be suitable when you want:
- Lower installation costs
- Flexible camera placement
- The ability to expand the system gradually
- Direct control over recordings and settings
- No long-term monitoring contract
Professional installation may be more appropriate when:
- Cameras require new electrical wiring
- You need extensive coverage across a large property
- The system must integrate with commercial access control or alarms
- You cannot safely use a ladder or work near electrical wiring
- Insurance, business, or contractual requirements specify a particular installation
A professional installer can still use consumer-grade equipment, so ask exactly what hardware, storage, warranty, and ongoing service are included.
Choose the Right Camera System for Your Home
The right system depends less on the number of cameras than on the property layout, lighting, network reliability, recording needs, and maintenance you are willing to handle.
Wireless Wi-Fi cameras
Wi-Fi cameras send video over your home network. They are usually the simplest option for renters and existing homes because installation often requires only mounting the camera and connecting it to power.
Advantages:
- Easier installation
- Flexible placement
- No dedicated video cable to each camera
- Often compatible with a mobile app
Limitations:
- A weak signal can cause dropped video or delayed alerts
- Battery models require charging
- A Wi-Fi outage may interrupt remote access
- Many models depend heavily on a vendor’s cloud service
- Outdoor placement still requires a suitable power and weatherproofing plan
A Wi-Fi camera should not be installed at the far edge of wireless coverage simply because the app connected during initial setup. Test the signal at the intended mounting location under normal household network use.
Wired PoE cameras
PoE cameras receive power and network data through one Ethernet cable connected to a PoE switch or recorder. They are often a strong choice for homeowners who want continuous recording and stable connections.
Advantages:
- One cable can carry power and data
- More consistent connection than marginal Wi-Fi
- Suitable for 24-hour recording
- Local recording is common
- No battery charging
Limitations:
- Cable routing can be difficult
- Installation may require attic, crawl-space, or exterior work
- A network outage or failed PoE switch can affect several cameras
- The installation is less convenient for renters
Use outdoor-rated Ethernet cable and follow local electrical and building requirements. Do not improvise cable penetrations that allow water into walls or siding.
Battery-powered cameras
Battery cameras are useful where running a cable is difficult. They can work well for temporary monitoring, rental properties, gates, or locations without nearby power.
Battery life varies substantially with temperature, signal strength, motion activity, live-view use, resolution, and recording settings. A manufacturer’s estimated battery life is not a guarantee for every installation.
Battery cameras may be a poor fit when you need:
- Continuous recording
- Rapidly changing activity
- A camera mounted in a difficult-to-reach location
- Reliable operation during cold weather
- Immediate access to every event without subscription restrictions
Cloud, local, and hybrid recording
| Recording method | Best suited for | Main advantage | Main limitation |
|---|---|---|---|
| Cloud recording | Simple remote access | Recordings remain available if the camera is stolen | May require a subscription and internet access |
| microSD storage | One or a few cameras | Low ongoing cost | Card failure, limited capacity, and possible camera theft |
| NVR storage | Multiple wired cameras | Centralized local recording and continuous coverage | Higher setup complexity and equipment cost |
| Hybrid storage | Users wanting redundancy | Local and remote copies can coexist | More settings, storage, and account management |
Local recording is not automatically more private or more reliable. If an NVR is left unsecured, a thief may take both the cameras and the recordings. Cloud storage is not automatically safer either; account compromise can expose footage. Consider where the recorder is located, how accounts are protected, and whether important clips are backed up.
Resolution, field of view, and night vision
Higher resolution can provide more detail, but it does not guarantee useful identification. The result depends on distance, lighting, lens quality, compression, motion blur, and the angle of the person’s face.
A wide field of view covers more area but may make distant objects smaller. A narrow field of view shows more detail in one direction but covers less of the property. For an entry door, place the camera so faces are visible rather than relying on a very wide lens pointed from far away.
Infrared night vision can illuminate dark areas in black and white. Color night vision usually needs some visible light. Bright lights behind a subject can create silhouettes, while reflective surfaces can produce glare.
Source: Bing
Plan Camera Placement Before You Buy
A camera plan should begin with the event you want to observe, not with the number of cameras included in a package.
Prioritize important views
For many U.S. homes, useful locations may include:
- The main entry door
- A driveway or front walk
- A side gate or side passage
- A rear door
- A garage entrance
- A detached garage, shed, or other outbuilding
- A large interior area where an alarm event might occur
Do not automatically point every camera toward the street. A camera aimed at a private entry, walkway, or package delivery area may provide more useful evidence than a distant view of passing traffic.
Aim for identification, not just detection
A camera can detect that someone entered a zone without capturing enough detail to identify the person. To improve useful coverage:
- Mount cameras high enough to reduce tampering but not so high that faces become difficult to see.
- Avoid aiming directly toward the rising or setting sun.
- Use a sheltered position to reduce rain, snow, and glare.
- Keep the lens clear of walls, gutters, branches, and reflective surfaces.
- Test the view during daytime and nighttime.
- Check whether hats, hoods, masks, or strong backlighting obscure faces.
- Use activity zones to exclude sidewalks, roads, and areas that create unnecessary alerts.
A camera should not be treated as a replacement for exterior lighting. Motion-activated lighting can improve both visibility and deterrence, but it must be positioned so it does not blind the camera or disturb neighbors.
Consider privacy boundaries
Avoid pointing cameras into bedrooms, bathrooms, neighboring homes, or areas where people reasonably expect privacy. Window-facing cameras can unintentionally record private spaces across a street or property line.
In the United States, privacy and audio-recording rules vary by state. Video recording in an outdoor area visible from a lawful location is not a universal answer to every privacy question, and audio can create additional legal issues. Some states require consent from all parties for certain private conversations, while others use different standards. Review applicable state and local rules before enabling audio recording, and seek advice from a qualified attorney for a dispute-specific question.
Renters should check the lease before drilling, attaching equipment to exterior surfaces, or recording shared spaces. Homeowners’ associations and condominium associations may have rules about exterior devices, visible wiring, doorbell cameras, or placement.
Check the network at each planned location
Before permanently mounting a Wi-Fi camera:
- Stand at the proposed location with a phone or laptop.
- Test the wireless signal and internet connection.
- Test at the time of day when the network is busiest.
- Confirm that the location does not switch unpredictably between access points.
- Plan for cameras that are separated from the router by concrete, brick, metal, or multiple walls.
If the signal is weak, a mesh access point or wired connection may be more dependable than adding a Wi-Fi extender. Extenders can help, but they also introduce another device that must be configured, secured, and maintained.
Source: Bing
How to Install a DIY Camera Security System
Install the system in stages. Configure one camera, verify how it works, and then repeat the process rather than mounting every device before testing the first one.
Prerequisites
Gather:
- A list of camera locations
- A compatible phone or tablet
- A reliable home network
- Strong account credentials
- A mounting surface suitable for the supplied hardware
- A drill and appropriate fasteners, if needed
- A ladder that can be used safely
- Outdoor-rated cable and weatherproof fittings for wired installations
- A storage plan
- A written record of device names, locations, and settings
For PoE systems, also verify the cable category, cable length limits specified by the equipment, PoE standard compatibility, switch capacity, and NVR requirements.
Step 1: Secure the account first
Create the camera account with a unique password that is not reused on email, banking, or other services. Enable multifactor authentication when available. Use the manufacturer’s official app or website rather than an unofficial installer or link received by text message.
If multiple household members need access, use individual accounts with appropriate permissions where the system supports them. Avoid sharing one administrator password.
Step 2: Update equipment before final installation
Connect the camera in a temporary location and check for firmware and app updates. Update the router, NVR, hub, and cameras according to their documentation.
A camera that works during setup may still need a firmware update before it is exposed to outdoor conditions or relied on for alerts. Record the model and firmware version so troubleshooting is easier later.
Step 3: Configure the network
Use a current home Wi-Fi security mode supported by the router and camera. Change default router administrator credentials. Disable features you do not need, such as remote administration from the public internet, unless you understand the security implications.
A separate guest or Internet of Things network can limit how smart devices interact with computers and personal files. However, some cameras require local-device communication, discovery, or specific ports. Test the system after separating devices rather than assuming every camera will work on a guest network.
Do not expose an NVR or camera directly to the internet through port forwarding unless the manufacturer and a qualified network professional provide a clear, secure reason. Prefer the vendor’s documented secure remote-access method, a properly configured virtual private network, or local-only access when appropriate.
Step 4: Mount and weatherproof each camera
Use fasteners appropriate for the wall, brick, siding, or other mounting surface. Seal exterior penetrations against water. Keep power adapters and connectors within the environmental limits stated by the manufacturer.
Do not place an indoor-rated camera or power adapter outdoors. Do not run a household extension cord through a window or doorway as a permanent installation. If new electrical wiring, an outlet, or a junction box is needed, consult a qualified electrician and follow local requirements.
Step 5: Set recording and alert rules
Configure:
- Time zone and daylight-saving settings
- Recording quality
- Motion sensitivity
- Detection zones
- Person or vehicle filters, if available
- Audio recording, if legally appropriate
- Notification schedules
- Video retention period
- Shared-user permissions
- Privacy masks
Start with conservative alert settings. Excessive notifications lead to alert fatigue, and users may stop checking the alerts that matter.
Step 6: Test the system under realistic conditions
Perform tests during daylight, darkness, rain if possible, and normal household activity. Walk through detection zones, approach from different directions, and check whether the recording shows a usable face or only a distant figure.
Verify that:
- Alerts arrive promptly enough for your intended use.
- Recordings can be played back.
- Timestamps are correct.
- Night images are not dominated by glare.
- Two-way audio works where permitted and needed.
- The camera reconnects after a router restart.
- The system continues recording during an internet outage if local recording is supposed to work.
- The recorder is located somewhere a visitor or intruder cannot easily remove it.
Signs of a successful installation
The installation is working as intended when each camera covers the planned area, recordings can be retrieved, alerts are manageable, timestamps are accurate, and the system remains accessible after ordinary network interruptions.
If coverage fails, adjust the camera angle or move the camera before increasing resolution or sensitivity. Better placement often solves problems that extra features cannot.
Source: Bing
Estimate Storage, Internet, and Ongoing Costs
A DIY system’s purchase price is only one part of the cost. Include storage, replacement batteries, subscriptions, networking equipment, mounting hardware, and possible professional electrical work.
A simple storage estimate
For continuous video, an approximate storage calculation is:
Storage in gigabytes ≈ bitrate in megabits per second × recording seconds per day × number of days ÷ 8,000
For example, a hypothetical camera recording at 4 megabits per second for 24 hours per day over seven days would require approximately:
4 × 86,400 × 7 ÷ 8,000 = 302.4 GB
Actual storage use varies with compression, variable bitrate, frame rate, resolution, audio, and scene activity. Motion-only recording may use much less storage, but it can miss events if detection fails or the camera begins recording too late.
For multiple cameras, multiply the estimate by the number of cameras and add overhead. A storage device should not be filled to its absolute limit; maintain a buffer and check whether the NVR overwrites the oldest recordings automatically.
Internet upload requirements
Cloud cameras generally upload video through the home internet connection. Several cameras recording simultaneously can consume substantial upload bandwidth, particularly at higher quality or during live viewing.
A system that looks fine with one camera may become unreliable after adding three or four more. Check the camera’s documented bitrate and your internet service plan. If the connection has a data cap, confirm how recorded video counts toward that cap.
Local recording can reduce continuous upload traffic, but remote viewing still requires internet access. During a power or internet outage, local recording may continue only if the cameras, network equipment, and recorder have power.
Subscription and replacement planning
Subscription terms can affect access to:
- Cloud recording
- Longer retention
- Person or vehicle detection
- Activity history
- Video downloads
- Extended warranties
- Cellular backup
- Professional monitoring
Review what happens if the subscription ends. Some systems continue live viewing but stop recording; others restrict historical footage or advanced detections. Policies and features can change, so confirm current terms before purchase.
Budget for:
- Replacement batteries
- MicroSD cards or hard drives
- Backup power
- Damaged outdoor equipment
- Router or mesh upgrades
- Subscription increases
- A replacement if the vendor discontinues support
Source: Bing
Improve Security and Privacy After Installation
A camera system protects the property only if the cameras, accounts, recordings, and network are protected.
Use account security controls
Apply these controls:
- Use a unique password for the camera account.
- Enable multifactor authentication.
- Keep the camera app, firmware, router, and recorder updated.
- Remove former residents, contractors, and unused devices from account access.
- Review login history if the service provides it.
- Avoid sharing public links to recordings.
- Download important clips to a controlled location and delete unnecessary copies.
- Use screen locks on phones and tablets that can view the cameras.
The Cybersecurity and Infrastructure Security Agency (CISA) recommends basic protections for internet-connected devices, including changing default passwords, updating software, and securing home networks. These practices apply to cameras and related hubs as well as computers.
Protect recordings
Recordings may show children, visitors, neighbors, license plates, medical activity, or private conversations. Treat them as sensitive personal information.
Limit who can view or download footage. If you use local storage, put the NVR in a locked or less visible location. If you use cloud storage, review the provider’s retention, deletion, account recovery, and data-sharing policies.
A camera system should not be used to harass neighbors, monitor people without a legitimate purpose, or record private areas. Audio should remain disabled unless you have considered the legal and practical consequences.
Prepare for outages
A basic uninterruptible power supply can keep a router, modem, NVR, and PoE switch operating during a short power interruption. It will not provide unlimited backup power, and battery runtime depends on the equipment load.
If the system is important during an outage, identify which components must remain powered. A camera with battery backup is not useful for remote viewing if the home router and internet modem are off.
Understand what cameras cannot do
Cameras generally cannot:
- Guarantee that a crime will not occur
- Identify a person in poor lighting or at a long distance
- Replace a monitored fire, carbon monoxide, or professionally designed alarm system
- Reliably detect every package, person, animal, or vehicle
- Provide emergency dispatch simply because an alert appears
- Preserve footage if storage fails and no backup exists
If a crime occurs, preserve the original recording, avoid editing the only copy, note the date and time, and provide footage to law enforcement through an appropriate channel. Do not confront a suspected person based solely on an automated alert.

Source: Bing
Troubleshoot Common DIY Camera Problems
Start with the safest and simplest checks. Do not open a power adapter, alter mains wiring, or bypass a device’s safety controls.
Camera is offline
Possible causes include:
- Loss of power
- Weak Wi-Fi signal
- Router or internet outage
- Expired credentials
- Firmware failure
- Vendor service interruption
- Damaged cable or connector
Check whether the camera has power, whether other devices are online, and whether the app reports a broader service issue. Restart the camera and network equipment according to the manufacturer’s instructions. If the camera repeatedly disconnects, test it near the router. A stable connection there suggests a coverage or interference problem at the original location.
Alerts are too frequent
Likely causes include:
- Activity zones covering sidewalks or roads
- Sensitivity set too high
- Moving trees, shadows, insects, or headlights
- Pets entering the detection area
- A detection feature that classifies objects incorrectly
Narrow the detection zone, reduce sensitivity, change the camera angle, and adjust schedules. Do not rely on an alert filter as if it were perfectly accurate.
Recordings are missing
Check:
- Whether recording is continuous or motion-triggered
- Whether the storage card or hard drive is full or failing
- Whether the subscription or retention plan changed
- Whether the camera’s time zone is correct
- Whether the camera lost power or network access
- Whether an overwrite setting deleted older footage
If a memory card repeatedly fails, replace it with storage approved for the camera’s recording workload. Download important footage promptly rather than assuming the service will retain it indefinitely.
Night video is washed out or too dark
Look for:
- Infrared reflection from a nearby wall, window, or cover
- A bright lamp behind the subject
- A dirty lens
- Fog, rain, or spider webs
- An incorrect night-vision setting
- A camera mounted too far from the area of interest
Clean the lens, move the camera slightly, reposition lighting, and retest. Do not place a camera behind glass if infrared night vision is required; reflections commonly reduce image quality.
Two-way audio does not work
Confirm that microphone and speaker permissions are enabled, the camera supports two-way audio, and the phone is not muted. Also consider whether recording or transmitting audio is legally appropriate in the location and circumstances.

Source: Bing
Common DIY Camera Security Mistakes
Avoid these mistakes:
- Buying cameras before checking power and Wi-Fi. A camera is not useful where it cannot maintain a connection or receive dependable power.
- Mounting every camera too high. Height can reduce tampering but may produce poor facial views.
- Using one password for every device. A compromised account can expose more than the camera system.
- Ignoring storage failure. Local recording needs health checks, capacity planning, and replacement storage.
- Relying entirely on motion alerts. Alerts can be delayed, missed, or incorrectly classified.
- Recording private areas. Privacy concerns can create legal and neighbor disputes.
- Leaving the recorder exposed. A thief who takes the recorder may take the evidence with it.
- Running unsafe permanent power. Temporary extension-cord solutions can create shock, fire, and weather risks.
- Failing to test at night. A daytime view does not prove that the camera works after dark.
- Assuming a subscription is optional after purchase. Some systems limit recording or key detection features when paid service ends.

Source: Bing
DIY Camera Security System Checklist
Use this checklist before finalizing the installation:
- I identified the specific areas and events I want to monitor.
- I checked privacy, lease, HOA, and local requirements.
- I selected wired, Wi-Fi, battery, cloud, local, or hybrid equipment based on the property.
- I verified power and network coverage at each camera location.
- I created a storage and retention plan.
- I used unique account credentials and multifactor authentication.
- I updated the router, app, camera, hub, and recorder.
- I mounted and weatherproofed the equipment correctly.
- I tested daytime and nighttime views.
- I adjusted motion zones to reduce unnecessary alerts.
- I tested playback, timestamps, downloads, and outage behavior.
- I secured the NVR, storage, power supply, and network equipment.
- I scheduled periodic maintenance and firmware checks.

Source: Bing
Frequently Asked Questions
Are DIY security cameras worth it?
They can be worthwhile when the owner wants flexible installation, remote access, and control over costs. Their value decreases if the property needs complex wiring, continuous professional response, or guaranteed maintenance. The best system is one that continues recording, sends useful alerts, and receives regular security updates.
Do security cameras work without Wi-Fi?
Some cameras can record locally without Wi-Fi, including certain PoE and wired systems. Remote viewing and cloud storage generally require an internet connection. Battery cameras may continue detecting activity locally, but their exact offline behavior depends on the model.
Is local storage better than cloud storage?
Neither option is universally better. Local storage can reduce recurring fees and keep recordings on the property, while cloud storage can preserve footage if the camera or recorder is stolen. A hybrid system can provide redundancy, but it costs more and requires additional administration.
How many cameras does a typical home need?
There is no reliable standard number. Start with the main entry and the areas most likely to need documentation, such as driveways, side gates, rear doors, and detached structures. Add cameras only after checking whether existing views provide useful coverage without excessive overlap.
Can I install security cameras if I rent my home?
Often, renters can use removable or non-permanent equipment, but lease terms and building rules control what is allowed. Ask the landlord before drilling, attaching devices to shared areas, routing cables through walls, or recording common spaces. Avoid cameras that view private areas belonging to neighbors or other tenants.

Source: Bing
Sources and Verification Notes
For current technical, cybersecurity, and legal information, consult the documentation and official guidance relevant to your equipment and location:
- Cybersecurity and Infrastructure Security Agency: Securing Internet-Connected Devices
- Federal Trade Commission: Home Security and Smart Devices guidance
- National Institute of Standards and Technology: Cybersecurity guidance
- Your camera manufacturer’s current installation, privacy, firmware, storage, and subscription documentation
- Your state attorney general, state legislature, landlord, homeowners’ association, or qualified attorney for location-specific privacy and recording rules
Manufacturer features, subscription terms, app requirements, and firmware support can change. Verify those details immediately before purchase and again during installation.
Conclusion
A successful do-it-yourself camera security system begins with a coverage plan, not a product count. Choose the recording method, power source, network connection, and camera type around the property’s actual constraints. Then secure the account, install equipment safely, test day and night performance, and maintain storage and software over time.
For the next step, identify your highest-priority view, test Wi-Fi or cable access at that location, and decide whether you need continuous local recording, cloud event storage, or a combination of both.
