
Do your photos look too dark, blurry, or grainy? You are not alone. Many new camera owners struggle to get bright, sharp shots.
When you learn photography, you quickly hear about exposure and ISO. But understanding ISO vs exposure can feel tricky at first.
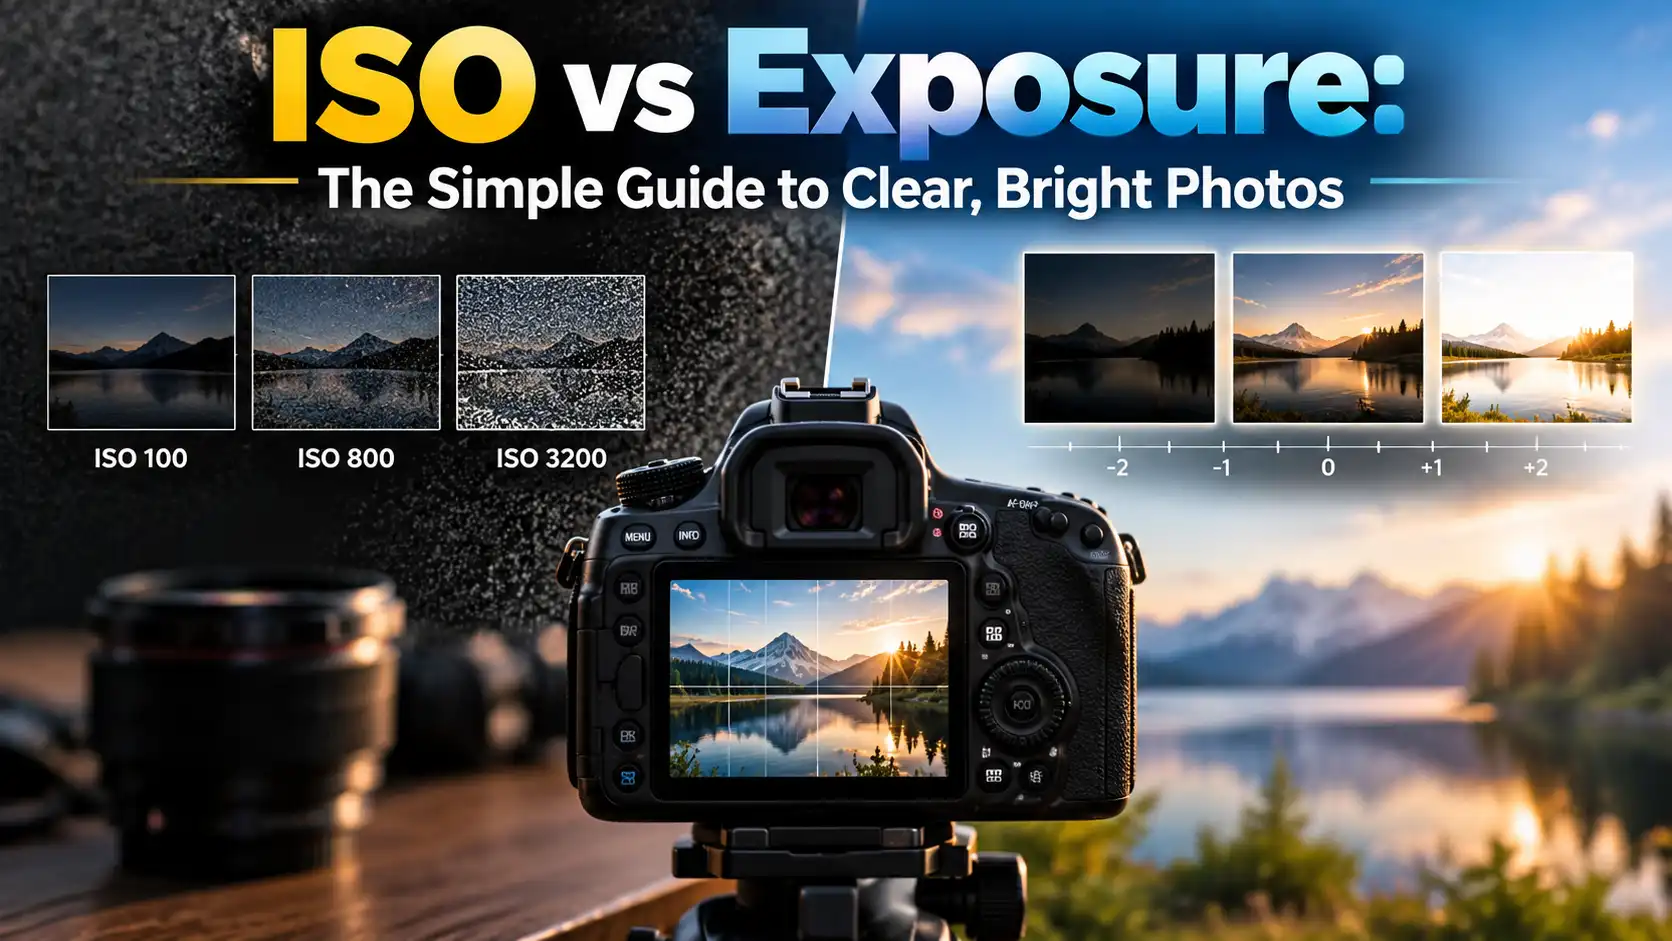
Exposure is the actual amount of physical light that hits your camera sensor. ISO, on the other hand, does not add light. Instead, ISO tells your camera how much to brighten the image after the light enters.
Knowing how these two work together will save you money and frustration. You will take sharper photos in low light, pick the right lenses, and stop blaming your camera gear for dark shots.
Quick Answer
Exposure is the total amount of physical light that reaches your camera sensor, controlled only by shutter speed and lens aperture. ISO does not capture more light; it merely brightens or amplifies the recorded image signal. High ISO makes dark photos brighter, but too much ISO causes digital noise and grain.
What Is Exposure in Photography?
Exposure simply means how much light enters your camera when you press the button.
Think of your camera like an empty bucket. Light is like water from a tap.
-
If you let in too little water, the bucket stays empty (underexposure). The photo looks dark and muddy.
-
If you let the water overflow, you spill everywhere (overexposure). The photo turns bright white, and you lose fine details in the bright areas.
-
If you fill the bucket just right, you get a clean, well-balanced image.
True physical exposure is set by two camera controls:
-
Aperture: The physical opening inside your lens that lets light pass through.
-
Shutter Speed: The time your camera shutter stays open to collect that light.
That is all. If you want more real light, you must open your lens wider or keep the shutter open longer.
Also See: Best Manual Focus Camera Android: 5 Top Picks
What Is ISO and How Does It Work?
Many camera guides say ISO is “sensor sensitivity.” In digital cameras, that is not quite true.
Your camera sensor has a fixed sensitivity to light. When you change ISO from 100 to 800 or 3200, the sensor does not attract more photons. Instead, it boosts or multiplies the electrical signal created by the light.
Think of ISO like the volume knob on a radio:
-
When a radio station has a strong, clear signal, you do not need to turn the volume way up. The sound is clean and clear.
-
When the station signal is weak, you turn the volume knob to the maximum. You can hear the music better, but you also hear loud static and hissing.
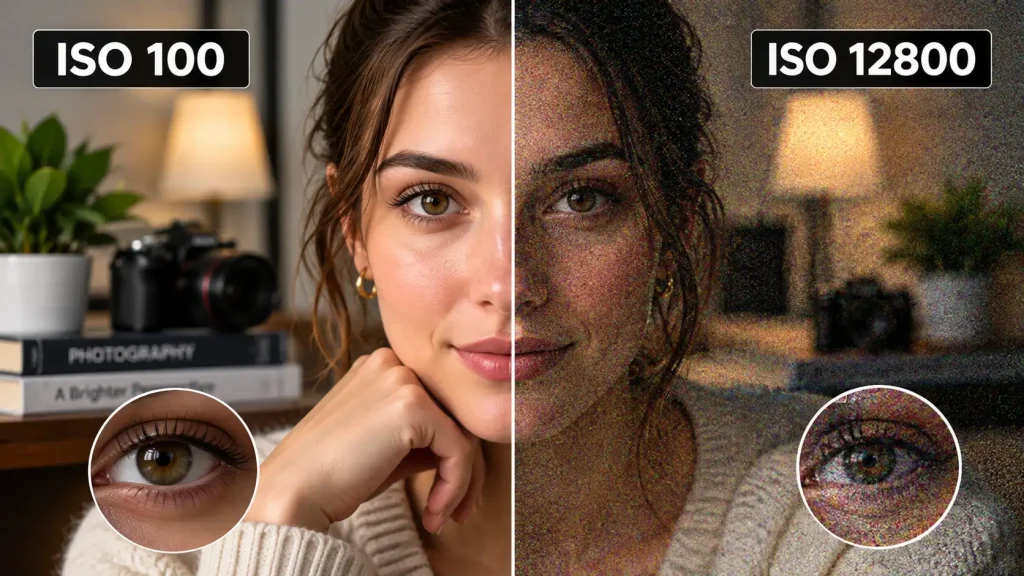
In your camera, that static is called digital noise. It looks like rough, colorful grain or sand across your photo. Low ISO values like ISO 100 give you the cleanest image quality. High ISO values brighten dark scenes, but they add grain and reduce color depth.
According to the DxOMark camera sensor testing methodology, larger sensors handle this signal boost far better than small sensors, producing much cleaner images at higher ISO settings.

Is ISO Exposure? The Key Difference Explained
The short answer is no, ISO is not exposure.
Exposure is purely the physical light captured per unit area of the sensor. ISO is the gain or digital boost applied to that capture.
Why does this matter to you?
If you try to brighten a dark room by only raising ISO, you are boosting a weak signal. Your photo will look noisy and washed out. But if you gather more actual light—by using a lens with a wider opening or using a slower shutter speed on a tripod—your photo stays clean and sharp.
ISO vs Exposure vs Shutter Speed
When shooting handheld, shutter speed controls two things:
-
How long light enters the camera.
-
How sharp moving subjects appear.
If your photo is dark and you make the shutter speed slower, more light enters. But if you shoot too slow, any hand shake makes the shot blurry.
Here is the general rule:
-
In bright sun, use a fast shutter speed (like 1/500s) and a low ISO (like ISO 100).
-
In dim light, slow down your shutter speed as much as you safely can without causing blur. If the shot is still dark, then raise your ISO to brighten the final image.
Exposure vs Aperture
Aperture is measured in f-stops, such as f/1.8, f/4, or f/8.
-
A small f-number (like f/1.8 or f/2.8) means a wide opening. It lets in lots of light and creates a blurry, soft background.
-
A large f-number (like f/11 or f/16) means a narrow opening. It lets in less light, but keeps both foreground and background in sharp focus.
When you compare exposure vs aperture, remember that aperture is one of the two direct gates for real light. Opening your lens from f/4 to f/2 lets in four times more light. That allows you to keep your ISO low and your image noise-free.
ISO vs Exposure Compensation
On most cameras, you will see a button with a small +/- icon. This is the exposure compensation dial.
Exposure compensation tells your camera’s auto meter to make the scene brighter or darker than normal.
-
In Aperture Priority mode, turning the dial changes your shutter speed.
-
In Shutter Priority mode, it changes your lens aperture.
-
If you use Auto ISO, turning the dial adjusts the ISO.
In plain terms, ISO is a specific tool you adjust. Exposure compensation is a direct command telling the camera: “Make this photo brighter or darker than your meter thinks it should be.”
Brand Guide: ISO vs Exposure on Canon and Nikon Cameras
Camera brands use slightly different names and menu systems, but the core physics stays identical.
ISO vs Exposure on Canon Cameras
Canon DSLRs and mirrorless bodies (like the EOS R series) feature dedicated ISO buttons near the shutter button or top wheel.
According to the official Canon global camera technology guide, modern Canon DIGIC image processors work to reduce digital grain automatically when high ISO settings are used.
-
Auto ISO Limits: On Canon cameras, you can set a “Max ISO” limit in the red shooting menu. Set this to ISO 3200 or 6400 to prevent the camera from producing overly noisy family photos.
-
Exposure Simulation: On Canon mirrorless models, the rear screen displays your exposure live. If the screen looks dark, you do not have enough real light or enough ISO boost.
ISO vs Exposure on Nikon Cameras
Nikon bodies (like the Z-mount mirrorless system or D-series DSLRs) handle ISO with great precision.
Detailed documentation in the Nikon digital camera shooting manual explains that Nikon’s matrix metering system balances ambient light and ISO to protect highlight details from blowing out.
-
Easy ISO: Many Nikon cameras allow you to set the rear command wheel to change ISO instantly without pressing a button.
-
Auto ISO with Minimum Shutter Speed: Nikon has an exceptional Auto ISO mode. You can tell the camera never to let the shutter drop below 1/125s (ideal for kids or pets). The camera will keep the image sharp and only raise the ISO when needed.
Comparing Exposure Controls: Quick Reference Guide
Use this handy comparison table to see how each setting affects your shot and your gear choices.
| Camera Setting | Does It Add Real Light? | What It Controls | Downside If Pushed Too Far | Best Use Case |
| Aperture (f-stop) | Yes | Light volume & depth of field | Very shallow focus; edges may look soft | Portraits, blurry backgrounds, low light |
| Shutter Speed | Yes | Light duration & motion blur | Motion blur from hand shake or moving subjects | Sports, moving water, night photography |
| ISO | No | Signal amplification (brightness) | Grain, digital noise, loss of color richness | Dark rooms, evening events, fast action |
| Exposure Comp (+/-) | Indirectly | Target brightness via auto modes | Blown out white skies or muddy black shadows | Snow, sunsets, backlit subjects |
Step-by-Step: How to Set Perfect Exposure in 4 Steps
Follow this simple checklist whenever you pick up your camera:
-
Set your aperture based on your creative goal. Use a low f-number (like f/2.8) if you want a blurry background. Use a higher number (like f/8) for landscapes and group photos.
-
Set your shutter speed to match movement. If your subject is still, 1/100s or 1/160s is safe for hand holding. If you are tracking kids, pets, or sports, use 1/500s or faster.
-
Check your base ISO. Keep your ISO at its native level (usually ISO 100 or 200) to get maximum image sharpness and color.
-
Raise ISO only to make up the missing light. If your aperture is as wide as it goes, and your shutter speed is as slow as you can hold safely, start raising your ISO until the exposure meter rests in the center.
Expert Tip: Before you spend $1,000 upgrading to a newer camera body to get “better low light shots,” consider buying a fast 50mm f/1.8 prime lens instead. These lenses often cost under $200 and let in over four times more physical light than a standard kit zoom lens. That extra physical light means you can keep your ISO low and your photos crystal clear.
Common Mistakes Camera Buyers Should Avoid
-
Relying on ISO instead of buying faster glass: Kit lenses that come in the box usually have small apertures (like f/5.6 or f/6.3). This forces your camera to use very high ISO settings indoors. Investing in an f/1.8 or f/2.8 lens solves the root problem.
-
Using long shutter speeds without camera stabilization: Leaving your shutter open longer lets in great light, but hand tremor will ruin the shot. Turn on In-Body Image Stabilization (IBIS) or use a sturdy travel tripod.
-
Leaving ISO set to high values on sunny days: If you shot an indoor event at ISO 3200 yesterday and go outside today, you will blow out your highlights. Always check your ISO before shooting.
-
Fearing high ISO completely: Digital noise looks slightly ugly when you zoom in to 100%, but a slightly grainy photo is always better than a blurry, missed moment. Do not hesitate to use ISO 3200 or 6400 if it saves the shot.
-
Confusing camera exposure with phone screen brightness: Phone screens boost photos with aggressive auto software. Dedicated cameras give you natural files, which may look darker at first glance until properly exposed.
Warning Signs: When Your Gear Needs Care or Inspection
Sometimes dark, uneven, or poor exposures are not caused by your settings. They can stem from hardware faults. Look out for these signs:
-
Dark spots in the exact same spot in every frame: If tiny gray blobs show up in the bright sky at f/11 or f/16, your camera sensor has collected dust. Use a handheld rubber air blower to clean it safely.
-
Oily lines or uneven black bands: If half of your photo is dark and the other half is light, your mechanical shutter may be sticking or reaching the end of its operational life.
-
Sluggish lens iris: If your photos turn out pure white when shooting outdoors at small apertures, your lens aperture blades may have oil on them, preventing them from snapping shut.
-
Web-like haze inside the lens barrel: This is lens fungus. It scatters incoming light, drops overall contrast, and causes dull, murky exposures.
When to Get Professional Help or a Second Opinion
Learning settings is free, but touching sensitive camera hardware carries real risk. Here is when you should stop DIY troubleshooting and visit an authorized repair center:
-
Sticky or oily shutter blades: Never spray cleaners or lubricants into a camera body. Shutter assemblies are delicate and must be replaced by factory-trained technicians.
-
Persistent sensor stains: A hand blower removes dry dust easily. But if sticky pollen or fluid spots get on your sensor glass, do not scrub it with household cotton swabs. You can scratch the sensor filter, resulting in an expensive sensor replacement.
-
Internal lens fungus or haze: Opening a modern autofocus lens requires specialized optical alignment tools. If you spot fungus inside, send the lens to a certified repair shop for optical cleaning.
-
Erratic exposure readings: If your camera meter suddenly fluctuates wild stops under constant studio lighting, the internal metering sensor or circuit board may need professional diagnostic testing.
FAQs
Is it better to adjust ISO or shutter speed first?
It depends on what you are shooting. If your subject is moving, set your shutter speed first to freeze action. If you are shooting stationary scenes, keep your ISO low and use a slower shutter speed on a tripod.
Does a higher ISO drain my camera battery faster?
A higher ISO uses a tiny fraction more processing power to amplify the sensor signal, but the difference is minimal. Large LCD screens, electronic viewfinders, and continuous autofocus drain battery power far more than high ISO.
Can I fix underexposed photos in photo editing software?
Yes, shooting in RAW format allows you to brighten dark photos on your computer. However, raising the exposure slider in editing software increases digital grain just like raising ISO in the camera.
Why are my indoor photos blurry even with normal lighting?
Typical indoor living room light is much dimmer than your eyes realize. Your camera must slow the shutter speed down to capture enough light, which creates hand shake and motion blur. Opening your aperture or raising your ISO will fix this.
What is native or base ISO?
Base ISO is the lowest setting at which your sensor captures light without digital amplification—usually ISO 100 (or ISO 640 on some video modes). It delivers the cleanest image, highest dynamic range, and most accurate color reproduction.
Why do full-frame cameras handle high ISO better than crop sensors?
Full-frame cameras have larger physical sensors with bigger individual pixels. These larger pixels collect more physical photons of light, providing a stronger signal and producing less noise when boosted.
Conclusion
Understanding ISO vs exposure is one of the most rewarding milestones in photography. Exposure is the physical volume of light you allow through your lens aperture and shutter curtain. ISO is simply the digital volume dial you turn to brighten that result when real light is scarce.
Next time your photos look dark or blurry, don’t rush to crank your ISO to maximum right away. First, check if you can open your lens wider or steady your camera for a slightly longer shutter speed. If you need better performance in dim rooms, look into affordable, fast prime lenses before replacing your entire camera body.
Pick up your camera right now, switch it to Manual (M) or Aperture Priority (A/Av) mode, take three test shots at different ISO settings, and see the difference with your own eyes!

1 thought on “ISO vs Exposure: The Simple Guide to Clear, Bright Photos”