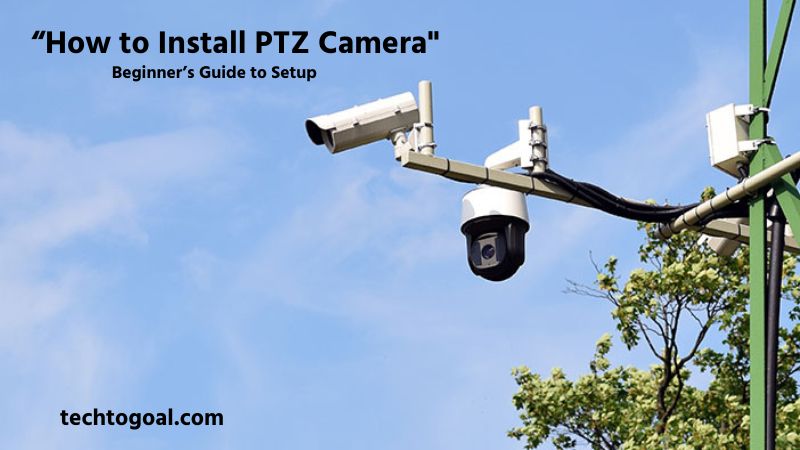
How to Install PTZ Camera: Installing a PTZ (Pan-Tilt-Zoom) camera is one of the most effective ways to enhance your security system with wide-area coverage and intelligent surveillance control. Unlike fixed cameras, PTZ cameras can rotate horizontally and vertically, zoom in on specific details, and track movement automatically, making them ideal for homes, businesses, parking lots, warehouses, and public spaces.
Many users feel confused when installing a PTZ camera for the first time, especially when dealing with mounting positions, power options, network configuration, and control settings. A small mistake during installation can affect video quality, movement accuracy, and long-term reliability. That’s why following a clear, step-by-step installation process is crucial for ensuring smooth operation and maximum security coverage.
In this guide, you’ll learn how to install a PTZ camera correctly, from choosing the right mounting location to configuring power, network, and camera controls. Whether you’re a beginner setting up a PTZ camera at home or a professional installing one for commercial use, this article will help you complete the installation confidently and efficiently.
Why Choose the PTZ Camera to Install?
Choosing a PTZ (Pan-Tilt-Zoom) camera for installation is a smart decision for anyone who needs advanced, flexible, and intelligent surveillance coverage. Unlike fixed security cameras that only monitor a single direction, PTZ cameras can pan left and right, tilt up and down, and zoom in on important details. This ability allows one PTZ camera to cover a large area that would normally require multiple fixed cameras, making it a cost-effective and efficient security solution.
One of the biggest reasons to choose a PTZ camera is its powerful zoom capability. PTZ cameras can zoom in optically to capture clear details such as faces, license plates, or suspicious activities without losing image quality. This makes them ideal for monitoring large spaces like parking lots, warehouses, factories, shopping malls, and outdoor perimeters where detail accuracy is critical for identification and evidence.
PTZ cameras also offer active monitoring and real-time control. Users can manually control the camera’s movement through a mobile app, computer, or joystick controller, allowing security personnel to follow moving subjects and investigate incidents as they happen. Many modern PTZ cameras also include automatic tracking features that detect motion and follow objects or people without manual input, improving security response and reducing the need for constant supervision.
Another important advantage of PTZ cameras is their wide coverage area. With the ability to rotate nearly 360 degrees and tilt vertically, PTZ cameras eliminate blind spots that are common with fixed cameras. This makes them especially suitable for high-risk or high-traffic areas where full visibility is essential. Installing a PTZ camera ensures better situational awareness and stronger overall security.
PTZ cameras are also designed with advanced features that enhance surveillance performance. Many models come equipped with night vision, infrared or low-light technology, weatherproof housing, motion detection, preset patrol routes, and smart alerts. These features make PTZ cameras reliable for both indoor and outdoor use, even in challenging lighting or weather conditions.
From a long-term investment perspective, PTZ cameras provide excellent value. Although the initial cost may be higher than standard fixed cameras, their ability to replace multiple cameras, reduce installation complexity, and offer advanced functionality makes them a cost-efficient choice over time. For businesses, institutions, and homeowners who want scalable and professional-level security, PTZ cameras are a future-proof solution.
In summary, choosing a PTZ camera to install means gaining greater control, wider coverage, sharper detail, and smarter security management. Whether for residential, commercial, or public surveillance, PTZ cameras deliver a powerful and flexible monitoring solution that adapts to your security needs.
Preparation Before Installation of a PTZ Camera
Proper preparation before installing a PTZ (Pan-Tilt-Zoom) camera is essential to ensure smooth installation, optimal performance, and long-term reliability. Having the right tools, accessories, and setup plan in place helps prevent installation errors, saves time, and ensures your camera delivers full coverage and stable operation from day one.
📌Read More👉How Do Cellular Trail Cameras Work?
1. Mounting Bracket: A sturdy mounting bracket is crucial for securely holding the PTZ camera in place. Because PTZ cameras move continuously, the bracket must be strong enough to support the camera’s weight and withstand vibration caused by pan and tilt movements. Choose a bracket designed specifically for your camera model and mounting surface, whether wall-mounted, ceiling-mounted, or pole-mounted, to ensure stability and proper camera alignment.
2. Power Source: Before installation, confirm the availability of a reliable power source near the mounting location. PTZ cameras require consistent power to operate their motors, zoom functions, and network features smoothly. Depending on the camera type, power may be supplied through a power adapter, PoE (Power over Ethernet), or a dedicated power line. Ensuring a stable power source helps prevent unexpected shutdowns and performance issues.
3. Internet Connection: A stable internet connection is essential for remote access, live viewing, and camera control. Before installing the PTZ camera, verify that your network can support high-quality video streaming without lag. Wired connections are generally more reliable than wireless ones, especially for PTZ cameras that transmit large video files and require real-time responsiveness.
4. Ladder: A strong and stable ladder is necessary when installing PTZ cameras at elevated locations. Since PTZ cameras are often mounted high to maximize coverage, using a ladder ensures safe access to walls, ceilings, or poles. Always place the ladder on a level surface and follow safety precautions to avoid accidents during installation.
5. Drill Machines: A drill machine is required to create mounting holes in walls, ceilings, or concrete surfaces. Using the correct drill bit for the mounting surface ensures clean, precise holes that securely hold screws and anchors. Proper drilling helps maintain camera stability and prevents the bracket from loosening over time.
6. Screwdriver: A screwdriver is essential for tightening screws during bracket installation and camera mounting. Using the correct screwdriver type and size helps avoid damaging screws and ensures a firm installation. Well-tightened screws keep the PTZ camera stable during continuous movement and reduce maintenance needs.
7. Level: A level tool helps ensure the PTZ camera is installed straight and properly aligned. An uneven installation can affect camera movement, preset accuracy, and video framing. Using a level during mounting ensures smooth pan and tilt operation and professional-looking installation results.
8. Ethernet Cables: An Ethernet cable provides a secure and stable network connection for the PTZ camera. It is especially important for PoE-enabled cameras, as it supplies both power and data through a single cable. Using high-quality Ethernet cables helps ensure uninterrupted video transmission, faster response times, and reliable remote access.
Additionally, before you start the installation procedure, complete a planning check.
- Examine the Area: Take a stroll around your property to determine the optimal location for the most coverage with the fewest obstacles.
- Verify Power and Signal Strength: For wireless models, be sure the location has a reliable power source and a strong Wi-Fi signal.
- Think About Lighting and Weather Exposure: Additionally, think about how visibility will be impacted by lighting and environmental exposure (rain, sun glare, etc.).
Don’ts
- Avoid placing the camera next to anything that can disrupt the wireless transmission.
- Avoid using walls, beams, or fixtures to obstruct the camera’s pan or tilt range.
How to Install a PTZ Camera?
Installing a PTZ (Pan-Tilt-Zoom) camera correctly in 2026 involves a combination of sturdy physical mounting and smart digital configuration. Depending on whether you choose a wireless or wired system, the installation process differs significantly in terms of complexity and cabling.
📌Read More👉How to Install Wireless Security Cameras
Here is a step-by-step guide for both wireless and wired PTZ camera installations.
1. Wireless PTZ Camera Installation Steps
Wireless PTZ cameras are the preferred choice for residential users and renters because they minimize drilling and messy cable management. In 2026, most wireless models use Wi-Fi 6 for high-speed data transfer while still requiring a power source.
- Step 1: Bench Test & Initialization: Before climbing a ladder, power on the camera near your router. Use the manufacturer’s mobile app to pair the camera with your Wi-Fi network. Set a strong password and name the device (e.g., “Front Porch”). This ensures the camera works before you mount it.
- Step 2: Signal Strength Check: Take your smartphone to the intended mounting location and check your Wi-Fi bars. For 4K PTZ streaming, you need a strong, stable signal. If the signal is weak, consider installing a Wi-Fi extender or mesh pod nearby.
- Step 3: Secure the Mounting Bracket: Use the provided mounting template to mark the drill holes on the wall or ceiling. Drill the holes, insert wall anchors, and secure the bracket with screws. Ensure the bracket is level so the camera’s 360-degree rotation remains balanced.
- Step 4: Attach and Power the Camera: Secure the PTZ unit onto the bracket. Connect the power adapter to the nearest weather-protected AC outlet. In 2026, many wireless cameras also offer solar panel options; if using solar, mount the panel at a 30-degree angle facing south for maximum sunlight.
- Step 5: Final Configuration: Open the app and test the Pan-Tilt-Zoom functions. Set up your “Home Position” (the default view) and configure “Auto-Tracking” so the camera follows moving subjects automatically.
2. Wired PTZ Camera (PoE) Installation Steps
Wired cameras, specifically PoE (Power over Ethernet) models, are the industry standard for professional and commercial security. They offer unparalleled stability because a single cable provides both high-speed data and electrical power.
- Step 1: Plan the Cable Route: Identify the shortest path from your PoE switch or NVR (Network Video Recorder) to the camera location. You will need to run a Cat6 or Cat7 Ethernet cable through walls, attics, or conduits to keep the wiring protected and hidden.
- Step 2: Physical Mounting: Much like the wireless version, mark and drill your holes at a high vantage point (ideally 8–12 feet high). If you are routing the cable through the wall, drill a larger center hole for the Ethernet jack to pass through. Secure the heavy-duty metal bracket to the surface.
- Step 3: Weatherproof the Connection: Connect the Ethernet cable to the camera’s RJ45 port. Most 2026 professional cameras include a waterproof strain-relief boot. Slide this over the connection and twist it tightly to prevent moisture from corroding the pins.
- Step 4: Connect to the Network: Plug the other end of the cable into a PoE-enabled port on your NVR or switch. The camera will take about 60 seconds to “initialize,” usually performing a self-test by rotating its head in all directions.
- Step 5: IP Configuration and Presets: Access the camera’s web interface or NVR software to assign a static IP address. Define your “Patrol Routes” (where the camera moves automatically every few minutes) and set up “Guard Tours” to monitor high-traffic zones like entrances or parking lot gates.
How to Connect PTZ Camera to WiFi
Connecting a PTZ (Pan-Tilt-Zoom) camera to WiFi is the most crucial step in achieving a wireless, high-tech security setup. In 2026, most PTZ cameras utilize dual-band WiFi (2.4 GHz and 5 GHz) and WiFi 6 technology to provide lag-free 4K streaming and responsive remote control.
📌Read More👉5 Best PTZ Camera for Church
Here is a step-by-step guide to successfully connecting your PTZ camera to your home network.
1. Power On and Initialization (Bench Test)
Before mounting the camera high on a wall, perform the setup indoors near your router. Connect the camera to its power adapter and plug it into a wall outlet. You will see the camera perform a self-test—rotating horizontally and vertically. Wait about 60 seconds until you hear a voice prompt like “Waiting for configuration” or see a flashing status light, indicating the device is in pairing mode.
2. Install the Manufacturer’s Smart App
Download the official app for your camera (such as Reolink, eufy Security, or V380 Pro) from the Apple App Store or Google Play Store. Create an account and log in. In 2026, these apps act as the command center, allowing you not only to connect to WiFi but also to manage AI auto-tracking and cloud storage settings.
3. Add Device via QR Code Scanning
In the app, tap the “+” icon to add a new device. Most modern PTZ cameras have a unique QR code printed on the base or side of the unit. Scan this code with your phone’s camera. The app will automatically identify the camera model and begin the handshake process. If the QR code is missing, you can usually select “Add Manually” and find your camera’s model from the list.
4. Enter Your WiFi Credentials
The app will now ask you to select your local WiFi network. Crucial Tip: While many 2026 cameras support 5 GHz, the 2.4 GHz band is still recommended for outdoor cameras because it penetrates walls and covers longer distances more effectively. Enter your WiFi password carefully—incorrect passwords are the #1 cause of connection failure.
5. Synchronize the Camera and Phone
A QR code will often appear on your smartphone screen. Hold your phone about 6–10 inches in front of the PTZ camera lens. The camera will scan the code from your phone to receive the encrypted WiFi credentials. Once successful, you will hear a confirmation tone or a voice prompt saying “WiFi Connection Success.”
6. Test and Final Placement
Once the app shows the “Live View,” test the Pan, Tilt, and Zoom controls to ensure there is no significant latency. Now that the camera is paired, you can unplug it and mount it in its permanent location. As long as it remains within range of your router, it will automatically reconnect to the WiFi once powered back on.
For best results, place the PTZ camera within strong Wi-Fi coverage, avoid interference from thick walls or metal objects, and regularly update the camera firmware. A stable Wi-Fi connection ensures smooth remote control, clear video streaming, and reliable security monitoring.
How to Connect a PTZ Camera to TV
Viewing your PTZ (Pan-Tilt-Zoom) camera feed on a large-screen TV has become a standard requirement for home security and church broadcasts alike. Whether you want a dedicated security monitor in your living room or a live “overflow” screen for a congregation, there are three primary ways to achieve this.
Here is a step-by-step guide to connecting your PTZ camera to a TV.
1. The NVR/DVR Method (Most Reliable)
Using a Network Video Recorder (NVR) is the professional standard. The NVR acts as a bridge that converts the camera’s digital data into a video signal that your TV can understand. This method ensures 24/7 stability and allows you to use a physical mouse to control the Pan-Tilt-Zoom functions directly on the TV screen.
- Step 1: Connect your PTZ camera to the NVR using a Cat6 Ethernet cable (PoE).
- Step 2: Use a high-speed HDMI 2.1 cable to connect the HDMI output port on the back of the NVR to an available HDMI port on your TV.
- Step 3: Switch your TV input to the corresponding HDMI source.
- Step 4: Plug a USB mouse into the NVR to navigate the on-screen menu and move the camera in real-time.
2. Direct HDMI/SDI Connections (Best for Low Latency)
Some high-end PTZ cameras designed for broadcasting (like those from PTZOptics or BirdDog) feature a direct HDMI or SDI output. This is the best method if you need zero-lag video for live events or church services.
- Step 1: Check if your PTZ camera has an HDMI Out port.
- Step 2: Run a long HDMI cable from the camera location to the TV. (For distances over 50 feet, use an HDMI-over-Ethernet extender or an active fiber optic HDMI cable).
- Step 3: Plug the cable directly into the TV. The TV will treat the camera like a cable box or gaming console, showing the live feed instantly.
Note: To control the camera movement in this setup, you will still need to use a separate joystick controller or a mobile app.
3. Smart TV App & Casting (Best for Wireless Setup)
If you have a smart TV (Android TV, Samsung, or LG) and a Wi-Fi-enabled PTZ camera, you can connect them wirelessly. This is the most “clutter-free” method but may have a 1–2 second delay (latency).
- Step 1: Ensure both your PTZ camera and your smart TV are on the same Wi-Fi network.
- Step 2: Download the camera’s official app (e.g., Tapo, eufy, or Reolink) from the TV’s App Store.
- Step 3: If no native app is available, use a streaming stick (Chromecast or Fire Stick) to mirror the camera feed from your phone to the TV.
- Step 4: Alternatively, use the RTSP (Real-Time Streaming Protocol) address of your camera and open it via a media player app like VLC on your TV to watch the stream.
For the best and most reliable viewing experience, using an NVR or DVR with an HDMI connection is highly recommended. It provides stable video, smooth PTZ control, and professional surveillance monitoring on a large screen.
Common PTZ Camera Installation Mistakes
Installing a PTZ (Pan-Tilt-Zoom) camera requires careful planning and precision. Even a high-quality PTZ camera can perform poorly if installed incorrectly. Understanding the most common installation mistakes can help you avoid performance issues, blind spots, and long-term maintenance problems.
📌Read More👉Where to Mount a PTZ Camera for Church?
1. Choosing the Wrong Mounting Location: One of the most common mistakes is installing the PTZ camera in a poor location. Mounting the camera too low, too high, or near physical obstructions can limit its pan, tilt, and zoom range. A poorly chosen location may create blind spots and reduce overall coverage. Always select a high, open position that allows full camera movement and wide-area visibility.
2. Using an Unstable or Weak Mounting Bracket: PTZ cameras are heavier than fixed cameras and constantly move during operation. Using a weak or incompatible mounting bracket can cause vibration, misalignment, or even camera failure over time. A stable, manufacturer-recommended bracket is essential to ensure smooth movement and long-term reliability.
3. Ignoring Camera Leveling: Failing to use a level during installation can cause the PTZ camera to tilt unevenly. An unlevel camera affects preset accuracy, patrol routes, and auto-tracking features. Proper leveling ensures smooth pan and tilt movement and professional video framing.
4. Poor Cable Management: Messy or exposed cables are a common installation mistake. Improper cable routing can lead to signal interference, accidental disconnection, or cable damage due to weather or tampering. Secure and conceal all power and network cables to maintain a clean, safe, and durable installation.
5. Weak Network or Wi-Fi Signal: Installing a PTZ camera without checking network strength can result in lag, disconnections, or poor video quality. PTZ cameras require a stable and strong network for real-time control and high-resolution streaming. Always test Wi-Fi signal strength or use wired connections for more reliable performance.
6. Incorrect Power Supply Setup: Using the wrong power adapter or an unstable power source can cause frequent reboots, motor malfunction, or camera failure. PTZ cameras need consistent power to operate their motors and zoom functions smoothly. Always follow the manufacturer’s power specifications and use surge protection when possible.
7. Skipping Firmware Updates: Many installers overlook firmware updates after installation. Outdated firmware can lead to security vulnerabilities, performance issues, and missing features. Updating firmware ensures better stability, improved security, and access to the latest camera functions.
8. Not Testing PTZ Movement and Presets: Failing to test pan, tilt, zoom, presets, and patrol routes after installation is a critical mistake. Without testing, issues may go unnoticed until a real security incident occurs. Always perform full functionality testing to ensure smooth movement, accurate tracking, and reliable monitoring.
9. Overlooking Environmental Factors: Ignoring weather conditions, lighting, and temperature can shorten camera lifespan. Installing outdoor PTZ cameras without proper weatherproofing or sun protection can cause overheating or water damage. Always choose cameras rated for the installation environment.
10. Poor Security Configuration: Leaving default usernames, passwords, or unsecured network settings can make the camera vulnerable to hacking. Strong passwords, encrypted connections, and secure network settings are essential to protect your PTZ camera system from unauthorized access.
Avoiding these common PTZ camera installation mistakes helps ensure optimal performance, longer equipment lifespan, and reliable security coverage. Proper planning, correct installation tools, and thorough testing are key to getting the most out of your PTZ camera system.
FAQs
What tools are needed to install a PTZ camera?
You typically need a drill, screwdriver, mounting brackets, screws, cable clips, and possibly a ladder. Some cameras may also require network cables or power adapters.
Where should I mount my PTZ camera?
Mount the camera at a high, stable location with a clear view of the area. Corners or walls overlooking entrances, driveways, or large rooms are ideal. Avoid obstructions and direct sunlight.
How do I connect a PTZ camera to power?
Some PTZ cameras use PoE (Power over Ethernet), where a single Ethernet cable provides both power and data. Others require a separate power adapter connected to an outlet.
How do I connect a PTZ camera to the network?
If it’s an IP camera, connect it via Ethernet cable to your router or network switch. Some PTZ cameras also support Wi-Fi connections, but wired connections are more stable for PTZ functionality.
How do I mount the camera securely?
Use the included mounting bracket. Drill holes into the wall or ceiling, insert anchors if needed, and attach the bracket with screws. Ensure the camera is tightly secured to prevent movement or vibration.
How do I configure PTZ controls?
After connecting to the network and power, access the camera via its software or mobile app. You can control pan, tilt, and zoom using the app or a compatible control panel.
Can PTZ cameras work at night?
Yes, most PTZ cameras come with infrared (IR) or low-light capabilities. Make sure your installation location allows the IR light to cover the desired area without obstruction.
How do I adjust the camera angle and zoom?
Use the PTZ controls in the camera software or app. Test the angles and zoom levels to ensure full coverage. Some cameras allow you to set preset positions for automatic movement.
How do I maintain my PTZ camera after installation?
Regularly clean the lens, check for loose connections, and update the camera’s firmware. Inspect the mounting to ensure it stays secure, especially in outdoor conditions.
Conclusion
Installing a PTZ (Pan-Tilt-Zoom) camera is a powerful step toward building a more flexible and effective security system. When installed correctly, a PTZ camera offers wide-area coverage, precise control, and the ability to zoom in on critical details that fixed cameras often miss. From proper planning and tool preparation to correct mounting, network setup, and final configuration, every step of the installation process plays an important role in overall performance.
Whether you choose a wired or wireless PTZ camera, taking the time to follow a structured, step-by-step installation approach helps prevent common mistakes and ensures smooth camera movement, stable connectivity, and clear video quality. Proper configuration of presets, patrol modes, motion detection, and security settings further enhances the camera’s effectiveness and reliability.
In conclusion, a well-installed PTZ camera not only improves surveillance coverage but also delivers long-term value through intelligent monitoring and reduced blind spots. By following best practices for installation, setup, and maintenance, you can maximize your PTZ camera’s performance and enjoy a professional-grade security solution for your home, business, or public space.