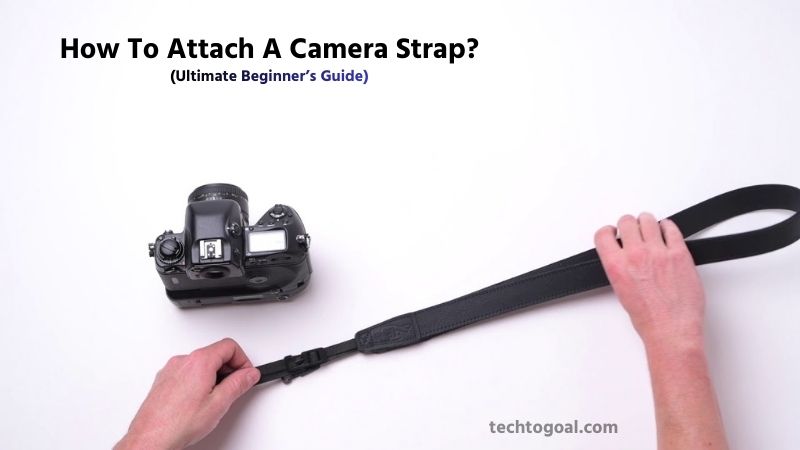
How To Attach A Camera Strap: Attaching a camera strap may seem like a small detail, but for beginners, it’s one of the most important steps in protecting a camera and shooting with confidence. A properly attached camera strap helps prevent accidental drops, reduces hand and neck strain, and allows you to move freely while keeping your camera secure. Yet many new photographers feel unsure about how to attach a camera strap correctly, especially with different strap styles, buckles, and camera body designs.
In this “How To Attach A Camera Strap: Ultimate Beginner’s Guide,” we’ll break down the process in a simple, stress-free way. Whether you’re using a DSLR, mirrorless camera, or compact camera, learning the correct method ensures your gear stays safe and comfortable during every shoot.
If you’ve just bought a new camera or want to double-check that your strap is attached securely, you’re in the right place. By the end of this guide, you’ll know exactly how to attach a camera strap properly and why doing it the right way matters more than you might think.
How To Attach A Camera Strap
Attaching a camera strap correctly is essential for protecting your camera and ensuring comfortable, stress-free shooting. Whether you’re using a DSLR, mirrorless, or compact camera, following the proper steps will help prevent accidental drops and keep your gear secure. Below is a simple, beginner-friendly, and SEO-optimized step-by-step guide you can confidently follow.
Step 1: Identify the Camera Strap Lugs
Find the strap lugs on the body of your camera first.These are small metal loops usually found on both sides of the camera. They are designed to securely hold the strap and support the weight of the camera during use.
Step 2: Check the Strap Orientation
Before attaching the strap, make sure it is not twisted. The camera brand logo or padded side should face outward for comfort and proper positioning when the camera hangs around your neck or shoulder.
Step 3: Thread the Strap Through the First Lug
Take one end of the strap and pass it through the strap lug from the bottom upward. Pull enough length through so you can easily secure it using the strap buckle or loop system.
Step 4: Secure the Strap Using the Buckle or Loop
Thread the loose end of the strap back through the plastic buckle or metal adjuster, following the strap’s original threading pattern. Pull tightly to ensure the strap is firmly locked in place. This prevents slipping or loosening while shooting.
Step 5: Add the Protective Strap Pad (If Included)
If your camera strap includes a small plastic or rubber protector, slide it between the strap and the camera body. This helps prevent scratches and reduces wear on both the strap and the camera lugs.
Step 6: On the opposite side, repeat the procedure
Attach the second end of the strap to the opposite strap lug using the same steps. Make sure both sides are equally tight and securely fastened for balanced weight distribution.
Step 7: Adjust Strap Length for Comfort
Once both ends are attached, adjust the strap length to suit your shooting style. A shorter strap keeps the camera close to your body, while a longer strap allows it to hang lower for quick access.
Step 8: Perform a Safety Check
Before using your camera, gently tug on the strap to confirm it’s securely attached. This final check ensures there’s no risk of the strap coming loose during use.
Always double-check your camera strap attachment, especially after adjusting it. A properly attached strap not only protects your camera from damage but also gives you confidence and comfort every time you shoot.
How To Attach a Nikon Camera Strap
Whether you are unboxing a classic Nikon D-series DSLR or a cutting-edge Nikon Z-series mirrorless camera, the first step to a successful shoot is ensuring your gear is securely tethered to you. Nikon straps are famous for their durability, but if they aren’t attached correctly, they can slip or leave messy “tails” that distract you while shooting. Most professional Nikon photographers use a specific “friction lock” method (often called the Nikon wrap) that tucks the loose ends away for a clean, fail-safe setup.

Follow this detailed, step-by-step guide to secure your Nikon with confidence.
Step 1: Alignment and Preparation: Start by placing your Nikon camera on a flat, protected surface with the lens facing away from you. Pick up your strap and identify the “Nikon” logo side; this should be facing outward. Ensure there are no twists in the fabric. Each end of the strap should have a plastic buckle (slider) and a small plastic retaining loop. Slide both of these several inches up the strap to give yourself plenty of working room at the tips.
Step 2: Threading the Eyelet: Nikon cameras feature sturdy metal eyelets (lugs) on the top corners of the body. Take the end of the strap and thread it through the eyelet from the top down. This is a common Nikon preference, as it allows the strap to naturally fall away from the controls. Pull approximately 6 to 10 inches of the strap through the eyelet so that you have enough length to create the secondary locking loop.
Step 3: Creating the Nikon “Professional Wrap”: To ensure the strap never slips, you must create a friction lock. Take the loose end that you just threaded through the eyelet and slide the plastic retaining loop down close to the camera. Now, look at the plastic buckle further up.
Instead of threading the end over the top, pull the main part of the strap slightly out of the buckle to create a gap, then thread the loose end through the inside of the buckle. The loose end should be sandwiched between the buckle and the main strap. This “tucked-in” method uses the weight of the camera to tighten the grip on the strap end.
Step 4: Final Tension and Safety Check: Once the end is tucked through the buckle, pull everything tight. Slide the retaining loop up to cover the loose tail, keeping it flush against the main strap. Repeat the process on the other side of the camera, being careful to ensure the strap remains untwisted. Finally, perform the “Tug Test”: Hold the strap firmly and give the camera a few gentle but firm tugs over a soft surface (like a bed). If the strap doesn’t budge or slip through the buckles, you are ready for the field.
Why the “Tucked-In” Method Matters
Using the Nikon-style tucked-in method isn’t just about looks. By keeping the loose ends on the inside of the strap, you prevent them from flapping into your eyes while using the viewfinder or getting caught on your jacket zipper. More importantly, it creates a much stronger friction lock, ensuring that even the heaviest Nikon lenses won’t cause the strap to gradually slide out of the plastic sliders.
Many Nikon users prefer attaching the strap so the camera hangs lens-down. This reduces strain on the lens mount and keeps the camera stable while walking.
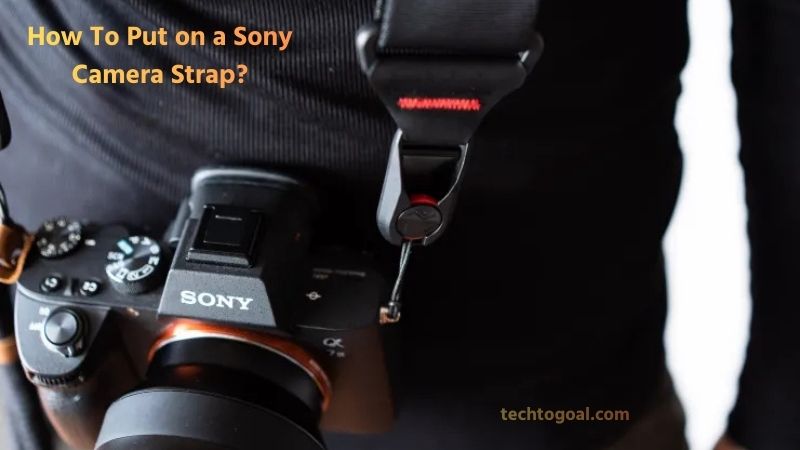
How To Put on a Sony Camera Strap
Whether you’ve just unboxed a brand-new Sony Alpha mirrorless camera or a compact ZV-series vlog camera, the first thing you should do is secure it with the included neck strap. Sony cameras are known for their sleek, compact designs, but they can be slippery. Attaching the strap using the “Professional Wrap” ensures that the loose ends of the strap don’t dangle or snag on your gear while providing a fail-safe lock that prevents the camera from falling.
Here is the most secure, human-friendly way to attach your Sony strap step-by-step.
Step 1: Lay Out Your Gear and Check the Rings: Start by placing your Sony camera on a flat, stable surface like a table. Locate the two metal attachment lugs on either side of the camera body. Most Sony Alpha cameras come with small triangular split rings already attached to these lugs. If they aren’t there, find them in your camera box and carefully thread them onto the lugs like you would a key onto a keychain. Once the rings are in place, lay your strap out flat with the “Sony” logo facing outward to ensure there are no twists.
Step 2: Threading the Buckles and Lugs: Take one end of the strap and identify the plastic slider and the retaining loop. Make sure both are on the strap. Take the tip of the strap and thread it through the triangular split ring from the bottom up. Pull about six inches of the strap through the ring to give yourself enough room to manipulate the buckle.
Step 3: The “Pro-Tucked” Buckle Method: This is the “Sony secret” for a clean look. Locate the plastic buckle further up the strap. Pull some slack through the buckle to create a small loop. Instead of threading the loose end of the strap over the top of the buckle, feed the end into the inside of the buckle.
Thread it through the top slot and then back down through the bottom slot. By tucking the tail of the strap on the inside (between the camera and the strap), it becomes sandwiched and locked by friction, making it significantly more secure than a standard loop.
Step 4: Final Adjustment and Tension Test: Once the end is threaded through the buckle, slide the small plastic retaining loop down toward the camera to hold the doubled-over strap together. Repeat the exact same process for the other side of the camera.
Before you head out, do a tension test: hold the strap firmly and let the camera hang just a few inches above a soft surface (like a bed). Give it a gentle shake to ensure the sliders are locked and the strap is not slipping.
Why Use This Method?
The “tucked-in” or “pro” style isn’t just about aesthetics; it’s about functionality. Standard threading leaves the “tail” of the strap flapping on the outside, which can get in the way of your viewfinder or accidentally catch on your thumb while you’re trying to press the shutter button. The tucked-in method keeps your Sony setup sleek, professional, and snag-free.
How To Attach Strap To Canon Camera
Nothing is more nerve-wracking than the thought of your expensive Canon camera slipping from your hands. Attaching your neck strap correctly isn’t just about comfort; it’s about the safety of your equipment. While there are several ways to do it, most professional photographers prefer the “Pro Loop” (or the “Canon wrap”), which ensures the strap ends are tucked away neatly and won’t accidentally slip through the buckles.

Follow this detailed, step-by-step guide to secure your camera like a pro.
Step 1: Alignment and Initial Threading: Before you begin, lay your camera on a flat, stable surface with the lens facing away from you. Pick up your strap and ensure it is not twisted; the “Canon” logo should be facing outward. Start with one side of the camera.
Take the plastic slider and the retaining clip and slide them onto the strap end. Now, thread the tip of the strap through the camera’s metal attachment lug from the bottom up.
Step 2: Preparing the Buckle: Once the strap is through the lug, pull about six to eight inches of slack through so you have plenty of room to work. Slide the retaining clip down close to the camera lug.
Now, locate the plastic buckle. You will notice the strap is already threaded through it, creating a loop. Pull some of that existing strap through the buckle to create a gap or a “slack loop” in the middle of the buckle.
Step 3: Executing the “Pro Loop”: This is the most critical part for security. Instead of threading the loose end of the strap over the top of the buckle, you are going to thread it through the inside. Take the loose end of the strap and tuck it into the upper slot of the buckle, following the path of the strap already there.
Then, loop it back down through the lower slot of the buckle. By doing this, the loose end of the strap is now sandwiched between the main strap and the buckle itself, creating a friction lock that is nearly impossible to pull loose.
Step 4: Final Tightening and Testing: After threading the end through the buckle, slide the retaining clip up over the loose end to keep everything neat and tidy. Repeat the exact same process for the other side of the camera, ensuring the strap isn’t twisted before you finish the second side.
Once both sides are attached, give the strap a firm tug while holding the camera over a soft surface. If the strap remains tight and the ends don’t slip, your Canon is now secure and ready for your next photo walk.
Pro Tip: Checking Your Work
A correctly attached strap should have no “loose tails” hanging out. The ends of the strap should be tucked inside the buckle and held flat against the main strap by the retaining clip. This prevents the ends from flapping around or getting caught on your clothing, and it provides a much cleaner, professional look.
How to Use Split Rings to Attach a Camera Strap
Using split rings (often called “lug rings” or “O-rings”) is the most common way to attach a strap to cameras with small, round eyelets, such as mirrorless or vintage film cameras. While they look like miniature key rings, they provide a very secure connection when installed properly.
Here is a detailed, step-by-step guide to securely attaching your camera strap using split rings.
Step 1: Find the Points of Attachment: The first step is to locate the mounting lugs on your camera body. These are the small metal eyelets typically positioned on the top left and right sides of the camera. Before you begin, ensure these lugs are clean and free of any debris.
If your camera is brand new, these eyelets might be bare; if it’s an older model, they might already have small triangular or round rings attached. If you are using new split rings, ensure the camera’s eyelets are sturdy enough to handle the metal-on-metal contact.
Step 2: Prepare and Adjust the Strap: Lay your camera strap flat on a table to ensure there are no twists in the fabric or leather. This is the best time to do a preliminary adjustment. Identify which side of the strap is the “top” and ensure it faces outward.
If your strap kit includes leather protectors, slide them onto the camera lugs now. These protectors act as a buffer between the metal split ring and the camera body, preventing the ring from scratching your camera’s finish.
Step 3: Open the Split Ring: Opening a split ring can be tricky and may be tough on your fingernails. It is best to use a small tool, such as a flat-head screwdriver, a guitar pick, or a dedicated split-ring opening tool. Gently pry the end of the metal ring upward just enough to create a small gap. Be careful not to overextend or overstretch the ring; if the metal is bent too far, it can lose its tension, which compromises the security of your camera.
Step 4: Connect the Camera to the Split Ring: Once you have a small gap in the ring, slide the opened end through the camera’s lug (or through the leather protector first, then the lug).
Once the tip of the ring is through the eyelet, use a rotating motion to “thread” the rest of the ring through, much like adding a key to a keychain. Keep rotating until the ring is fully seated and closed. After the ring is on the camera, you can then attach the strap’s connector or thread the strap webbing through the ring, depending on your specific strap design.
Step 5: Repeat for the Opposite Side: Repeat the exact same process for the other side of the camera. Before you finalize the second side, double-check the strap’s orientation one last time. It is very common to accidentally attach a strap with a twist in it, which can be uncomfortable during long shoots.
Once both rings are securely fastened, give each side a firm “tug test” over a soft surface to ensure the rings have snapped back to their original shape and the strap is locked in place.
Maintenance Tip
Over time, metal split rings can experience “fatigue” or slightly pull apart if you use very heavy professional lenses. It is a good habit to inspect these rings every few months. If you notice a gap in the ring where the metal doesn’t sit flush, replace it immediately to avoid a gear accident.
How to Install a Camera Strap?
Installing a camera strap correctly is an essential step for protecting your camera and improving comfort while shooting. A properly attached strap helps prevent accidental drops, reduces hand fatigue, and allows you to carry your camera safely during long photography sessions. Whether you are using a DSLR, mirrorless, or compact camera, following the right installation method ensures both security and ease of use.
First, begin by identifying the strap attachment points on your camera body. Most cameras are designed with two metal lugs located on either side of the body, specifically made to hold the strap securely. Place the camera on a flat, stable surface to avoid slipping, and ensure the attachment points are clean and free from dust or sharp edges that could damage the strap over time.
Next, prepare the camera strap before attaching it. Untangle the strap completely and check its orientation so the padded or branded side faces outward. If your strap includes plastic or leather protectors, make sure they are positioned correctly to prevent the metal rings from scratching the camera body. Adjust the strap length roughly at this stage to suit your preferred carrying style, whether around the neck, on the shoulder, or across the body.
Now, thread one end of the strap through the camera’s attachment lug or split ring. Pass the strap loop through the lug, then feed the end of the strap back through its own loop or buckle, depending on the strap design. Pull it tight and ensure the strap is firmly locked in place. Give it a gentle tug to confirm that it will not loosen or slide out unexpectedly.
Repeat the same process on the opposite side of the camera with the other end of the strap. Make sure both sides are attached evenly so the camera hangs straight and feels balanced when worn. Uneven attachment can cause discomfort and place unnecessary stress on one side of the camera body.
Finally, test the installation before regular use. Lift the camera by the strap and gently shake it to check for stability. If the strap feels secure and the camera hangs comfortably, the installation is complete. Taking a few extra moments to install your camera strap correctly can greatly improve safety, comfort, and confidence while shooting.
FAQs
Why is it important to attach a camera strap correctly?
Attaching a camera strap correctly helps prevent accidental drops and protects your camera from damage. A secure strap also provides better comfort and balance, especially when carrying the camera for long periods.
Do all cameras use the same method to attach a strap?
Most DSLR, mirrorless, and compact cameras use side metal lugs for strap attachment, but the exact method may vary slightly depending on the strap design. Always follow the manufacturer’s instructions for the best fit.
What tools do I need to attach a camera strap?
In most cases, no tools are required. You can attach a camera strap using your hands, although split rings may sometimes need a fingernail or a small flat object to open them safely.
How do I know if my camera strap is attached securely?
After attaching the strap, gently pull on both ends and lift the camera slightly. If the strap doesn’t slip or loosen and the camera feels balanced, it is securely attached.
Should the camera strap be twisted or flat when attaching?
The strap should always lie flat and not be twisted. A twisted strap can cause discomfort while wearing and may weaken the strap over time.
Can I attach a camera strap using only one side?
It is not recommended to attach a strap using only one side unless it is a wrist strap designed for single-point attachment. Standard neck or shoulder straps should always be attached to both sides for proper balance and safety.
How tight should the strap be after attaching it?
The strap should be tightened enough so it cannot slip through the buckle or loop. However, it should not be forced too tightly, as this may damage the strap material or attachment points.
Can split rings scratch my camera body?
Yes, metal split rings can scratch the camera if not protected. Using plastic, rubber, or leather protectors between the ring and camera body helps prevent cosmetic damage.
How often should I check my camera strap attachment?
It’s a good idea to check your camera strap regularly, especially before important shoots or travel. Over time, straps can loosen due to movement and wear.
Is it safe to use third-party camera straps?
Yes, third-party camera straps are generally safe if they are well-made and compatible with your camera. Always ensure the strap is strong enough to support your camera’s weight and is attached securely.
Conclusion
Attaching a camera strap properly is a simple yet crucial step for every photographer, whether beginner or professional. A securely installed strap not only protects your camera from accidental drops but also improves comfort and confidence while shooting.
By carefully following the correct attachment method, ensuring the strap lies flat, and double-checking both sides for a firm hold, you can avoid unnecessary damage and enjoy a safer photography experience. Taking a few extra moments to attach your camera strap the right way helps extend the life of your equipment and allows you to focus fully on capturing great photos without worry.