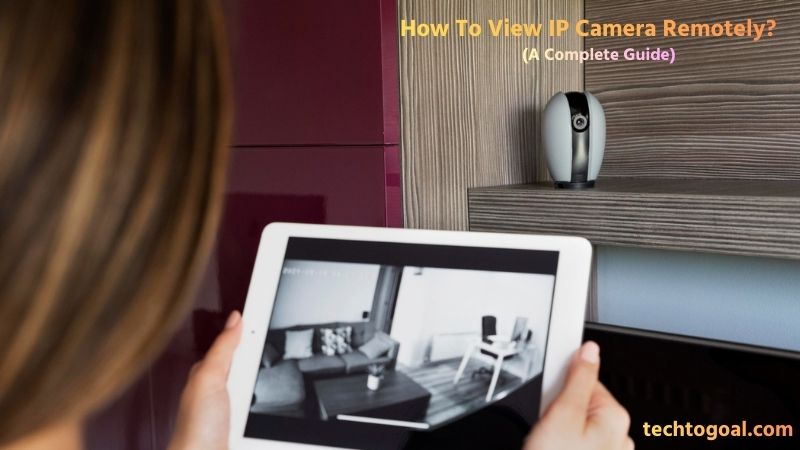
How To View IP Camera Remotely: In today’s connected world, being able to monitor your home, office, or business from anywhere is no longer a luxury; it’s a necessity. IP cameras have become one of the most popular security solutions thanks to their high-quality video, smart features, and remote accessibility. However, many users still struggle to understand how to view an IP camera remotely, especially with evolving technologies and security standards in 2026.
Whether you want to check live footage from your smartphone, receive real-time alerts while traveling, or manage multiple cameras from a single dashboard, remote access is the key feature that makes IP cameras truly powerful. The good news is that modern IP cameras now offer multiple remote viewing options, including mobile apps, web browsers, cloud services, and secure port forwarding.
In this complete guide, you’ll learn how to view IP cameras remotely in 2026, step by step, using safe and reliable methods. We’ll cover the latest tools, best practices, common setup mistakes to avoid, and tips to keep your camera feed secure from unauthorized access. Whether you’re a beginner or upgrading an existing system, this guide will help you gain full control of your IP camera anytime, anywhere.
What is a remote viewing camera?
In the context of 2026 home security, a remote viewing camera is an advanced Internet Protocol (IP) surveillance device that allows users to access live and recorded video footage from any location in the world via an internet connection.
📌Read More👉How to Connect Security Cameras to TV
Unlike traditional closed-circuit systems (CCTV) that required you to be physically present at a monitor station, a remote viewing camera digitizes video signals and transmits them over secured networks to your smartphone, tablet, or laptop. This technology bridges the physical gap between a homeowner and their property, providing “virtual presence” through high-definition visual data.
The magic behind a remote viewing camera lies in its connectivity. Most modern units utilize P2P (peer-to-peer) technology or cloud-based servers to bypass complex networking hurdles.
When you open your security app in 2026, the camera sends an encrypted stream through a secure tunnel directly to your device. This process happens in milliseconds, allowing for two-way audio communication, real-time AI alerts, and the ability to pan or tilt the camera remotely to get a better view of the surroundings.
From an SEO and functional perspective, remote viewing cameras are the backbone of the smart home ecosystem. They integrate seamlessly with platforms like Amazon Alexa, Google Home, and Apple HomeKit, transforming a standalone camera into a proactive security guard. Whether you are monitoring a sleeping infant from the next room or checking on a vacation home from a different continent, a remote viewing camera provides the ultimate layer of transparency and peace of mind by ensuring that your eyes are always on what matters most, regardless of where you are.
How Remote Viewing Security Cameras Work
Understanding how remote viewing security cameras work in 2026 is like looking at a high-speed digital relay race. At its core, the process involves capturing light, converting it into data, and sprinting that data across the internet to your device in a fraction of a second.
Unlike old analog systems that sent a continuous electrical signal through a wire, a remote-ready IP camera acts as its own mini-computer, processing video internally before it ever leaves the device.
The Capture and Compression Phase
The process begins when the camera’s sensor captures raw video footage. Because 4K or 8K video files are massive, the camera uses advanced H.265+ or H.266 (VVC) compression algorithms. These “codecs” shrink the video size without losing critical detail, making it light enough to travel over home Wi-Fi or cellular networks.
In 2026, many cameras also perform Edge AI processing, where the camera identifies if the object is a human, vehicle, or animal before even sending the data, ensuring you only receive relevant streams.
The Digital Handshake: P2P and Cloud Servers
Once the video is compressed, the camera needs to find your smartphone. This is usually handled via a P2P (peer-to-peer) server or a cloud relay. When you open your app, your phone sends a request to a central server asking for the camera’s location.
The server then facilitates a “digital handshake” between your device and the camera. Thanks to NAT Traversal technology, this connection bypasses your router’s complex firewall settings automatically, eliminating the need for the manual “port forwarding” that was common in the past.
Encrypted Data Transmission
Security is the top priority in 2026. The data travels through a secure tunnel using protocols like WebRTC (Web Real-Time Communication) or TLS 1.3 encryption. This ensures that even if someone intercepts the data packets while they are moving through the internet, they cannot “read” or view the footage.
For users who prioritize privacy, some systems use a VPN (Virtual Private Network) tunnel, which makes the remote camera appear as if it is on the same local network as your phone, even if you are thousands of miles away.
Decoding and Live Display
The final step occurs on your viewing device (phone, tablet, or TV). Your device receives the compressed digital packets and uses its hardware to “decode” them back into a visual image. Because of ultra-low latency 5G and 6G integration, this entire loop from the camera capturing a movement to you seeing it on your screen happens in less than 200 milliseconds. This near-instantaneous speed allows for responsive two-way audio, letting you talk to someone at your door in real time from anywhere in the world.
What You Need to Set Up Remote Viewing
For a moment, let’s be honest. Too much jargon is thrown at you by many manuals. What you actually need to watch security cameras remotely is as follows:
- 1. The Appropriate Camera: Avoid grabbing any old webcam. Select a security camera for remote watching that is designed for mobile and web access. A hint: I’ll shortly discuss the top Aqara models.
- 2. A Sturdy WiFi Network: Your camera stream won’t function if your home Wi-Fi is inconsistent. Make sure your router is password-protected, conveniently located, and up to date.
- 3. A computer, tablet, or smartphone: To see the camera stream from a distance, you need a gadget. The majority of individuals use their phones, which are always in their pockets.
- 4. The Camera App: The majority of cameras are compatible with a branded app (such as Aqara Home). Some connect to larger ecosystems, such as Apple HomeKit, Google Home, Alexa, or SmartThings, so you can control everything at once.
- 5. An Account for Users: Make sure your camera has a secure login. Account protection keeps hackers away, so don’t overlook this.
- 6. Local or Cloud Storage: Choose between saving video to a memory card in the camera for further privacy or to the cloud for convenient viewing. You have both choices with Aqara cameras.
Techtogoal makes every step easy, even for complete beginners.
How to Set Up Remote Camera Monitoring via Smartphone (Step-by-Step Guide)
Step 1: Choose a Smartphone-Compatible Camera
The first step to setting up remote camera monitoring is selecting an IP camera that supports mobile access. Most modern security cameras come with dedicated Android and iOS apps, cloud support, and remote viewing features. Before purchasing, confirm that the camera explicitly mentions smartphone monitoring, remote access, or mobile app support in its specifications.
Step 2: Install the Camera’s Official Mobile App
Download the official app provided by the camera manufacturer from the Google Play Store or Apple App Store. Avoid third-party apps unless recommended by the brand, as official apps offer better security, firmware updates, and stable performance for remote monitoring.
Step 3: Power On the Camera and Connect It to Wi-Fi
Plug in the camera and follow the in-app instructions to connect it to your home or office Wi-Fi network. Most cameras use a QR code or Bluetooth pairing process to simplify setup. Ensure you are using a stable 2.4 GHz or compatible Wi-Fi band for reliable connectivity.
Step 4: Create or Log In to Your Camera Account
To enable remote viewing, you’ll need to create a user account within the camera app. This account allows secure cloud access to your camera feed from anywhere in the world. Use a strong password and enable two-factor authentication (2FA) if available for added security.
Step 5: Add the Camera to the App
Choose “Add Device” or “Set Up New Camera” in the app after logging in. The app will automatically detect the camera on your network. Assign a name and location (such as “Front Door” or “Living Room”) to easily identify the camera when monitoring remotely.
Step 6: Enable Remote Access and Cloud Services
Most IP cameras require cloud services to stream footage remotely. Enable remote access or cloud storage options inside the app settings. Some brands offer free basic plans, while others require a subscription for full remote playback and recording features.
Step 7: Configure Camera Settings for Mobile Viewing
Adjust video resolution, frame rate, motion detection sensitivity, and notification preferences to suit your needs. Lower resolutions may load faster on mobile data, while higher resolutions provide clearer footage when using Wi-Fi.
Step 8: Test Remote Viewing Using Mobile Data
Turn off your phone’s Wi-Fi and switch to mobile data to test remote access. Open the app and check if the live camera feed loads smoothly. This step ensures your camera is properly configured for monitoring outside your local network.
Step 9: Enable Motion Alerts and Push Notifications
To stay informed while away, activate motion alerts in the app. Your smartphone will receive instant notifications whenever movement is detected. This feature is especially useful for home security, baby monitoring, or business surveillance.
Step 10: Keep Firmware and App Updated
Regularly update both the camera firmware and the mobile app. Updates improve security, add new features, and fix bugs that could affect remote viewing performance. Keeping everything up to date ensures a smooth and secure monitoring experience.
Always secure your camera system with strong passwords and avoid using public Wi-Fi when accessing live feeds. Proper setup and security measures will allow you to monitor your cameras safely and reliably from anywhere in the world.
How to Set Up Security Camera Remote Viewing via Port Forwarding?
While most modern users in 2026 rely on P2P cloud services, port forwarding remains the preferred method for power users and professionals who want a direct, high-speed connection to their cameras without relying on a third-party server. By “opening a door” in your router’s firewall, you allow your smartphone to talk directly to your DVR, NVR, or IP camera.
Here is the step-by-step technical guide to setting up remote viewing via port forwarding:
Step 1: Assign a Static IP Address to Your Camera
Before touching the router, you must ensure your camera (or NVR) always stays at the same internal address. By default, routers use DHCP, which can change your camera’s address.
- Log into your camera’s web interface via a browser.
- Go to Network Settings and select “Static” instead of “DHCP” for the IP setting.
- Assign it a unique address like 192.168.1.100. This ensures that when the router “looks” for the camera, it always finds it at this exact location.
Step 2: Identify the Required Port Numbers
Every camera system uses specific “lanes” or ports to send data. To view your camera remotely, you typically need to forward two or three specific ports.
- Check your camera’s manual or network settings for the HTTP Port (usually 80 or 8080), the RTSP Port (usually 554), and the Server/Media Port (often 8000 or 9000).
- Write these numbers down, as you will need to input them into your router’s firewall settings in the next step.
Step 3: Access Your Router’s Port Forwarding Menu
Now, you need to tell your router to allow outside traffic to reach your camera.
- Type your router’s IP address (usually 192.168.1.1) into a web browser and log in.
- Look for a section labeled “Port Forwarding,” “Virtual Server,” or “Applications & Gaming.” This is the control center for directing internet traffic into your home network.
Step 4: Create the Port Forwarding Rules
This is where you “open the door.” For each port number you identified in Step 2, you must create a new rule.
- Enter the internal IP address (e.g., 192.168.1.100) of your camera.
- Input the internal and external ports (e.g., 8000).
- Set the protocol to “Both” or “TCP/UDP.” * Repeat this for the HTTP and RTSP ports to ensure video, audio, and control data all pass through successfully.
Step 5: Set Up a DDNS (Dynamic DNS)
Most home internet connections have a dynamic WAN IP, meaning your “home address” on the global internet changes every few days. If it changes, your remote link will break.
- In your NVR or router settings, look for the DDNS tab.
- Sign up for a service like No-IP or DynDNS. You will receive a URL like myhome.ddns.net.
- Now, instead of typing a number that changes, you will use this permanent URL to access your cameras from anywhere.
Step 6: Configure the Mobile App for Direct Access
Now that the “pipe” is built, you need to tell your smartphone app to use it.
- Open your camera app and select “Manual Add” or “IP/Domain.”
- Enter your DDNS URL (from Step 5) and the port number you forwarded.
- Enter your camera’s username and password. By using this method, your phone connects directly to your home, often resulting in faster 4K streaming than cloud-based P2P methods.
Step 7: Test the Connection Outside Your Network
To verify the setup, you must test it from a different network.
- Turn off your phone’s Wi-Fi and switch to 5G/6G cellular data.
- Open the app. If the live feed appears, your port forwarding is successful.
Security Tip: Because you have opened a port, ensure your camera has a very strong, complex password to protect against unauthorized scans.
How to View IP Camera Remotely without Internet
In 2026, viewing an IP camera remotely without an “external internet” is a common requirement for off-grid cabins, rural farms, or high-security locations where privacy is paramount. While you cannot access the camera from a different city without the internet, you can create a local remote network that allows you to view footage wirelessly across your property.
📌Read More👉10 Best Alarm System with Camera of 2026
This setup relies on a local “Intranet” to bridge the gap between your camera and your viewing device. Here is the professional guide to viewing your IP cameras without an active internet subscription:
Step 1: Establish a Local Area Network (LAN)
The “remote” aspect in an offline setup depends on a local wireless signal. You will need a standalone Wi-Fi router. You do not need an ISP or a monthly data plan; you simply need the router to act as a communication hub. Plug your router into a power source and ensure it is broadcasting a Wi-Fi SSID. This creates a “digital bubble” where your cameras and smartphone can talk to each other without needing to send data to the cloud.
Step 2: Connect Cameras via Ethernet or Local Wi-Fi
Next, you must link your cameras to this offline router. For the most stable connection, use Ethernet cables to plug your IP cameras or NVR directly into the router’s LAN ports. If you are using wireless cameras, connect them to the router’s Wi-Fi signal. Since there is no internet, the camera will display a “No Internet” status, but it will still be assigned a local IP address (e.g., 192.168.1.5), which is all you need for local remote viewing.
Step 3: Assign Static IP Addresses
Without the internet to manage cloud handshakes, your router might occasionally change the camera’s address, breaking your connection. You must log into the router’s settings and assign a static IP to each camera. This ensures that every time you open your viewing app, it knows exactly which “room” the camera is in within your local network. This stability is the key to a reliable offline system.
Step 4: Use an NVR for Centralized Viewing
While you can connect directly to a single camera, using an NVR (Network Video Recorder) is the most effective way to view multiple cameras offline. Connect the NVR to the same router. The NVR will act as the “brain,” recording footage to its internal hard drive and providing a single access point. In 2026, many NVRs come with a built-in Wi-Fi chip, allowing them to create their own local hotspot for direct smartphone pairing.
Step 5: Install a Non-Cloud Viewing App
Many popular camera apps (like Ring or Nest) require a cloud login to work, which won’t function without the internet. Instead, use a Generic IP Discovery App or the manufacturer’s “Local Account” mode (e.g., Reolink or Hik-Connect in “Local Guest” mode). Alternatively, use VLC Media Player or IP Cam Viewer. These apps allow you to manually enter the camera’s local IP address and RTSP port to pull the feed directly over the Wi-Fi.
Step 6: Bridge the Distance with Wireless APs (Optional)
If your “remote” location is a barn 500 feet away from your house, the standard router signal won’t reach. To achieve “Long-Distance Offline Viewing,” install Point-to-Point (PTP) Wireless Bridges. These devices act like an invisible Ethernet cable, beaming the camera’s signal from the barn to your house wirelessly. As long as your phone is connected to the router at the receiving end, you can view the “remote” barn camera without a drop of internet data.
Step 7: Access the Feed via Local Wi-Fi
To view the footage, simply connect your smartphone or tablet to the router’s Wi-Fi. Open your chosen app and add the cameras using their local IP addresses. Even though you are “remote” from the camera’s physical location (perhaps in a different building on the same property), the signal travels through your private network. This provides the fastest, most private 4K stream possible, completely immune to internet outages or hacking from the outside world.
Troubleshooting Common Remote Viewing Issues (IP & Security Cameras)
Remote viewing allows you to monitor your security or IP camera from anywhere, but technical issues can sometimes interrupt access. Understanding the most common remote viewing problems and how to fix them can save time, reduce frustration, and ensure your surveillance system works reliably. Below are the most frequent remote viewing issues along with practical solutions.
Camera Not Connecting to the Internet: One of the most common reasons remote viewing fails is that the camera is not properly connected to the internet. This can happen due to weak Wi-Fi signals, incorrect network credentials, or router issues. Ensure the camera is within range of the router, recheck the Wi-Fi password, and reboot both the camera and router. Remote access requires a reliable internet connection.
Incorrect Port Forwarding Settings: If you’re using port forwarding for remote viewing, incorrect configuration can block access. Issues often occur when the wrong port number, IP address, or protocol, is entered in the router settings. Verify that the camera’s internal IP address is correct and ensure the selected ports are open and not being used by other devices.
Dynamic IP Address Changes: Many internet service providers use dynamic IP addresses that change periodically. When this happens, your saved remote access link may stop working. Using a Dynamic DNS (DDNS) service helps solve this issue by automatically updating your IP address, ensuring uninterrupted remote viewing.
Firewall or Router Blocking Access: Firewalls and router security settings may block incoming connections required for remote viewing. This is especially common when strict firewall rules are enabled. Temporarily disabling the firewall for testing or adding exceptions for your camera’s ports can help restore access while maintaining security.
Outdated Camera Firmware or App: Using outdated firmware or an old mobile app can cause compatibility issues, slow performance, or connection failures. Manufacturers regularly release updates to fix bugs and improve remote access stability. Always keep your camera firmware and viewing app updated to the latest version.
Mobile App Login or Permission Issues: Sometimes remote viewing issues are caused by incorrect login credentials or restricted app permissions. Double-check your username and password, and make sure the app has permission to use mobile data, Wi-Fi, background activity, and notifications. Logging out and back into the app can also refresh the connection.
Slow Internet Speed or High Network Traffic: Remote viewing relies heavily on upload speed from the camera’s network. If your internet speed is slow or multiple devices are consuming bandwidth, video feeds may lag or fail to load. Reducing network traffic or upgrading your internet plan can significantly improve remote viewing performance.
Incorrect Camera IP Address: If your camera’s IP address changes due to DHCP settings, remote viewing links may stop working. Assigning a static IP address to your camera ensures consistency and prevents unexpected connection failures.
NAT or Double Router Issues: In networks with multiple routers (double NAT), remote access may fail because ports are not forwarded correctly across both devices. Configuring bridge mode or forwarding ports on both routers can resolve this issue and restore remote viewing functionality.
Server or Cloud Service Outages: For cloud-based cameras, remote viewing may be temporarily unavailable due to server maintenance or outages. Checking the manufacturer’s service status page can confirm whether the issue is on their end. Waiting is frequently the only option in these situations.
Most remote viewing problems can be fixed by checking internet connectivity, verifying network settings, and keeping your camera software updated. Regular maintenance and proper configuration ensure reliable and secure remote monitoring.
Potential Risks of Remote Access to Security Cameras
Remote access makes security cameras incredibly convenient, but it also introduces several risks if not properly managed. Understanding these risks can help users take the right precautions and protect their privacy, data, and network security.
📌Read More👉Risks of Connecting CCTV to a TV Without an NVR
Unauthorized Access and Hacking: One of the biggest risks of remote camera access is unauthorized entry by hackers. Weak passwords, default login credentials, or outdated firmware can make cameras easy targets. Once accessed, hackers may view live footage, control camera settings, or even disable the system entirely, putting your home or business at serious risk.
Privacy Invasion: If a security camera is compromised, personal and sensitive moments inside your home or workplace can be exposed. Hackers may spy on daily activities, monitor schedules, or misuse recorded footage. This invasion of privacy can be especially concerning for indoor cameras placed in living rooms, offices, or bedrooms.
Data Breaches and Footage Leaks: Many IP cameras store footage in cloud servers or local network storage. If remote access is not secured with encryption, recorded videos can be intercepted or leaked. Stolen footage may be shared online or used for blackmail, identity theft, or other malicious purposes.
Network Vulnerabilities: Remote viewing often requires port forwarding or internet exposure, which can create entry points into your entire home or office network. If attackers exploit these openings, they may gain access not only to cameras but also to other connected devices such as computers, smart TVs, and IoT systems.
Malware and Botnet Attacks: Unsecured security cameras can be infected with malware and secretly added to botnets. In such cases, your camera may be used to launch cyberattacks on other networks without your knowledge, leading to legal or internet service issues.
Dependence on Third-Party Cloud Services: Many camera brands rely on cloud platforms for remote access. If the service provider experiences a breach, outage, or policy change, your camera data and access may be affected. Users have limited control over how these third-party companies manage and secure stored footage.
False Sense of Security: Remote access can sometimes give users a false sense of safety. Relying solely on live viewing without proper alerts, backups, or physical security measures may result in delayed responses during real incidents, reducing the overall effectiveness of the security system.
To reduce these risks, always use strong passwords, enable two-factor authentication, keep firmware updated, avoid unnecessary port forwarding, and use encrypted connections like VPNs whenever possible.
FAQs
What does it mean to view an IP camera remotely?
Viewing an IP camera remotely means accessing your security camera’s live video feed or recordings from a different location using the internet or a local network. This allows you to monitor your home, office, or property through a smartphone, tablet, or computer from anywhere in the world.
Do I need an internet connection to view my IP camera remotely?
In most cases, yes, an internet connection is required for true remote viewing. However, you can still view an IP camera without the internet if you are connected to the same local network using LAN access or direct Wi-Fi connection methods.
Can I view my IP camera on my smartphone?
Yes, most modern IP cameras support remote viewing through dedicated mobile apps for Android and iOS. These apps let you watch live footage, receive motion alerts, control camera settings, and review recordings directly from your smartphone.
Is port forwarding required for remote IP camera access?
Port forwarding is optional. While it is a traditional method for remote viewing, many cameras now use cloud services or P2P (peer-to-peer) technology, which allows remote access without manual router configuration.
Is remote viewing of IP cameras secure?
Remote viewing can be secure if proper precautions are taken. Using strong passwords, enabling two-factor authentication, updating firmware regularly, and avoiding default login credentials help protect your camera from unauthorized access.
Can multiple users view the same IP camera remotely?
Yes, many IP camera systems allow multiple users to access the same camera remotely. You can usually share viewing permissions through the app, controlling whether others can only view footage or also manage camera settings.
What devices can be used to view IP cameras remotely?
IP cameras can be viewed remotely on smartphones, tablets, laptops, desktop computers, and even smart TVs. All you need is a compatible app, web browser, or camera software and proper login credentials.
Conclusion: Mastering Your Security from Anywhere
As we’ve explored in this guide, remote viewing in 2026 is no longer a complicated technical hurdle but a standard feature of a modern, secure lifestyle. Whether you choose the simplicity of P2P cloud apps, the high-speed directness of port forwarding, or the ultimate privacy of an offline LAN setup, the ability to monitor your property from your smartphone or web browser provides an invaluable layer of protection.
However, with great connectivity comes the responsibility of security. As you set up your remote access, always prioritize Two-Factor Authentication (2FA) and strong encryption to ensure that your private feeds remain exactly that—private. Technology will continue to evolve, with 6G and AI making our systems even smarter, but the fundamental goal remains the same: providing you with total peace of mind, no matter where you are in the world.
By following the steps outlined in this guide, you have transformed your security cameras from simple recording devices into a proactive, global monitoring system. Now, your home is never truly “unattended,” and your loved ones are always just a click away.