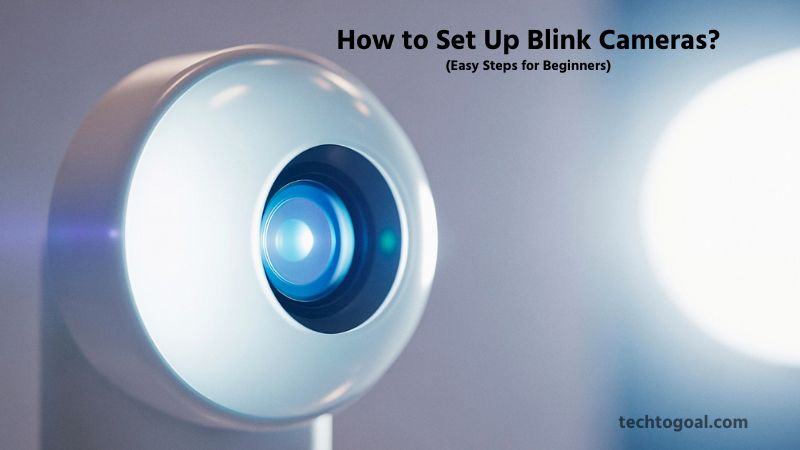
Blink cameras have become a popular choice for home security thanks to their affordability, wireless design, and easy installation process. As smart home technology continues to evolve, setting up Blink cameras in 2026 is more user-friendly than ever, even for complete beginners. Whether you’re installing a Blink Indoor, Blink Outdoor, Blink Mini, or Blink Doorbell, a proper setup is essential to ensure reliable performance and full security coverage.
However, for a beginner, the first few steps—syncing the module, configuring the 2.4 GHz Wi-Fi, and optimizing motion zones—can still feel a bit daunting. Should you use cloud storage or a local USB backup? How do you ensure the batteries actually last for two years? These are the questions every new user asks.
In this comprehensive guide, we will walk you through the Blink camera setup process for 2026 from scratch. From downloading the app to mounting your devices for the perfect field of view, we’ve simplified the technical jargon so you can get your system up and running in minutes. Let’s dive into the future of stress-free home security!
What Is a Blink Camera?
A Blink camera is a smart home security camera designed to help homeowners monitor their property easily and affordably. Developed by Blink and owned by Amazon, Blink cameras are known for their wireless design, long battery life, and simple setup process. They allow users to watch live video, receive motion alerts, and review recorded footage directly through the Blink mobile app, making home security accessible even for beginners.
How Blink Cameras Work
Blink cameras use motion detection sensors to monitor activity within their field of view. When movement is detected, the camera records a short video clip and sends an alert to your smartphone. These cameras connect to your home Wi-Fi network and store footage either in the cloud or on a local USB drive via the Blink Sync Module. This setup provides flexibility for users who want cloud convenience or local storage options.
Types of Blink Cameras
Blink offers several camera models to suit different security needs. Popular options include Blink Indoor, Blink Outdoor, Blink Mini, and Blink Video Doorbell. Indoor and outdoor models are battery-powered for flexible placement, while Blink Mini is a compact plug-in camera ideal for indoor use. Each model is designed to deliver reliable performance while remaining budget-friendly.
Key Features of Blink Cameras
Blink cameras stand out for their long battery life, with some models lasting up to two years on standard AA batteries. They also feature HD video quality, infrared night vision, customizable motion zones, and smart alerts. Integration with Amazon Alexa allows users to control cameras using voice commands, adding extra convenience to daily use.
Common Uses of Blink Cameras
Blink cameras are commonly used for home security, apartment monitoring, package surveillance, and checking on pets or children. Their wireless design makes them suitable for renters and homeowners alike, while their affordable pricing makes them an attractive option for anyone looking to enhance home security without complex installation.
📌Read More👉How to Reset Arlo Cameras?
How to Set Up Blink Cameras
Setting up Blink cameras is a straightforward process that can be completed in just a few minutes, even if you’re new to smart home security. Whether you’re installing a Blink Indoor, Blink Outdoor, Blink Mini, or Blink Video Doorbell, following the correct steps ensures smooth connectivity, reliable motion alerts, and optimal video performance.
Step 1: Unbox and Prepare Your Blink Camera
Begin by unboxing your Blink camera and confirming that all components are included. This typically includes the camera, batteries or power cable, mounting hardware, and the Blink Sync Module if required. Insert the batteries into battery-powered models or plug in wired models like Blink Mini. Make sure your smartphone is fully charged and connected to a stable Wi-Fi network before continuing.
Step 2: Download and Install the Blink App
Next, download the Blink Home Monitor app from the Apple App Store or Google Play Store. Open the app and sign in with your Amazon account. If you don’t already have one, you’ll be prompted to create an account. The Blink app is essential for managing camera settings, viewing live video, and receiving motion alerts.
Step 3: Set Up the Blink Sync Module
If your Blink system uses a Sync Module, plug it into a power outlet and connect it to your Wi-Fi router using the Blink app. The Sync Module helps manage multiple cameras and enables local video storage through a USB drive. Follow the in-app instructions until the Sync Module’s light indicator shows it is successfully connected.
Step 4: Add Your Blink Camera to the App
In the Blink app, tap “Add Device” and select your Blink camera model. Scan the QR code on the camera or manually enter the serial number when prompted. The app will guide you through connecting the camera to your Wi-Fi network. Once connected, the camera will appear in your device list.
Step 5: Position and Mount the Camera
Place your Blink camera in the desired location, ensuring a clear view of the area you want to monitor. For outdoor cameras, choose a weather-protected spot and avoid direct sunlight to reduce glare. Mount the camera using the included hardware, adjusting the angle to cover entry points, walkways, or high-traffic areas.
Step 6: Customize Camera Settings
After installation, customize your camera settings through the Blink app. Adjust motion sensitivity, set activity zones, enable or disable notifications, and test night vision. These settings help reduce false alerts and ensure the camera captures important activity accurately.
Step 7: Test Live View and Motion Alerts
Finally, test your Blink camera by using the Live View feature and walking through the detection area. Confirm that motion alerts are delivered to your phone and that video clips are recording correctly. Make any necessary adjustments to improve coverage and performance.
By following these steps, you can set up your Blink cameras quickly and enjoy reliable home security monitoring. Proper setup ensures clear video, timely alerts, and peace of mind whether you’re at home or away.
Pro-Tips for a Perfect Setup
- Wi-Fi Frequency: Remember that Blink only supports 2.4 GHz Wi-Fi. If your router is dual-band, ensure you aren’t trying to connect to the 5 GHz band.
- Local Storage: If you want to avoid monthly cloud fees, insert a USB flash drive (up to 256 GB) into the side of your Sync Module 2 to save clips locally.
- Firmware Updates: Immediately after setup, your camera might stay “Busy” for a minute; this is usually a mandatory firmware update. Let it finish to ensure all 2026 security patches are active.
How to Set Up Blink Outdoor 4
The Blink Outdoor 4 is the flagship wireless security camera from Amazon, known for its sleek design, 143-degree wide field of view, and advanced person detection. Setting it up in 2026 is faster than ever thanks to the improved Blink Home Monitor app.
Here is a comprehensive, step-by-step guide to setting up your Blink Outdoor 4 system.
Step 1: Initialize the Blink App
The app is the control center for your entire security system.
- Download: Search for “Blink Home Monitor” on the iOS App Store or Google Play Store.
- Account Creation: Open the app and tap “Create Account.” Follow the prompts to verify your email and phone number (2-factor authentication is mandatory for security).
- Region Selection: Ensure you select the correct region to ensure the fastest cloud server response times.
Step 2: Set Up the Sync Module 2 (The Hub)
The Outdoor 4 requires a Sync Module to connect to your Wi-Fi and manage battery life.
- Plug in: Connect the Sync Module to a power outlet using the included USB cable and adapter. Choose a central location in your home, roughly halfway between your Wi-Fi router and where the camera will be placed.
- Add Device: In the Blink app, tap the “+” icon and select “Sync Module.”
- Scan & Sync: Scan the QR code on the back of the module. When the light blinks blue, follow the app prompts to connect it to your 2.4 GHz Wi-Fi network. (Note: 5 GHz Wi-Fi is not supported).
Step 3: Power Up the Outdoor 4 Camera
Now it’s time to prepare the hardware.
- Open the Back Cover: Use the included opening tool to turn the screw on the back of the camera counter-clockwise until the back pops off.
- Insert Batteries: Insert the two included AA lithium batteries.
- Scan the Camera: In the app, tap the “+” icon again and select “Wireless Camera.” Scan the QR code located inside the battery compartment. The app will automatically associate the camera with your new Sync Module system.
Step 4: Test Connectivity and Placement
Before you drill holes in your walls, perform a “signal check.”
- Signal Check: Take the camera to the intended mounting spot. Tap the “Live View” icon in the app. Check the “Camera to Sync Module” and “Camera to Wi-Fi” signal icons. Both should show at least 3 bars for reliable 1080p streaming.
- Adjust Zones: Use the app to set Activity Zones. In 2026, the Outdoor 4 features enhanced person detection by blocking out high-traffic areas like sidewalks; you’ll only get alerts when someone actually approaches your door.
Step 5: Mounting for Optimal Coverage
Blink Outdoor 4 comes with a versatile mount that snaps into the back of the camera.
- Height: The ideal mounting height is 8 to 10 feet above the ground. This provides a wide field of view while keeping the camera out of reach of potential intruders.
- Angle: The Outdoor 4 has a 143-degree field of view. Angle it slightly downward to capture faces clearly as people approach.
- Secure the Mount: Screw the mount into your surface (wood or brick) and snap the camera on. You can then rotate and swivel the camera to fine-tune the view.
Pro-Tips for 2026 Users
- No Subscription Option: If you don’t want to pay for a monthly cloud plan, insert a USB flash drive into the Sync Module 2. This allows you to store all motion clips locally for free.
- Alexa Integration: Since Blink is an Amazon company, you can say, “Alexa, show me the backyard” on your Echo Show or Fire TV to see your feed instantly.
- Privacy Zones: If your camera sees part of a neighbor’s window, use the Privacy Zone feature in the app to “black out” that specific area for ethical monitoring.
How to Set Up Blink Outdoor Cameras
Setting up your Blink Outdoor cameras in 2026 is a seamless process designed for speed and security. Whether you are installing the latest Blink Outdoor 4 or the Outdoor 2K+, the setup relies on a wireless connection to a central “Sync Module” and the Blink Home Monitor app.
Follow these simple, step-by-step instructions to get your home protected in minutes.
Step 1: Initialize the Blink App
The app serves as the control center for your entire security system.
- Download & Install: Search for the “Blink Home Monitor” app in the iOS App Store or Google Play Store.
- Create an Account: Open the app and tap “Create Account.” You will need to verify your email and set up two-factor authentication (2FA) for added security. Once logged in, you’re ready to add your first system.
Step 2: Set Up the Sync Module (The Hub)
The Sync Module is the bridge between your Wi-Fi and your cameras. It helps conserve camera battery and allows for local video storage.
- Plug in for Power: Plug the Sync Module into a wall outlet in a central location, ideally halfway between your Wi-Fi router and where your outdoor cameras will be.
- Add Device: In the app, tap the “+” icon and select “Sync Module.” Scan the QR code on the back of the device.
- Connect to Wi-Fi: Wait for the light to blink blue and turn solid green. Follow the app prompts to connect it to your 2.4 GHz Wi-Fi network. (Note: Blink does not support 5 GHz bands).
Step 3: Power Up Your Outdoor Cameras
Now it’s time to activate the hardware.
- Remove the Back Cover: Use the included opening tool (or a coin/flathead screwdriver) to turn the rear screw counter-clockwise. Gently pry the back cover off.
- Insert Batteries: Insert two fresh AA lithium batteries. High-quality lithium is mandatory; alkaline batteries will drain rapidly and cause connection drops.
- Scan to Sync: Inside the app, tap the “+” icon again, select “Wireless Camera,” and scan the QR code located inside the camera’s battery compartment. The app will automatically pair the camera to your active Sync Module.
Step 4: Test Signal and Adjust Settings
Before mounting, ensure the camera has a stable connection in its intended location.
- Check Signal Strength: Hold the camera in your chosen outdoor spot and check the Live View in the app. Ensure both the Wi-Fi and Sync Module signals show at least 3 bars.
- Customize Activity Zones: In the app settings, use your finger to “paint” over areas you want to ignore, like a busy sidewalk or swaying tree. This prevents annoying false notifications and extends battery life.
Step 5: Mount Your Camera for Best Results
Mounting your Blink Outdoor camera properly is key to capturing the right motion.
- Optimal Height: Mount the camera 8 to 10 feet high. This keeps it out of reach of intruders while providing a clear view of faces.
- Angle of Detection: Position the camera so that motion moves across the field of view rather than directly toward it. This triggers the sensor much faster.
- Secure the Mount: Screw the mounting bracket into your surface (wood, brick, or vinyl), then simply snap the camera into the swivel joint.
How to Set Up Blink Indoor Camera
Setting up a Blink Indoor camera (such as the Blink Mini 2 or the wireless Indoor 4) is a quick and rewarding DIY project. Because these cameras are designed to blend into your home decor, the setup process focuses on high-speed connectivity and strategic placement for interior monitoring.
Follow these professional steps to get your indoor security system online in minutes:
Step 1: Download and Configure the Blink App
The Blink Home Monitor app is the heart of your system.
- Action: Download the app from the Apple App Store or Google Play Store. Create a new account by providing your email and selecting your region. You will be asked to verify your account via a secure code sent to your email. For 2026 users, it is highly recommended to link your Amazon account at this stage to enable seamless Alexa voice commands and smart home automation.
Step 2: Set Up the Sync Module (For Wireless Models)
If you are using the battery-powered Blink Indoor 4, you will need to set up the Sync Module 2 first. If you are using the plug-in Blink Mini, you can skip directly to Step 3, though a Sync Module is still recommended for local storage.
- Action: Plug the Sync Module into a central wall outlet. In the app, tap the “+” icon, select “Sync Module,” and scan the QR code on the back. Follow the prompts to connect it to your 2.4 GHz Wi-Fi network. Once the lights stay solid green, your “hub” is ready.
Step 3: Power On and Scan Your Camera
Now, prepare your camera for pairing.
- For Wireless Indoor Cameras: Remove the back cover and insert the two included AA lithium batteries. Scan the QR code inside the battery compartment using the Blink app.
- For Blink Mini (Plug-in): Simply plug the camera into a power outlet using the included USB cable. Tap the “+” icon in the app, select “Mini Camera,” and scan the QR code on the back of the device. The app will initiate a handshake with your Wi-Fi to bring the camera online.
Step 4: Optimize Indoor Placement and Activity Zones
Positioning is key for indoor security, especially if you have pets.
- Action: Place your camera on a flat surface like a bookshelf or mount it in a corner. Open the “Live View” in the app to check the angle. Use the “Activity Zones” feature to “mask out” areas like a ceiling fan or a pet’s bed; this prevents your phone from buzzing every time your cat moves, ensuring you only get alerts for genuine security events.
Step 5: Finalize Settings for Privacy and Storage
Since this camera is inside your home, privacy is a top priority.
- Action: Navigate to the camera settings in the app. Here, you can enable or disable the status LED. Finally, decide on your storage: either subscribe to the Blink Subscription Plan for cloud storage or insert a USB thumb drive into your Sync Module for free local storage of all your indoor clips.
Common setup problems & fixes
Even in 2026, setting up smart home tech can occasionally run into a few bumps. If your Blink setup isn’t going perfectly, don’t worry; most issues are related to Wi-Fi frequency or signal strength. Here are the most common Blink setup problems and their professional fixes:
- “Unable to Connect to Sync Module”
This is the most frequent error during the initial setup. It usually happens when your phone cannot communicate with the temporary Wi-Fi network the Sync Module creates.
- The Fix: Ensure your phone’s Bluetooth is on and Location Services are enabled. If it still fails, “power cycle” the module: unplug it for 10 seconds and plug it back in. Wait for the blinking blue/solid green light pattern before trying again in the app.
- Wi-Fi Connection Fails (Incorrect Password or Frequency)
Blink cameras are strictly compatible with 2.4 GHz Wi-Fi networks. If you are trying to connect to a 5 GHz band, the setup will fail every time.
- The Fix: Check your router settings to ensure the 2.4 GHz band is active. If your router uses “Smart Connect,” you may need to temporarily disable the 5GHz band or move further away from the router during setup so your phone forcibly picks up the 2.4GHz signal.
- QR Code Won’t Scan
Sometimes the camera lens on your phone struggles to focus on the tiny QR code inside the battery compartment or on the back of the Mini.
- The Fix: Increase the lighting in the room or use a flashlight to illuminate the code. If it still won’t scan, look for the Serial Number (DSN) printed next to the QR code and enter it manually in the Blink app by tapping “Enter Manually.”
- Camera is “Busy” or “Offline” After Setup
If you’ve finished the setup but see a “Camera Busy” or a cloud icon with a slash, the camera is likely too far from the Sync Module or the Router.
- The Fix: Check the signal strength in the app settings. You need at least 3 bars of “Camera to Sync Module” and “Camera to Wi-Fi.” Move the Sync Module closer to the camera, or consider a Wi-Fi extender if you are placing cameras deep in the backyard.
- Red Light Flashing on Camera
A flashing red light after setup usually indicates a power or pairing issue.
- The Fix: For wireless cameras, this is almost always a battery issue. Ensure you are using Energizer Ultimate Lithium AA batteries. Brand-new alkaline or rechargeable batteries often do not provide enough consistent voltage for the 2026 Blink firmware, causing the camera to drop its connection and flash red.
FAQs
How long does it take to set up a Blink camera?
Most Blink cameras can be set up within 10–15 minutes using the Blink Home Monitor app, provided you have a stable Wi-Fi connection and the Sync Module ready.
Do Blink cameras work without a Sync Module?
Some newer Blink models can work without a Sync Module, but using one is recommended for better performance and local storage support.
What Wi-Fi network is best for Blink cameras?
Blink cameras work best with a 2.4 GHz Wi-Fi network. Dual-band routers should be set to allow 2.4 GHz during setup.
Can I set up Blink cameras without an Amazon account?
No, an Amazon account is required to sign in to the Blink app and complete the camera setup process.
Why won’t my Blink camera scan the QR code?
This usually happens due to low lighting or camera glare. Try scanning the QR code in a well-lit area, and ensure your phone camera lens is clean.
Where should I place my Blink Outdoor camera for best results?
For optimal coverage, mount Blink Outdoor cameras 7–10 feet above ground, angled slightly downward, and away from direct sunlight.
Do Blink cameras start recording immediately after setup?
Yes, once motion detection is enabled in the app, Blink cameras begin recording automatically when motion is detected.
Can I move my Blink camera after setup?
Yes, Blink cameras are fully wireless, so you can reposition them anytime. Just test motion detection again after moving the camera.
Why am I not receiving motion alerts from my Blink camera?
This may be due to disabled notifications, low motion sensitivity, or incorrect activity zones. Check these settings in the Blink app.
Do I need a subscription to use Blink cameras?
Blink cameras work without a subscription for basic features, but a subscription is required for extended cloud storage and additional recording options.
Conclusion
Setting up your Blink camera system is one of the most effective ways to upgrade your home security without the burden of complex wiring or expensive professional help. As we’ve explored in this guide, the key to a successful 2026 setup lies in three things: a stable 2.4 GHz Wi-Fi connection, strategic placement at the right height (8-10 feet), and the use of high-quality lithium batteries to ensure that legendary two-year lifespan.
Whether you are monitoring your front porch with the Outdoor 4 or keeping an eye on your pets with the Mini 2K+, Blink’s ecosystem offers a “set-and-forget” convenience that few other brands can match.
By following these steps and fine-tuning your motion zones, you’ve not just installed a camera; you’ve built a smarter, safer environment for your family. Remember, technology works best when it’s optimized, so don’t hesitate to revisit your app settings as the seasons change to keep your system performing at its peak.