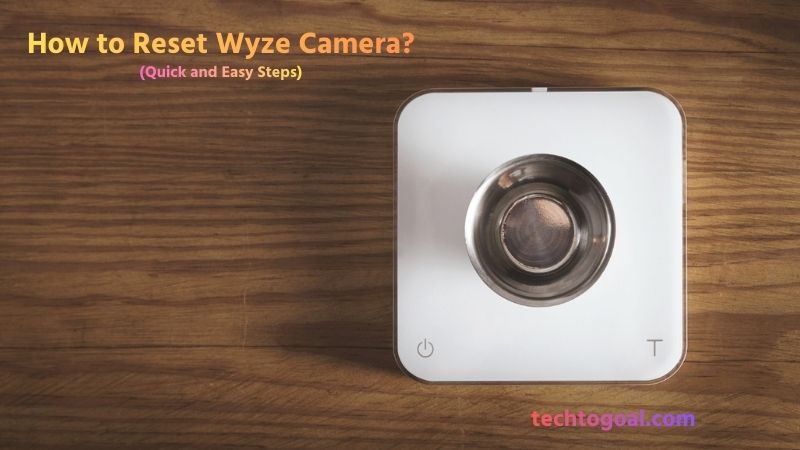
How to Reset Wyze Camera: Wyze cameras have revolutionized home security by offering smart, high-tech features at an affordable price point. However, like any smart device, they aren’t immune to the occasional technical hiccup. Whether your camera is struggling to connect to the Wi-Fi, experiencing a frozen live stream, or you are simply preparing to sell it or move it to a new home, a factory reset is often the most effective solution to get things back on track.
While the idea of “resetting” might sound intimidating to some, it is actually a straightforward process that takes less than a minute. But there is a catch: different Wyze models, such as the Cam v3, Pan, or Outdoor, have slightly different button placements and procedures. Doing it incorrectly could leave you stuck in a setup loop.
In this comprehensive guide, we’ll walk you through the quick and easy steps to reset your Wyze camera. From performing a simple “power cycle” to a full “factory reset,” you’ll learn exactly how to troubleshoot your device and restore it to its original settings, ensuring your home stays protected without any technical lag.
How to Reset a Wyze Camera?
Resetting your Wyze camera is often the fastest solution when the device stops responding, fails to connect to Wi-Fi, or needs to be set up for a new user. The process is simple and only takes a few minutes if you follow the steps carefully.
📌Read More👉How To Use a Tripod For a Photography
Step 1: Keep the Wyze Camera Powered On
Before starting the reset process, make sure your Wyze camera is plugged into a power source and turned on. The camera must be receiving power for the reset to work properly. You should see a solid or blinking status light, which confirms the device is active.
Step 2: Locate the Reset Button
Find the reset button on your Wyze camera. On most Wyze Cam models, the reset button is located at the bottom or back of the camera, near the microSD card slot. You may need to unplug the camera briefly or adjust its position to see it clearly.
Step 3: Press and Hold the Reset Button
Using your finger or a paper clip, press and hold the reset button for about 10–15 seconds. Keep holding until you hear a voice prompt saying “Ready to connect” or see the status light turn yellow or blink. This indicates that the camera has successfully reset.
Step 4: Wait for the Camera to Restart
Once you release the reset button, allow the camera a minute or two to reboot. During this time, the Wyze camera will erase its previous settings and return to factory defaults. Do not unplug the camera while it is restarting.
Step 5: Open the Wyze App
After the reset is complete, open the Wyze app on your smartphone. Make sure your phone is connected to a 2.4 GHz Wi-Fi network, as Wyze cameras do not support 5 GHz networks. Log in to your Wyze account if you are not already signed in.
Step 6: Add the Camera as a New Device
In the Wyze app, tap the “+” (Add Device) icon and select Cameras > Wyze Cam. Follow the on-screen instructions to reconnect your camera to Wi-Fi. Scan the QR code shown on your phone with the camera lens when prompted.
Step 7: Confirm Successful Setup
Once connected, give your camera a name and choose its location. You should now see a live video feed in the Wyze app, confirming the reset and setup were successful. Your Wyze camera is now ready to use again.
When Should You Reset a Wyze Camera?
Resetting a Wyze camera is recommended when:
- The camera won’t connect to Wi-Fi
- The Wyze app cannot detect the device
- You changed your router or Wi-Fi password
- The camera is frozen or unresponsive
- You’re selling or giving the camera to someone else
A factory reset deletes all previous settings, so you’ll need to set up the camera again from scratch. Keeping your Wyze app updated and ensuring a stable Wi-Fi connection can help prevent the need for frequent resets.
Troubleshooting Common Reset Issues
- Button Not Responding: If holding the button does nothing, try using a different power cable or adapter to ensure the camera is getting enough voltage.
- Stuck on Solid Light: If the light stays solid and never flashes after a reset, you may need to manually “Flash the Firmware” using a microSD card and a computer (this is a more advanced fix found on the Wyze support site).
How to Reset Wyze Camera V1?
Resetting the original Wyze Cam V1 is slightly different from the newer models, but it remains a highly effective way to solve connectivity issues or prepare the device for a new user. Since the V1 is an older model, the internal processing is a bit slower, so patience during the reboot phase is key.
Here is the professional, step-by-step guide to performing a factory reset on a Wyze Cam V1.
Step 1: Prepare the Camera
Before starting the reset, ensure your Wyze Cam V1 is plugged into a reliable power source using the original USB cable and wall adapter. If you have a microSD card inserted in the base of the camera, remove it now. This prevents any potential data corruption during the firmware wipe.
Step 2: Locate the Setup Button
On the Wyze Cam V1, the Setup button is located on the bottom of the camera body. To access it, you will need to gently pull the hinged mounting base away from the camera. Look for a small circular button labeled “Setup.”
Step 3: Initiate the Reset
While the camera is powered on, press and hold the Setup button firmly for 20 seconds. Unlike the newer versions that only require 10 seconds, the V1 often needs a longer press to trigger the factory default settings.
Step 4: Monitor the Status Light
Continue holding the button until the status light on the back of the camera turns solid yellow. Once you see the solid yellow light, release the button. This color indicates that the camera is clearing its internal cache and preparing to reboot into setup mode.
Step 5: Wait for the Voice Prompt
After releasing the button, wait about 30 to 60 seconds. The status light will transition from solid yellow to flashing yellow. At this point, the camera should play an automated voice prompt saying, “Ready to Connect.” This is the confirmation that the reset was successful and the device is ready for a fresh installation.
Step 6: Reconfigure the Camera
Once the reset is complete, the camera will no longer be linked to your Wi-Fi or account settings. You must open the Wyze App, delete the existing V1 device profile from your list, and tap the “+” icon to “Add New Device.” Follow the standard QR code scanning process to get your V1 back online.
Important Troubleshooting Tips for Wyze V1
- Stuck on Solid Yellow: If the light stays solid yellow for more than 5 minutes and never flashes, the firmware might be “frozen.” Try unplugging the power for 30 seconds and then repeating the reset process.
- Connectivity Limits: Remember that the Wyze Cam V1 only supports 2.4 GHz Wi-Fi networks. It will not be able to “see” or connect to a 5 GHz network after the reset.
- Firmware Updates: After a factory reset, it is highly recommended to check for firmware updates in the Wyze app to ensure your older V1 has the latest security patches.
How to Reset Wyze Camera v2?
Resetting a Wyze Cam v2 is a quick and effective way to fix “Device Offline” errors and connection timeouts or to wipe your personal data before giving the camera to someone else. Because the V2 is one of Wyze’s most popular legacy models, knowing the precise reset sequence is essential for keeping it functional.
📌Read More👉How to Charge Sony Cyber-shot Camera?
Here is the professional, step-by-step guide to performing a factory reset on your Wyze Cam v2.
Step 1: Clear the Local Storage
Before initiating the reset, check if you have a microSD card inserted in the slot at the base of the camera. If so, remove it. Performing a factory reset while a card is active can sometimes lead to file errors. Removing it ensures a “clean” wipe of the camera’s internal memory.
Step 2: Power Up the Device
Ensure your Wyze Cam v2 is connected to a stable power source using a functional Micro-USB cable. The reset process requires a consistent flow of electricity; if the power is interrupted during the firmware reset, the camera could become “bricked” (permanently unusable).
Step 3: Locate and Press the Setup Button
The Setup button on the v2 is located on the bottom of the camera unit. You will need to tilt or unfold the square mounting base to reveal the button.
- Action: Press and hold the Setup button for 10 to 15 seconds.
- What to watch for: Keep holding the button until the status light on the back of the camera turns solid yellow (sometimes it may look amber).
Step 4: Wait for the Reboot Cycle
Once the light turns solid yellow, release the button. The camera is now clearing its settings and restarting its internal software. This usually takes about 30 to 60 seconds. During this time, the light will eventually transition from solid yellow to flashing yellow.
Step 5: Listen for the “Ready to Connect” Prompt
The reset is officially successful when the status light begins to flash yellow and the camera’s internal speaker broadcasts the voice prompt “Ready to Connect.” This indicates that the camera has forgotten all previous Wi-Fi credentials and is waiting for a new setup.
Step 6: Perform a Fresh Setup in the App
Since a factory reset removes the camera from your network, it will appear as “Offline” in your app.
- Open the Wyze app.
- Go to the settings of the old camera and select “Delete Device.”
- Tap the “+” (plus) icon on the home screen and choose “Add Device.”
Follow the prompts to scan the QR code and connect the v2 back to your 2.4 GHz Wi-Fi network.
Pro-Tips for Wyze v2 Troubleshooting
- The “Solid Yellow” Trap: If your camera stays on solid yellow for more than two minutes and never flashes, it usually means the firmware is stuck. Try a power cycle (unplug for 30 seconds) and then attempt the reset again.
- Check Your Frequency: The Wyze Cam v2 cannot connect to 5 GHz Wi-Fi. If you are struggling to set it up after a reset, ensure your smartphone is connected to a 2.4 GHz network during the pairing process.
- Firmware Refresh: After a reset, always check the app for a firmware update. Older v2 cameras often need the latest patches to communicate with modern smartphone OS versions.
How to Reset a Wyze Camera to New WiFi?
Changing your home network or moving to a new house means your Wyze camera will lose its connection, as these devices cannot automatically “find” a new Wi-Fi network. Unlike a smartphone, you cannot simply select a new network from a list in the settings; you must essentially re-pair the device.
Here is the professional, step-by-step guide to resetting and connecting your Wyze camera to a new Wi-Fi network.
Step 1: Delete the Old Camera Profile (Optional but Recommended)
While not strictly required for the camera to function, it is best practice to start fresh. Open the Wyze app, select your camera, tap the Settings (gear icon), and at the bottom, select “Delete Device.” This prevents any “ghost” connections or sync errors when you try to add the camera back under the new network.
Step 2: Power the Camera and Locate the Setup Button
Plug your Wyze camera into a power outlet at its new location. Make sure the status light is on. Locate the Setup button, which is typically on the bottom of the device (v2, v3, v4) or the bottom of the base (Pan models).
Step 3: Trigger the Setup Mode
You do not necessarily need to perform a full 15-second factory reset just to change Wi-Fi, but you must enter setup mode.
- Action: Press and hold the Setup button for about 3 to 5 seconds (or until you hear the voice prompt).
- Voice Prompt: The camera will say, “Ready to Connect.”
- Status Light: The light should begin to flash, indicating it is searching for a new handshake.
Step 4: Add the Device via the Wyze App
Now, use your smartphone to bridge the connection:
- Ensure your smartphone is connected to the new 2.4 GHz Wi-Fi network. (Wyze cameras generally do not support 5 GHz).
- Open the Wyze app and tap the “+” icon in the top left corner.
- Select Add Device > Cameras and pick your specific model.
The app will ask for your new Wi-Fi name and password. Double-check the password, as this is the most common cause of setup failure.
Step 5: Scan the QR Code
The app will generate a QR code on your phone’s screen. Hold your phone roughly 5–10 inches in front of the Wyze camera lens. Once the camera “sees” the code and recognizes the new Wi-Fi credentials, it will say, “QR code scanned.” Tap the button in the app that says, “I heard ‘QR code scanned.'”
Step 6: Finalize the Connection
Wait for the camera to finish its internal configuration. The status light will change from flashing to solid blue (on most models). You can now rename your camera (e.g., “Kitchen” or “Front Door”) and start viewing your live stream on the new network.
Troubleshooting New Wi-Fi Connections
- 2.4 GHz vs. 5 5GHz: If your new router is a “Dual-Band” model that merges both speeds into one name, the Wyze camera might struggle to connect. Try to temporarily disable the 5GHz band in your router settings or move further away from the router during setup to force your phone onto the 2.4GHz band.
- Special Characters: Wyze cameras sometimes have trouble with very long Wi-Fi passwords or those containing complex symbols like & or *. If the connection fails repeatedly, try a simpler password.
- Firewall Settings: If you are in an office or a dorm, the new network might have a “captive portal” (a login page). Wyze cameras cannot bypass these pages; you will need to use a travel router or contact the IT department to whitelist the camera’s MAC address.
How Can I Solve Wyze Camera v3 Factory Reset Issues?
The Wyze Camera v3 is known for its reliability, but sometimes factory reset issues can prevent the camera from entering setup mode or reconnecting to Wi-Fi. These problems often appear as blinking lights, no voice prompts, or repeated setup failures. The good news is that most Wyze Cam v3 reset issues can be solved at home with a few simple checks and adjustments. This guide walks you through the most effective solutions step by step.
📌Read More👉How to Format SD Card Camera in 2026
- Make Sure the Camera Is Getting Proper Power: Factory reset issues often start with insufficient power. Use the original Wyze USB cable and power adapter whenever possible. Avoid USB ports on TVs or computers, as they may not supply enough power. A weak power source can stop the camera from completing the reset process.
- Perform the Correct Factory Reset Method: Unplug your Wyze Cam v3, then plug it back in. Once powered on, press and hold the reset button for 10–15 seconds. Release the button only after you hear the voice prompt saying “Ready to connect” or see a flashing red or yellow status light. If you release the button too early, the reset may fail.
- Wait Patiently After Resetting: After performing a factory reset, allow the camera at least 1–2 minutes to fully reboot. Many users interrupt the process by unplugging the camera too soon, which can cause repeated reset failures. During this time, avoid pressing any buttons or closing the Wyze app.
- Confirm You’re Using a 2.4 GHz Wi-Fi Network: Wyze Camera v3 does not support 5 GHz Wi-Fi. If your phone is connected to a 5 GHz network during setup, the camera may fail to reconnect after reset. Switch your phone to a 2.4 GHz Wi-Fi network before adding the camera in the Wyze app.
- Check the Wyze App for Updates: An outdated Wyze app can cause factory reset and setup problems. Open your app store and update the Wyze app to the latest version. App updates often include bug fixes that resolve camera reset and connection issues.
- Keep the Camera Close to the Router: During setup after a factory reset, place your Wyze Cam v3 within 5–10 feet of the Wi-Fi router. Weak Wi-Fi signals can prevent the camera from completing the setup process, making it seem like the reset didn’t work.
- Clean the Camera Lens for QR Code Scanning: If the camera resets but fails during setup, the issue may be QR code scanning. Gently clean the camera lens with a soft cloth. Increase your phone’s screen brightness and hold the QR code steady about 6–8 inches from the camera lens.
- Try a Different USB Cable or Power Adapter: Faulty or low-quality charging cables can prevent a successful factory reset. If the camera shows no lights or voice prompts, try a different USB cable or adapter to rule out power-related problems.
- Reset the Camera Again and Re-Add It: If the first reset attempt fails, repeat the factory reset process from the beginning. Then, in the Wyze app, remove the device (if visible) and add it again as a new camera. Many reset issues are resolved on the second attempt.
- Contact Wyze Support if the Problem Persists: If none of the above solutions work, your Wyze Camera v3 may have a hardware issue. At this point, reaching out to Wyze Support is the best option. Provide details about the status light behavior and any error messages for faster assistance.
Common Signs of Wyze Cam v3 Factory Reset Problems
- No voice prompt after holding the reset button
- Status light not turning red or yellow
- Camera not appearing in the Wyze app
- Setup fails repeatedly at the QR code step
Most Wyze Camera v3 factory reset issues are caused by power problems, Wi-Fi incompatibility, or interrupted setup steps. By carefully following these troubleshooting tips, you can successfully reset your camera and restore its functionality without technical stress.
Wyze Camera v2 Factory Reset Not Working? Here’s How to Fix It
If your Wyze Camera v2 factory reset is not working, you’re not alone. Many users face issues like no voice prompt, blinking lights that won’t change, or the camera refusing to reconnect after reset. These problems are usually caused by power issues, incorrect reset timing, or Wi-Fi setup errors. The good news is that most Wyze Cam v2 reset problems can be fixed with a few practical troubleshooting steps.
- Check the Power Source First: A failed factory reset often starts with unstable power. Make sure you’re using a reliable wall adapter and USB cable. Avoid plugging the camera into a TV, laptop, or power bank, as these may not provide the consistent power needed for a full reset.
- Use the Correct Factory Reset Method: Unplug your Wyze Camera v2, then plug it back in. Once powered on, press and hold the reset button for 10–15 seconds. Keep holding until you hear the voice prompt saying “Ready to connect” or see a flashing yellow light. Releasing the button too early is one of the most common reset mistakes.
- Give the Camera Time to Restart: After releasing the reset button, wait 1–2 minutes for the camera to reboot fully. Interrupting the process by unplugging the camera too soon can cause the reset to fail or partially complete.
- Confirm 2.4 GHz Wi-Fi Is Being Used: Wyze Camera v2 only supports 2.4 GHz Wi-Fi. If your phone is connected to a 5 GHz network during setup, the camera may not reconnect even after a successful reset. Switch your phone to 2.4 GHz before adding the camera in the Wyze app.
- Update the Wyze App: An outdated Wyze app can prevent the camera from completing setup after a reset. Check your app store and update to the latest Wyze app version. App updates often fix bugs related to device pairing and factory resets.
- Move the Camera Closer to the Router: During setup after reset, place your Wyze Cam v2 within 5–10 feet of your Wi-Fi router. Weak or unstable signals can cause setup failures that appear like reset problems.
- Clean the Camera Lens for QR Code Scanning: If the reset seems successful but setup fails at the QR code stage, clean the camera lens gently. Increase your phone screen brightness and hold the QR code 6–8 inches from the camera for better scanning.
- Try a Different USB Cable or Adapter: A faulty cable can stop the camera from entering setup mode properly. If the camera shows no lights or voice prompts, swap the USB cable or power adapter to rule out power-related issues.
- Remove and Re-Add the Camera in the Wyze App: If the camera still appears in the Wyze app, delete it first. Then perform the factory reset again and add the camera as a new device. This step often resolves persistent reset issues.
- Consider Hardware Limitations: Wyze Camera v2 is an older model, and long-term use can lead to hardware wear. If none of these fixes work, the camera may have a hardware fault. In that case, contacting Wyze Support or considering an upgrade may be the best solution.
Common Signs Wyze Cam v2 Reset Is Failing
- No “Ready to connect” voice prompt
- The status light doesn’t change after holding reset
- The camera won’t appear in the Wyze app
- Setup fails repeatedly during QR code scanning
When a Wyze Camera v2 factory reset is not working, the issue is usually related to power supply, Wi-Fi compatibility, or incomplete reset steps. By following these troubleshooting tips carefully, most users can successfully reset and reconnect their camera without professional help.
How to Reset Wyze Camera Outdoor?
Resetting a Wyze Camera Outdoor is slightly different from resetting indoor Wyze cameras because it relies on a base station and battery power. Whether the camera is offline, not connecting to Wi-Fi, or you’re setting it up at a new location, a proper reset can quickly solve most issues. Follow these simple steps to reset your Wyze Cam Outdoor safely and correctly.
Step 1: Bring the Camera Close to the Base Station
Wyze Camera Outdoor works only with its base station, so keep the camera within a few feet of it before resetting. Make sure the base station is powered on and connected to the internet.
Step 2: Turn On the Wyze Cam Outdoor
Ensure the camera is powered on and has enough battery charge. If the battery is low, charge the camera fully before attempting a reset. A low battery can interrupt the reset process.
Step 3: Locate the Sync/Reset Button
Open the back cover of the Wyze Camera Outdoor. Inside, you’ll find a SYNC button near the battery compartment. This button is used for both pairing and resetting the camera.
Step 4: Press and Hold the Sync Button
Press and hold the SYNC button for about 5–10 seconds until you hear a voice prompt or see the status light change. This indicates the camera has entered reset or pairing mode.
Step 5: Wait for the Camera to Reset
Release the button and wait 1–2 minutes while the camera resets and clears previous settings. Do not close the battery cover or move the camera during this process.
Step 6: Open the Wyze App
Launch the Wyze app on your smartphone and log in. Make sure your phone is connected to the same network as the Wyze base station.
Step 7: Re-Add the Camera in the Wyze App
In the Wyze app, tap the “+” (Add Device) icon, select Cameras, then choose Wyze Camera Outdoor. Follow the on-screen instructions to pair the camera with the base station again.
Step 8: Confirm Successful Setup
Once setup is complete, name your camera and assign its location. You should see the live video feed in the Wyze app, confirming the reset was successful.
When Should You Reset the Wyze Camera Outdoor?
Resetting is recommended if:
- The camera shows offline in the app
- You changed locations or network settings
- The camera won’t sync with the base station
- You’re giving the camera to a new user
- The device becomes unresponsive
Important Tips for Wyze Camera Outdoor Reset
- Keep the camera close to the base station
- Ensure the battery is fully charged
- Do not reset the base station unless necessary
- Update the Wyze app for best compatibility
Resetting a Wyze Camera Outdoor is quick and easy when you follow the correct steps. Because it depends on a base station, keeping everything powered and nearby is key. Once reset, your camera will be ready to reconnect and protect your outdoor space without interruption.
FAQs
How do I reset my Wyze camera?
To reset a Wyze camera, plug it in and keep it powered on. Press and hold the reset button for 10–15 seconds until you hear the voice prompt “Ready to connect” or see a blinking yellow light. This means the camera has been reset successfully.
Where is the reset button on a Wyze camera?
The reset button is usually located on the bottom or back of the camera, near the microSD card slot. On Wyze Cam Outdoor, the reset (SYNC) button is inside the battery compartment.
Will resetting my Wyze camera delete all settings?
Yes, a factory reset removes all saved settings, including Wi-Fi details, camera name, and custom preferences. You will need to set up the camera again in the Wyze app after resetting.
How long does it take to reset a Wyze camera?
The reset process usually takes 1–2 minutes. Holding the reset button takes about 10–15 seconds, followed by a short reboot period.
Why is my Wyze camera not resetting?
Common reasons include insufficient power, releasing the reset button too early, using a faulty USB cable, or hardware issues. Make sure the camera is properly powered and try resetting again.
Do I need to reset my Wyze camera to change Wi-Fi?
Yes. Wyze cameras cannot switch to a new Wi-Fi network automatically. You must perform a factory reset and then reconnect the camera to the new Wi-Fi network using the Wyze app.
Does the Wyze camera support 5 GHz Wi-Fi after a reset?
No. Wyze cameras only support 2.4 GHz Wi-Fi. Even after a reset, the camera will not connect to a 5 GHz network.
Can I reset my Wyze camera without the Wyze app?
Yes, you can perform the factory reset using the reset button alone. However, you will need the Wyze app to set up and use the camera again after the reset.
Should I reset my Wyze camera before selling or giving it away?
Absolutely. Resetting the camera removes your account and personal settings, ensuring the new user can set it up safely as a new device.
What should I do if reset still doesn’t work?
If resetting fails multiple times, try using a different power adapter or USB cable, update the Wyze app, and place the camera closer to the router. If the issue continues, contacting Wyze Support is recommended.
Conclusion
Resetting your Wyze camera is the ultimate troubleshooting tool to fix connectivity issues, software glitches, or to prepare your device for a new owner. While the process is quick and simple, it is essential to follow the specific steps for your particular model whether it’s the original V1, the popular v2, or the advanced v3. By performing a clean factory reset, you ensure that your security system remains reliable and your personal data stays protected.
Remember, a reset should be your last resort after trying a simple power cycle. If you’ve successfully reset your camera to connect to a new Wi-Fi network, always double-check your router settings to ensure a stable 2.4GHz connection for the best performance. Regularly updating your firmware after a reset will also provide you with the latest security patches and features, keeping your home monitoring system at its peak.
Whether you are troubleshooting or upgrading your home network, mastering these reset techniques empowers you to take full control of your smart home security.