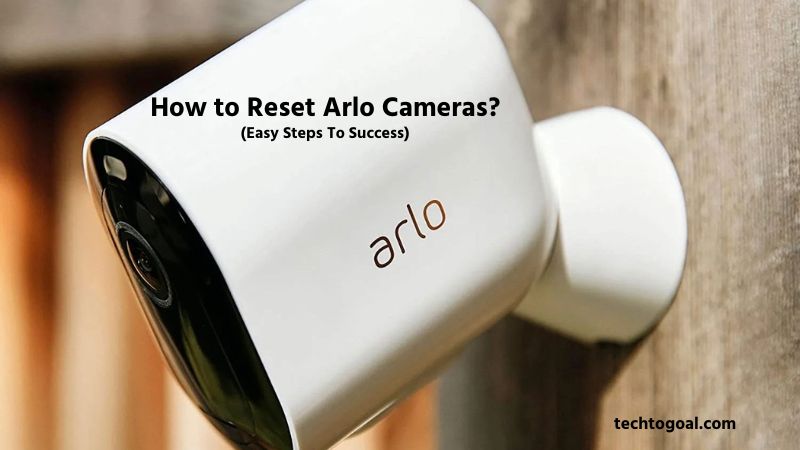
How to Reset Arlo Cameras: Arlo cameras are widely regarded as some of the most sophisticated tools in the world of smart home security, offering crystal-clear video and advanced motion detection. Even the greatest technology, though, occasionally encounters a problem. Whether your camera is struggling to stay connected to Wi-Fi, the live stream is lagging, or you are preparing to sell your device to a new owner, knowing how to reset your Arlo camera is the most effective way to restore peak performance.
A factory reset essentially acts as a “fresh start” for your security system. It wipes out temporary software glitches, clears corrupted cache files, and removes old network configurations that might be causing hardware conflicts. While the thought of “resetting” might seem technical, Arlo has designed the process to be remarkably user-friendly, provided you know exactly where the hidden sync buttons are located for your specific model.
In this guide, we will walk you through the precise, step-by-step instructions for resetting various Arlo models, including the Arlo Pro series, Arlo Essential, and the Arlo Ultra. We will also discuss the critical difference between a simple reboot and a full factory reset, ensuring you choose the right solution for your problem without losing unnecessary data. Let’s get your home security back on track!
How to Reset Arlo Cameras
Resetting your Arlo camera is a simple yet essential process when troubleshooting connectivity issues, changing networks, or preparing the device for a new user. Depending on your goal, Arlo offers two types of resets: soft reset and factory reset. Here’s a detailed, step-by-step guide for each.
📌Read More👉How to Reset Ring Camera in 2026 (Quick and Easy Steps)
1. Soft Reset (Quick Refresh)
A soft reset is useful when your camera is unresponsive, lagging, or not syncing properly with the Arlo app. This reset does not erase your settings.
Steps:
- Locate the Sync button on your Arlo camera. This is usually a small, round button on the back or bottom.
- Press and hold the Sync button for 10 seconds until the LED light blinks amber.
- Release the button and wait for the camera to reboot automatically.
- Check your Arlo app to ensure the camera is back online and functioning properly.
2. Factory Reset (Full Reset)
A factory reset erases all settings and removes the camera from your account. Use this when selling the camera, troubleshooting persistent errors, or starting fresh.
Steps:
- Make sure your camera is powered on.
- Press and hold the Sync button for 15–20 seconds until the LED flashes amber and then green.
- Release the button. The camera will restart automatically.
- Open the Arlo app and follow the prompts to re-add your camera to your account if needed.
3. Resetting Through the Arlo App
Some Arlo models allow reset directly from the Arlo mobile app:
- Open the Arlo app on your smartphone.
- Navigate to Devices and select the camera you want to reset.
- Go to Device Settings > Remove Device.
- Confirm the removal. Once removed, you can re-add it as a new device, which acts like a soft factory reset.
Tips for a Successful Reset
- Ensure your camera has a fully charged battery or is connected to power during the reset.
- Keep your camera close to the Wi-Fi router if re-adding it after a reset.
- If issues persist, try rebooting your base station or Wi-Fi router before performing a full factory reset.
Always try a soft reset first, as it often fixes most issues without wiping your settings. Factory resets should be a last resort.
How to Factory Reset Arlo Cameras
Resetting your Arlo camera can resolve technical issues, restore default settings, or prepare the device for a new user. Whether you have an Arlo Essential, Pro, or Ultra model, performing a factory reset ensures that all personalized settings, including Wi-Fi credentials, motion detection preferences, and linked accounts, are cleared. Here’s a comprehensive guide to help you reset your Arlo camera safely and efficiently.
Step 1: Power On Your Camera
Before initiating a reset, ensure that your Arlo camera is fully charged or properly connected to a power source. A low battery can interrupt the reset process, potentially causing software issues. If you are using a battery-powered model, it is recommended to temporarily remove the battery and reinsert it to ensure the camera starts fresh.
Step 2: Locate the Reset Button
Most Arlo cameras feature a dedicated reset button. For Arlo Essential and Pro models, this button is usually found at the back or bottom of the camera. On Arlo Ultra models, the button may be located near the USB port or behind a small panel. Use a paperclip or a pin to press the button if it is recessed, ensuring you do not apply excessive force.
Step 3: Perform the Factory Reset
Press and hold the reset button for about 10–15 seconds until the camera’s LED light begins to blink amber. The blinking light indicates that the camera is entering the reset mode. Let go of the button and watch as the camera finishes the reset. This may take a few minutes. During this time, avoid touching the camera or attempting to reconnect it to Wi-Fi.
Step 4: Confirm the Reset
Once the LED light turns solid green or cycles through the default startup pattern, the factory reset is complete. Your Arlo camera is now restored to its original factory settings. All previous configurations, user accounts, and network settings have been erased, so the camera will behave like a brand-new device.
Step 5: Reconfigure Your Camera
After a factory reset, you will need to set up your camera from scratch. Open the Arlo app on your smartphone or tablet, sign in with your Arlo account, and follow the on-screen instructions to reconnect the camera to your Wi-Fi network and reconfigure motion detection zones, alerts, and other preferences. This step ensures that your camera operates optimally after the reset.
Step 6: Troubleshooting Tips
If the camera fails to reset or the LED indicators do not behave as expected, check the following:
- Ensure the battery is charged or the power supply is stable.
- Press the reset button firmly and hold it long enough for the camera to enter reset mode.
- If issues persist, consult the Arlo support website for model-specific reset instructions.
Resetting your Arlo camera is a straightforward process that can solve most technical glitches and restore performance. By following these steps carefully, you can ensure your camera is ready for a fresh setup or new ownership, maintaining seamless security monitoring in your home or office.
How to Factory Reset Arlo Pro 4 Camera
A factory reset is the ultimate solution to fix persistent issues with your Arlo Pro 4 camera, such as connectivity problems or unresponsive behavior, or when you want to remove the camera from your account before selling or giving it away. This process restores the camera to its original factory settings, erasing all personal configurations, Wi-Fi connections, and app settings.
📌Read More👉How to Reset Wyze Camera?
Step 1: Prepare Your Camera
Before performing a factory reset, make sure your Arlo Pro 4 camera is powered on. If it’s battery-operated, ensure it is fully charged. Performing a reset with a low battery may interrupt the process and cause errors. Additionally, have your Arlo account credentials ready, as you’ll need them to reconnect the camera after the reset.
Step 2: Locate the Sync Button
On the Arlo Pro 4, the Sync button is located on the back of the camera, just below the battery compartment. This button is used to reset and reconnect the camera to your base station or Wi-Fi network. Identifying the button correctly is crucial for a successful reset.
Step 3: Perform the Factory Reset
Follow these steps carefully to reset your Arlo Pro 4:
- Hold down the Sync button for 15 to 20 seconds.
Observe the LED indicator:
- It will flash amber during the reset process.
- After releasing the button, the LED will flash green, indicating the reset is complete.
- Wait for the camera to reboot automatically, which may take 1–2 minutes.
Important: Releasing the Sync button too early may result in only a soft reset, which doesn’t erase your settings.
Step 4: Reconnect Your Camera
Once the factory reset is complete:
- Open the Arlo app on your smartphone.
- Navigate to Devices > Add Device, and select Arlo Pro 4.
- Follow the on-screen instructions to re-add your camera to your account and reconnect it to your Wi-Fi network.
- Test your camera to ensure it is functioning properly and recording as expected.
Step 5: Tips for a Smooth Reset
- Always perform the factory reset with stable power.
- Keep the camera close to your Wi-Fi router or base station during setup.
- If the camera doesn’t reconnect, try restarting your router or the Arlo base station.
Remember, a factory reset erases all previous settings, so back up any important configurations before proceeding. Factory resetting your Arlo Pro 4 should be a last resort. Often, a soft reset can fix most issues without wiping your personalized settings.
How to Factory Reset Your Arlo Pro 2 Camera
Performing a factory reset on your Arlo Pro 2 camera can resolve issues like connectivity problems or unresponsive settings or prepare the device for a new user. A factory reset restores the camera to its original default settings, erasing all Wi-Fi connections, schedules, and preferences.
Step 1: Ensure Your Camera is Powered On
Before starting the reset process, make sure your Arlo Pro 2 camera is fully charged or connected to its power source. A powered-on camera is essential for the reset to work effectively.
Step 2: Locate the Sync/Reset Button
The Arlo Pro 2 camera has a small Sync/Reset button on the back of the device. This button is recessed, so to push it, you might need a pin or paperclip. Be careful to press only this button to avoid triggering other functions.
Step 3: Press and Hold the Reset Button
Press and hold the Sync/Reset button for about 10 seconds until the LED light on the camera starts blinking amber. This indicates the camera is initiating the reset process. Keep holding the button until the light turns off and then blinks amber again, signaling that the factory reset has started.
Step 4: Wait for the Reset to Complete
Release the button and allow the camera a few minutes to finish resetting. During this time, all previous settings, Wi-Fi connections, and schedules will be deleted. The LED light will eventually flash white, showing that the camera has returned to its factory default settings.
Step 5: Reconnect Your Camera
After the reset, open the Arlo app on your smartphone and add the camera as a new device. Follow the on-screen instructions to reconnect it to your Wi-Fi network and customize its settings according to your preferences.
Step 6: Test Your Camera
Once set up, test your Arlo Pro 2 camera by checking the live feed, motion alerts, and recording functions to ensure everything is working properly. This confirms that the factory reset was successful and your camera is ready for normal use.
How to Reset Your Arlo Essential Spotlight Camera
If your Arlo Essential Spotlight Camera is experiencing connectivity issues, not recording properly, or you want to set it up for a new location or user, performing a reset can solve most problems. Resetting restores the camera to its factory default settings, removing all saved Wi-Fi credentials, schedules, and custom preferences.
📌Read More👉How To Reset Ring Doorbell?
Step 1: Power On Your Camera
Before starting the reset, make sure your Arlo Essential Spotlight Camera is fully charged or connected to its power source. A powered-on camera is necessary for the reset process to work correctly.
Step 2: Locate the Reset Button
The reset button on the Arlo Essential Spotlight Camera is typically a small, recessed button located at the back or bottom of the device. You may need a paperclip or pin to press it. Be careful not to press other buttons, as this could interfere with the camera’s normal functions.
Step 3: Press and Hold the Reset Button
Hold down the reset button for ten to fifteen seconds. You will notice the LED light on the camera start blinking amber. Continue holding the button until the LED turns off and then blinks amber again. This shows that the factory reset procedure has been started.
Step 4: Wait for the Reset to Complete
After releasing the reset button, allow the camera a few minutes to complete the process. During this time, all previous settings, Wi-Fi connections, and schedules will be erased. The LED light will eventually turn solid white, signaling that the camera has successfully returned to its factory default settings.
Step 5: Reconnect and Set Up Your Camera
Once the reset is complete, you need to set up your Arlo Essential Spotlight Camera as if it were new. Open the Arlo app on your smartphone, select Add Device, and follow the on-screen instructions to connect it to your Wi-Fi network and customize settings.
Step 6: Test Your Camera
After setup, check the camera’s live feed, motion detection, and spotlight functionality to ensure everything is working properly. This confirms that the reset was successful and your camera is ready for normal operation.
How to Factory Reset Your Arlo Essential Camera
Resetting your Arlo Essential camera can help resolve connectivity issues, clear unwanted settings, or prepare the device for a new user. Fortunately, the process is straightforward and doesn’t require any technical expertise. Before starting, ensure your camera is powered on and fully charged or connected to its power source.
Step 1: Locate the Reset Button
On your Arlo Essential camera, the reset button is usually a small, recessed button found on the back or bottom of the device. You might need a paperclip or a small pin to press it. Identifying this button correctly is crucial to avoid pressing any other controls accidentally.
Step 2: Press and Hold the Reset Button
Hold down the reset button for ten to fifteen seconds. You will notice the LED light on the camera blinking amber and then turning off momentarily, which indicates the camera is performing the reset. Keep holding until you see the LED flash amber again, signaling that the factory reset has begun.
Step 3: Wait for the Reset to Complete
After releasing the button, give your camera a few minutes to complete the reset process. During this time, the camera will erase all previous settings, including Wi-Fi credentials, schedules, and user preferences. The LED light will eventually turn solid white, indicating that the device has returned to its factory default settings.
Step 4: Reconnect Your Camera
Once reset, your Arlo Essential camera is ready to be set up as if it were brand new. Open the Arlo app on your smartphone, follow the on-screen prompts to add a new device, and connect it to your Wi-Fi network. This ensures your camera is fully functional and ready to monitor your home or office again.
Step 5: Test Your Camera
After setup, test your camera by checking the live feed, motion alerts, and video recording functions. This step ensures that the factory reset was successful and that your Arlo Essential camera is operating smoothly.
Why Are My Arlo Cameras Offline? (Causes & Solutions)
Seeing your Arlo cameras offline can be frustrating, especially when you rely on them for home security. Offline cameras mean they are not communicating with the Arlo app or base station, which can happen due to several reasons. Understanding the causes and solutions can help you restore connectivity quickly.
1. Wi-Fi Connectivity Issues
Arlo cameras rely on a stable Wi-Fi connection to function. If your Wi-Fi signal is weak or intermittent, or the network has changed, your camera may go offline.
Solution:
- Move the camera closer to the Wi-Fi router or base station.
- Make sure your Wi-Fi network is operational by checking it.
- Restart your router and try reconnecting the camera.
2. Power Problems
Battery-operated Arlo cameras can go offline if the battery is low or completely drained. Wired cameras may also lose connection during power outages.
Solution:
- Recharge or replace the batteries.
- Make sure the power supply is steady for wired cameras.
- Check for loose connections or damaged cables.
3. Base Station or Hub Issues
Many Arlo cameras communicate through a base station. If the base station is offline or disconnected from the internet, the cameras will show as offline.
Solution:
- Ensure the base station is powered on and connected to your network.
- Restart the base station by unplugging it for 10 seconds and plugging it back in.
- Make sure the base station firmware is updated through the Arlo app.
4. Camera Software or Firmware Glitches
Sometimes, software glitches in the camera or outdated firmware can cause offline status.
Solution:
- Restart the camera by removing and reinserting the battery or using the power cycle for wired models.
- Check for firmware updates in the Arlo app and install them.
5. Network Interference
Other devices, thick walls, or distance from the router can interfere with the camera’s signal, causing it to go offline.
Solution:
- Reduce interference by moving the camera or router.
- Avoid placing cameras near microwaves, cordless phones, or other high-frequency devices.
- Consider adding a Wi-Fi range extender if your camera is far from the router.
6. Account or App Issues
Occasionally, offline cameras are caused by problems in the Arlo app or your account login.
Solution:
- Log out and log back into the Arlo app.
- Make sure the most recent version of your program is installed.
- Remove and re-add the camera to your account if needed.
Regularly check your cameras, Wi-Fi strength, and app notifications to prevent unexpected offline issues. Most offline problems are network-related and can be solved with simple troubleshooting.
How to Prevent Arlo Camera Issues with a Reset
Performing a factory reset on your Arlo camera is sometimes necessary to resolve technical problems or restore default settings. However, frequent or improper resets can lead to recurring issues if the root cause is not addressed. By taking preventive measures, you can reduce the likelihood of encountering problems and ensure that your Arlo camera functions smoothly over time.
Keep Your Firmware Updated: One of the most effective ways to prevent Arlo camera issues is to ensure your device is running the latest firmware. Arlo regularly releases updates that fix bugs, improve performance, and enhance security. Before considering a reset, check the Arlo app for any available updates and install them promptly. Updating firmware can often solve connectivity or performance issues without the need for a full factory reset.
Maintain a Stable Power Supply: Many camera problems arise from inconsistent or low power. For battery-operated Arlo cameras, regularly check battery levels and replace or recharge batteries as needed. For wired models, ensure the power adapter and cables are in good condition. A stable power supply helps prevent unexpected resets, connection drops, or camera malfunctions, reducing the need for repeated factory resets.
Optimize Wi-Fi Connectivity: Connectivity issues are a common reason users reset their Arlo cameras. Ensure your Wi-Fi network provides strong and consistent coverage in the area where your camera is installed. Position your camera within range of your router, and avoid physical obstructions like thick walls or metal objects that can weaken the signal. Using a Wi-Fi extender or mesh network can also improve stability and prevent network-related problems.
Avoid Frequent Resets: Factory resets should be a last resort. Resetting your camera too often can erase settings and may disrupt performance temporarily. Instead, try troubleshooting minor issues through the Arlo app, such as reconnecting the camera to Wi-Fi, restarting the device, or adjusting motion detection settings. Limiting resets helps maintain your camera’s reliability and prolongs its lifespan.
Backup Important Settings: If you anticipate needing a reset in the future, make a note of your current settings, including motion zones, schedules, and notifications. While Arlo does not provide a direct backup feature, recording this information manually allows you to restore your camera quickly after a reset, reducing downtime and preventing misconfigurations.
By following these preventive steps, you can minimize the need for factory resets and maintain consistent performance for your Arlo camera. Proactive maintenance, firmware updates, and careful troubleshooting ensure your security system stays reliable and effective, giving you peace of mind.
FAQs
What does resetting an Arlo camera mean?
Resetting an Arlo camera restores it to its original factory settings, erasing all customized configurations, Wi-Fi connections, and user accounts. It’s useful for troubleshooting or preparing the camera for a new owner.
When should I reset my Arlo camera?
You should reset your camera if it’s experiencing connectivity issues, software glitches, or unresponsive behavior, or if you are changing your Wi-Fi network or selling the device.
How do I perform a factory reset on an Arlo camera?
To reset an Arlo camera, press and hold the reset button (usually located on the back or bottom) for 10–15 seconds until the LED blinks amber. Let go of the button and watch as the camera finishes the reset.
Will resetting my Arlo camera delete my recordings?
No, videos stored in your Arlo cloud account are not deleted when you reset the camera. However, local recordings or settings stored on the device will be erased.
Can I reset an Arlo camera using the app?
Yes, some Arlo models allow you to remove or restart the camera through the Arlo app, but a full factory reset typically requires using the physical reset button on the device.
Will I need to set up my camera again after resetting?
Yes. After a factory reset, all settings are erased. You must reconnect your camera to Wi-Fi and reconfigure preferences through the Arlo app.
Can a reset fix Wi-Fi connectivity issues?
Often, yes. A factory reset can resolve network conflicts or corrupted settings, allowing the camera to reconnect to Wi-Fi. Make sure your network is stable before reconnecting.
Does resetting an Arlo camera void the warranty?
No. Performing a factory reset does not void the warranty. It is an approved troubleshooting step recommended by Arlo for resolving device issues.
Conclusion
Resetting your Arlo camera is the most effective way to resolve persistent connectivity issues, clear software glitches, and maintain the overall health of your smart home security system. Whether you choose the quick app-based removal or a more thorough physical factory reset, the goal remains the same: to give your device a clean slate for peak performance.
As a final tip, always remember that a factory reset is a powerful tool, but it should be followed by a proper setup ensuring your battery is charged and your firmware is up to date.
If you are moving or transferring ownership, don’t forget to release the device from your Arlo Secure account to ensure a smooth transition for the next user. By following these step-by-step instructions, you can keep your home protected and your cameras functioning flawlessly year-round.