How to Format SD Card Camera: In 2026, digital cameras continue to evolve, but one essential task remains the same for every photographer: properly formatting your SD card. Whether you’re using a DSLR, mirrorless camera, action cam, or security camera, knowing how to format an SD card in your camera is crucial for smooth performance and data safety. An incorrectly formatted SD card can lead to corrupted files, slow write speeds, or even lost photos and videos—problems no photographer wants to face.
Many beginners feel confused about when and how to format an SD card, while experienced users sometimes skip this step altogether. That’s a mistake. Formatting your SD card the right way ensures maximum compatibility with your camera, reduces errors, and keeps your storage running efficiently. The good news? The process is quick and simple and only takes a few seconds when done correctly.
We’ll lead you through the safest and most efficient ways to format an SD card directly in your camera in this tutorial, “How to Format SD Card Camera in 2026 (Quick & Easy Steps).” Whether you’re preparing a new card, fixing storage issues, or maintaining long-term performance, this beginner-friendly guide will help you get it right every time.
When Should an SD Card for a Camera Be Formatted?
SD card formatting is one of the essential stages in several instances.
Before Using a New SD Card: Whenever you buy a new SD card, you should format it in your camera before first use. New cards often come preformatted, but that format may not be optimized for your specific camera. Formatting in-camera ensures proper file structure and full compatibility and reduces the risk of early recording errors.
After Backing Up Photos and Videos: Once you’ve safely transferred and backed up all your photos and videos, it’s the perfect time to format your SD card. Formatting clears the card completely and prepares it for the next shoot. This habit helps avoid clutter, prevents accidental mixing of old and new files, and keeps your workflow organized.
When Switching Between Different Cameras: If you move an SD card from one camera to another, formatting is highly recommended. Different cameras may use different file systems and folder structures. Formatting the card in the camera you plan to use helps prevent compatibility issues, missing files, or unexpected error messages.
When You Experience Errors or Warnings: If your camera displays messages like “Card Error,” “Cannot Read Card,” or “Format Card,” it’s usually a sign that formatting is needed. After backing up any recoverable data, formatting the SD card in-camera can often resolve minor system issues and restore normal functionality.
Before Important Shoots or Events: Before weddings, travel shoots, professional assignments, or long video recordings, formatting your SD card is a smart precaution. Starting with a clean, freshly formatted card minimizes the risk of file corruption or storage failure during critical moments when you can’t afford mistakes.
After Deleting Large Amounts of Data: If you’ve deleted many photos or long video files individually, formatting the SD card is a better option. Deleting files one by one can leave fragmented data behind. Formatting refreshes the card completely and helps maintain optimal write speed and performance.
When the Camera Feels Slower Than Usual: If your camera takes longer to save images, struggles during burst shooting, or stops recording unexpectedly, an unformatted SD card may be the cause. Formatting can restore normal performance by cleaning up hidden system clutter and optimizing storage space.
As Part of Regular Camera Maintenance: For frequent shooters, formatting the SD card regularly, such as after every major shoot or every few weeks, is a good maintenance habit. This keeps your storage reliable, reduces long-term errors, and ensures your camera is always ready to perform at its best.
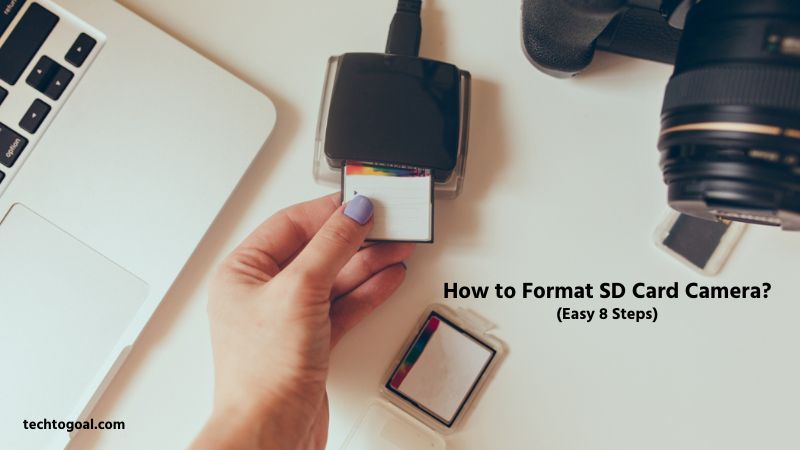
How to Format SD Card Camera
Formatting an SD card in your camera is one of the simplest yet most important steps to ensure smooth performance, error-free recording, and long-term storage reliability. Whether you’re using a DSLR, mirrorless camera, action camera, or security camera, the process is quick and beginner-friendly. Follow these easy steps to format your SD card safely and correctly.
📌Read More👉How to Wire a Backup Camera?
Step 1: Back Up All Your Data First
Before formatting, always transfer your photos and videos to a computer, external hard drive, or cloud storage. Formatting completely erases all data on the SD card, and once deleted, those files cannot be recovered easily. Backing up first keeps your memories and work safe.
Step 2: Insert the SD Card into Your Camera
Place the SD card into the correct slot of your camera while it is powered off. Ensure the card is inserted properly and locked into place. Using the card directly in the camera guarantees the formatting process will match your device’s requirements.
Step 3: Turn On the Camera
Power on your camera and wait until it fully boots up. This allows the camera to recognize the SD card and prepare it for formatting. If your camera shows a card-related error, formatting may be exactly what’s needed to fix it.
Step 4: Open the Camera Menu
Press the Menu button on your camera and navigate to the settings or setup section. Most cameras place the formatting option under “Setup,” “Tools,” or “Storage Settings.” Although menu layouts vary by brand, the option is usually easy to find.
Step 5: Select “Format” or “Format Memory Card.”
Once in the correct menu, choose the Format, Format Card, or Initialize option. This tells the camera you want to erase and reset the SD card. Some cameras may offer a “Quick Format” option, which is usually sufficient for normal use.
Step 6: Confirm the Formatting Process
Your camera will ask for confirmation to prevent accidental formatting. Select Yes or OK to proceed. The formatting process typically takes only a few seconds, depending on the card size and camera model.
Step 7: Wait Until Formatting Is Complete
While formatting is underway, do not switch off the camera or take out the SD card. Interrupting the process can damage the card. Once completed, the camera will automatically return to normal shooting mode.
Step 8: Check That the SD Card Is Ready to Use
After formatting, your SD card is clean and ready for use. Take a test photo or short video to confirm everything is working properly. You now have a fresh, error-free storage card optimized for your camera.
By following these quick and easy steps, you can keep your camera’s SD card running smoothly and avoid common storage issues. Proper formatting is a small task that makes a big difference in photography and videography performance.
Specific Brand Examples
For various camera manufacturers, the following are typical examples:
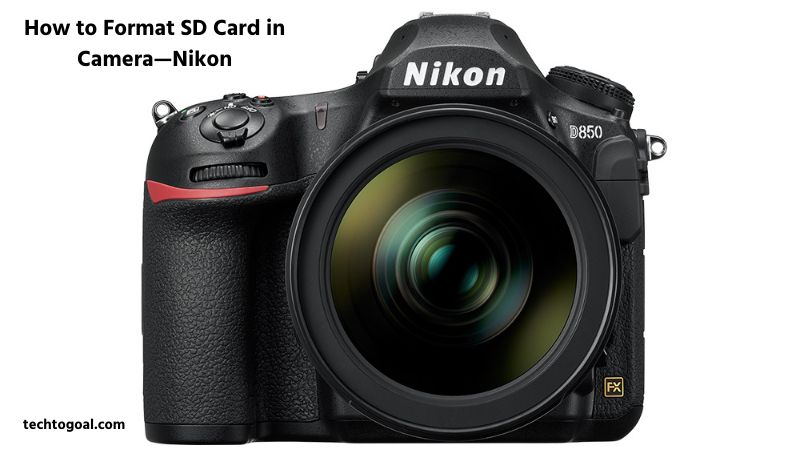
How to Format SD Card in Camera—Nikon
Formatting an SD card directly in your Nikon camera is the safest and most reliable way to keep your camera running smoothly. Whether you’re using a Nikon DSLR or mirrorless camera, in-camera formatting helps prevent file errors, improves write speed, and ensures full compatibility with Nikon’s file system. Follow these quick and easy steps to format your SD card the right way.
- Press the MENU button.
- Go to the Setup Menu
- Select “Format Memory Card.”
- Select “Yes” to confirm the action.
There is a “two-button format” shortcut on some Nikon models. To quickly access the format option, simultaneously press and hold the “Delete” (trash can) and “Menu” keys for a few seconds.
Many Nikon cameras offer a quick formatting shortcut. Press and hold the Delete button and the Mode/ISO button (marked with a green dot) simultaneously for a few seconds until the format prompt appears. This method is fast and convenient for experienced users, but always make sure your files are backed up first.
Formatting your SD card in your Nikon camera is a simple habit that can prevent errors, improve performance, and protect your images. Whether you’re preparing for a professional shoot or everyday photography, taking a few seconds to format your card ensures your Nikon camera is always ready to capture the moment.
How to Format SD Card in Camera—Sony
Formatting an SD card directly in your Sony camera is the best way to ensure smooth performance, maximum compatibility, and error-free photo and video recording.
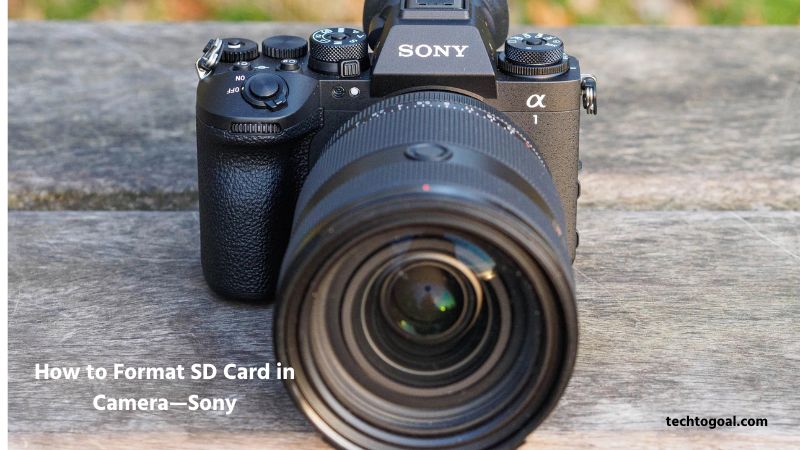
Whether you’re using a Sony Alpha mirrorless camera, DSLR-style body, or compact camera, in-camera formatting helps prevent file corruption and keeps your storage optimized. Follow these quick and easy steps to format your SD card safely.
📌Read More👉How Do Disposable Cameras Work?
- Click the MENU button.
- To reach the Setup or Shooting menu, click the gear or camera icon.
- Look for “Media” or “Format.”
- Choose the memory card slot that you want.
- Click “Enter” to quickly format. Clicking the “Delete” option will display a popup for “full formatting,” which is more extensive.
Helpful Sony Tips for Best Results
- Always format the SD card inside the Sony camera, not on a computer.
- Format your card regularly, especially after backing up files or before important shoots.
- Use high-speed SD cards (UHS-I or UHS-II) for 4K video and burst photography.
Formatting your SD card in a Sony camera is a quick habit that can prevent storage errors, improve performance, and protect your photos and videos. With just a few simple steps, you can keep your Sony camera ready to capture every moment without interruption.
How to Format an SD Card in a Reolink Camera?
The simplest way to format your SD card if you have a Reolink security camera is to use the Reolink app on your smartphone and follow the instructions below.

1. Access the camera settings by opening the Reolink app.
On your smartphone, use the Reolink app. After choosing the camera whose SD card you wish to format, press the “Gear icon” button. Tap “Device Information,” then choose “Storage” from this menu.
2. Choose your SD card and format it.
In the “storage” section, choose your SD card, click “Format,” and then click “OK.” The camera will restart and format the SD card in a few minutes.
What Should You Do If Your Camera Is Unable to Format an SD Card?
If your camera is unable to format an SD card, the procedures listed below will be helpful.
- Check the SD Card Lock Switch: Many SD cards have a small physical lock switch on the side. If this switch is set to the “Lock” position, your camera won’t be able to format or write data to the card. Remove the SD card, slide the switch to the unlocked position, reinsert it into the camera, and try formatting again.
- Restart the Camera and Try Again: Sometimes a temporary camera glitch can prevent formatting. Turn off your camera, remove the battery (if possible), wait a few seconds, then power it back on. Reinsert the SD card and attempt the formatting process again from the camera menu.
- Try Formatting the SD Card on a Computer: If your camera can’t format the card, insert the SD card into a computer using a card reader. Format it using the default file system (usually exFAT or FAT32), then reinsert it into your camera and format it once more in-camera. This can fix minor file system errors.
- Make Sure the SD Card Is Compatible: Not all SD cards work with every camera. Check your camera’s manual to confirm supported card types, capacities, and speed classes. Using an unsupported or outdated SD card can cause formatting failures and recording errors.
- Clean the SD Card and Camera Slot: Dust or debris on the SD card’s metal contacts or inside the camera’s card slot can prevent proper communication. Gently clean the card contacts with a soft, dry cloth, and ensure the camera slot is free of dust before reinserting the card.
- Try Another SD Card: Insert a different, known-working SD card into your camera and attempt to format it. If the new card formats successfully, the original SD card is likely damaged or worn out. SD cards have a limited lifespan and may fail after heavy use.
- Update Your Camera Firmware: Outdated camera firmware can sometimes cause SD card compatibility or formatting issues. For the most recent firmware update for your camera model, visit the manufacturer’s website. Updating firmware can resolve bugs and improve card support.
- Look for Error Messages Carefully: Pay attention to any error messages displayed on the camera screen, such as “Card Error” or “Cannot Format.” These messages often provide clues about whether the issue is related to the card, file system, or hardware.
- Avoid Forcing the Formatting Process: Never force the SD card into the slot or repeatedly interrupt formatting attempts. This can worsen the problem and permanently damage the card or camera slot. Always handle SD cards gently.
- Replace the SD Card If Problems Persist: If none of the above solutions work, the SD card may be corrupted or physically damaged beyond repair. In this case, replacing the SD card is the safest option to avoid data loss during future shoots.
When a camera can’t format an SD card, the issue is often minor and fixable with simple troubleshooting. By checking compatibility, cleaning contacts, and following proper formatting practices, you can quickly get back to shooting without risking your photos or videos.
Crucial Advice for Problem-Free Camera SD Card Formatting
- Always Back Up Your Data First: Before formatting any SD card, make sure all photos and videos are safely backed up to a computer, external hard drive, or cloud storage. Formatting permanently erases all data, and once deleted, files are difficult or impossible to recover. A quick backup step can save you from irreversible data loss.
- Format the SD Card Inside the Camera: For best results, always format your SD card directly in the camera you plan to use. Each camera brand has its own file system structure, and in-camera formatting ensures full compatibility, smoother performance, and fewer read/write errors compared to formatting on a computer.
- Avoid Formatting on Multiple Devices: Using the same SD card across different cameras, drones, or card readers can cause compatibility conflicts. If you must switch devices, format the card in the new camera before use. This prevents file system confusion and reduces the risk of corrupted files.
- Do Not Remove the SD Card During Formatting: Never turn off the camera or remove the SD card while formatting is in progress. Interrupting the process can damage the card’s file system and make it unreadable. Always wait until the camera confirms that formatting is complete.
- Use the Correct SD Card Type and Speed: Make sure your SD card meets your camera’s specifications. Using low-speed or unsupported cards can cause formatting errors, slow performance, or recording failures. For high-resolution photos and 4K/8K video, use high-speed SD cards such as UHS-I or UHS-II.
- Format Regularly for Best Performance: Regular formatting helps keep your SD card clean and efficient. Instead of deleting files one by one, format the card after backing up your data especially after large shoots. This reduces file fragmentation and maintains optimal write speed.
- Watch for Error Messages: If your camera shows warnings like “Card Error” or “Format Card,” don’t ignore them. These messages often indicate file system issues that formatting can fix. If errors persist after formatting, the SD card may be nearing the end of its lifespan.
- Avoid Using a Locked SD Card: Check the physical lock switch on your SD card before formatting. If the card is locked, the camera won’t be able to format or write data. Simply slide the lock switch to the unlocked position and try again.
- Use Full Format Only When Necessary: Most cameras perform a quick format, which is sufficient for everyday use. A full format may take longer and is usually only needed if you’re experiencing repeated errors. Use full formatting cautiously and only when recommended by the camera.
- Replace Old or Unreliable SD Cards: SD cards don’t last forever. If you frequently experience formatting issues, slow performance, or corrupted files, it’s time to replace the card. Using a reliable, high-quality SD card is essential for protecting your photos and videos.
Formatting your camera’s SD card properly is a simple habit that prevents major problems. By following these essential tips, you can format your SD card safely, avoid errors, and keep your camera performing at its best every time you shoot.
Why Format in the Camera?
Although an SD card may be formatted on a computer, it is strongly advised to do it in the camera that will be utilizing it. This is due to
📌Read More👉How to Develop Disposable Camera in 2026
Ensures Maximum Compatibility:
Formatting an SD card directly in your camera ensures full compatibility with that specific device. Every camera brand and model may organize files and folders slightly differently. When you format the card in-camera, it creates the correct file system structure that your camera expects, reducing the risk of read/write errors, missing files, or recording failures.
Reduces the Risk of File Corruption
Over time, SD cards can accumulate fragmented data, hidden files, or leftover metadata from other devices. Formatting in the camera clears these unnecessary elements and refreshes the card’s structure. This significantly lowers the chance of corrupted photos or videos, especially during long shoots or high-resolution video recording.
Improves Camera Performance
A freshly formatted SD card allows your camera to write data faster and more efficiently. This is especially important for burst photography, 4K/8K video recording, and continuous shooting modes. Formatting in-camera helps maintain consistent performance and prevents lag, buffering issues, or sudden recording stops.
Prevents Compatibility Issues Between Devices
Using the same SD card across multiple devices such as cameras, drones, or card readers can create conflicts. Formatting the card in your camera removes incompatible file systems and ensures the card works flawlessly with your current setup. This is a simple step that avoids unexpected errors during critical moments.
Helps Maintain Long-Term SD Card Health
Regularly formatting your SD card in the camera helps maintain its long-term reliability. It cleans up minor system errors and optimizes the storage space, which can extend the usable life of the card. While formatting doesn’t fix physical damage, it does keep the card operating at its best.
Keeps Your Files Organized Automatically
When you format an SD card in your camera, it automatically recreates the correct folder structure for photos and videos. This keeps your files neatly organized and makes it easier to manage, transfer, and back up your content later, especially if you shoot frequently.
A Quick and Safe Best Practice
Formatting in the camera is fast, safe, and recommended by most camera manufacturers. Once your files are backed up, formatting takes only a few seconds and gives you a clean slate for your next shoot. It’s a small habit that can save you from major storage headaches.
FAQs
Can I format my SD card on a computer instead of the camera?
Yes, you can, but it’s best to format the card in your camera. Cameras create a file system specific to their device, reducing compatibility issues and preventing file corruption.
How often should I format my SD card in a camera?
It’s recommended to format your SD card after backing up photos, before important shoots, or every few weeks for frequent photographers. Regular formatting keeps the card clean and prevents errors.
Will formatting delete all my photos and videos?
Yes. Formatting permanently deletes all content on the SD card. Always back up important files before formatting to avoid losing your data.
Can I format a locked SD card in my camera?
No. SD cards have a physical lock switch that prevents writing or formatting. Slide the switch to the unlocked position before attempting to format.
What should I do if my camera cannot format the SD card?
Try restarting the camera, cleaning the card contacts, using a different card, or formatting the card on a computer first. If problems persist, the SD card may be damaged and need replacement.
Does formatting improve SD card performance?
Yes. Regular formatting removes clutter, prevents fragmentation, and ensures faster write speeds, which is especially important for burst photography and high-resolution video recording.
Can I use the same SD card in multiple cameras without formatting?
It’s not recommended. Different cameras may use different file systems. Formatting the card in the new camera ensures full compatibility and reduces errors.
Is it safe to format a microSD card in a camera?
Yes. Formatting a microSD card in your camera is completely safe and works the same way as with a standard SD card, as long as the card is compatible with your device.
Conclusion
Formatting your SD card in a camera is a simple yet crucial step for every photographer and videographer. It ensures that your card is fully compatible with your device, reduces the risk of file corruption, improves write speeds, and keeps your storage organized. Whether you’re using a Nikon, Sony, Canon, or any other camera, regularly formatting your SD card after backing up your files helps maintain optimal performance and extends the card’s lifespan.
By following the proper steps and tips, such as formatting in-camera, checking the card lock switch, and backing up data, you can avoid common SD card issues and ensure a smooth, trouble-free shooting experience. Making formatting a regular habit is a small effort that protects your valuable photos and videos, allowing you to focus on capturing every moment with confidence.