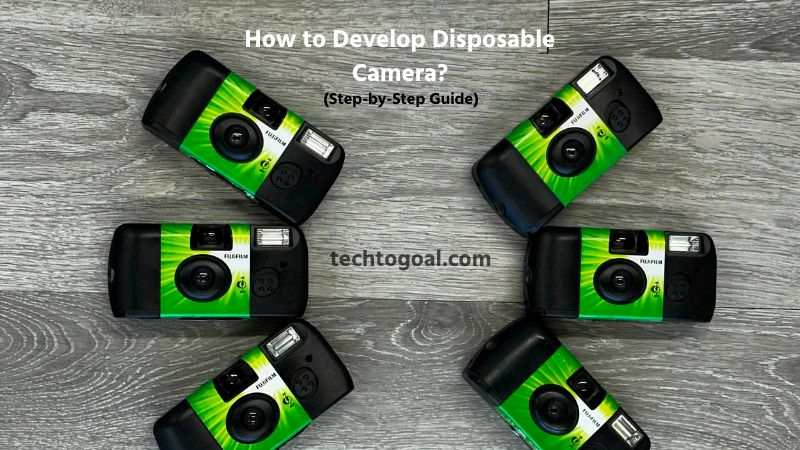
How to Develop Disposable Camera: Disposable cameras may seem old-fashioned in today’s digital world, but they continue to hold a special charm that modern photography often can’t replicate. From weddings and travel adventures to casual everyday moments, disposable cameras capture photos with a unique, nostalgic look that many people still love.
If you’ve recently finished a roll of film and are wondering what to do next, you’re not alone. Developing a disposable camera can feel intimidating, especially if you’ve never worked with film before. The good news is that the process is much simpler than it sounds, whether you choose professional photo labs or decide to try film development at home.
In this step-by-step guide, we’ll walk you through everything you need to know about developing a disposable camera, from understanding how it works to choosing the best development method for your needs. Whether you’re a beginner or just returning to film photography, this guide will help you start with confidence and preserve your photos the right way.
What is a disposable camera?
A disposable camera is a simple, single-use film camera designed for easy photography without the need for technical knowledge or advanced settings. It comes preloaded with film, a fixed-focus lens, and basic controls, making it ideal for beginners, travelers, and anyone who wants to capture moments quickly and effortlessly.
📌Read More👉How to Wire a Backup Camera
Once the film is used up, the entire camera, or in some cases just the film, is returned for photo development. From weddings and parties to vacations and outdoor adventures, disposable cameras have remained popular because of their simplicity, affordability, and nostalgic film look.
How a Disposable Camera Works
A disposable camera works using traditional 35mm film. Each time you press the shutter button, the camera exposes one frame of film to light. The film advances manually using a small thumbwheel, and once all exposures are used, the camera must be developed at a photo lab to reveal the images.
Most disposable cameras also include a built-in flash, powered by a small battery, allowing users to take photos in low-light conditions. Because the lens, exposure, and focus are fixed, the camera automatically handles the basics of photography.
Key Features of a Disposable Camera
Disposable cameras are intentionally designed to be straightforward and user-friendly. Common features include:
- Preloaded 35mm film (usually 24 or 27 exposures)
- Fixed-focus lens for general-purpose photography
- Simple shutter button with no manual settings
- Built-in flash for indoor or nighttime shots
- Lightweight, compact plastic body
These features make disposable cameras perfect for casual, stress-free photography.
How to Develop Disposable Camera Film at Home
Developing disposable camera film at home is a rewarding process that allows you to experience traditional film photography firsthand. While it requires patience, care, and the right tools, the results can be both satisfying and cost-effective. Follow these steps carefully to ensure successful film development.
Step 1: Know Your Disposable Camera Film
Before starting, it’s important to understand the type of film inside your disposable camera. Most disposable cameras use 35mm color negative film, typically ISO 400. Knowing the film type helps you choose the correct chemicals and processing method. Using the wrong developer can damage the film or ruin the images permanently.
Step 2: Gather Supplies
You’ll need essential film-developing tools such as a dark room or changing bag, film developing tank, reel, scissors, thermometer, measuring cup, film developer, stop bath, fixer, and clean water. Having all supplies ready beforehand ensures a smooth workflow and reduces the risk of mistakes during the process.
Step 3: Remove Disposable Camera Film
In complete darkness or inside a changing bag, carefully open the disposable camera casing using a flat screwdriver. Remove the film cartridge without exposing it to light. Any light exposure at this stage can destroy the photos, so this step must be done with extreme caution.
Step 4: Put Film on Reel
Once the film is removed, cut the film leader and slowly load the film onto the developing reel. Make sure the film is evenly placed and not touching itself, as overlapping can cause uneven development. Proper reel loading ensures chemicals reach every part of the film evenly.
Step 5: Combine Chemicals
Prepare the film developer, stop bath, and fixer according to the manufacturer’s instructions. Measure the correct temperature, usually around 20°C (68°F), to ensure accurate development. Mixing chemicals properly is essential for clear images and consistent color tones.
Step 6: Film Development
Pour the developer into the tank and gently agitate for the recommended time. This process brings the hidden images to life by reacting with the film’s light-sensitive layers. After development, drain the developer, and immediately apply the stop bath and fixer to preserve the images.
Step 7: Rinse and Dry Film
Thoroughly rinse the film with clean water to remove chemical residue. Hang the film in a dust-free area using clips and allow it to dry completely. Proper drying prevents water spots, dust marks, and scratches that could affect image quality.
Step 8: Print or Scan Film
Once dry, you can either scan the negatives using a film scanner or take them to a photo lab for printing. Scanning allows you to edit and share photos digitally, while printing offers a classic photographic finish. This final step transforms your developed film into usable memories.
Developing disposable camera film at home is a hands-on way to reconnect with analog photography. By following each step carefully and using the right materials, you can successfully reveal and preserve your images while enjoying the creative process behind traditional film development.
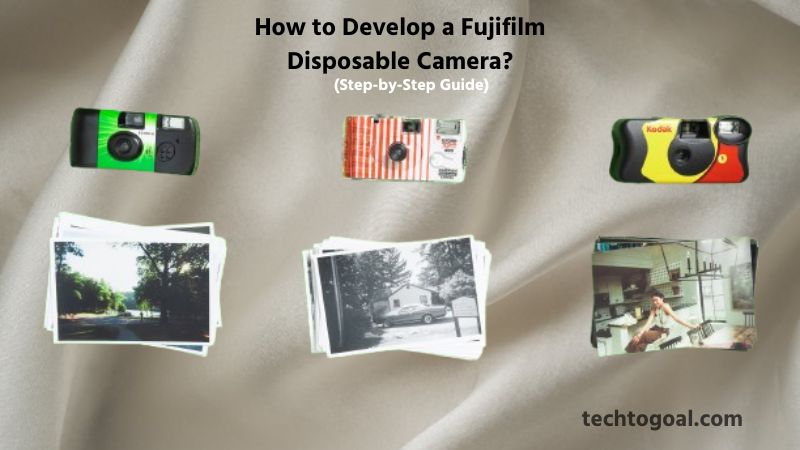
How to Develop a Fujifilm Disposable Camera
Developing a Fujifilm disposable camera is a straightforward process once you understand the film type and available development options. Fujifilm disposable cameras typically use 35mm color negative (C-41) film, which can be developed at photo labs or scanned for digital use. Below is a clear, human-written, and SEO-friendly guide to help you through the process.
📌Read More👉How to Block Neighbors Security Cameras in 2026
Step 1: Confirm the Film Type Inside the Camera
Most Fujifilm disposable cameras, such as Fujifilm QuickSnap, come preloaded with 35mm C-41 color negative film. This is the most common film type and is widely supported by photo labs across the USA, making development easy and accessible.
Step 2: Finish All Exposures Before Developing
Before sending or developing the camera, make sure you have taken all available shots (usually 27 or 36 exposures). Disposable cameras are sealed, so unfinished rolls may result in wasted film or blank frames.
Step 3: Choose a Development Method
You can develop a Fujifilm disposable camera in three main ways:
- Local photo labs
- Big retail stores (select locations)
- Mail-in film development services
- Professional labs are recommended for beginners to avoid damaging the film.
Step 4: Drop Off or Mail the Camera
Do not open the camera yourself unless you are experienced. Simply hand over the entire disposable camera to the lab or mail it securely to an online film processing service. They will safely extract the film in a darkroom environment.
Step 5: Film Development Using C-41 Process
The lab develops Fujifilm disposable camera film using the C-41 chemical process, which is standard for color negative film. This step reveals the images captured on the film.
Step 6: Choose Prints, Scans, or Both
Most labs allow you to select:
- Photo prints
- Digital scans (JPEG files)
- Both prints and digital copies
- Digital scans are ideal if you want to store, share, or upload photos online.
Step 7: Receive Your Photos
Processing time usually takes 3–10 days, depending on the lab. You may receive printed photos, a USB drive, a download link, or emailed files containing your scanned images.
Step 8: Store or Share Your Photos
Once developed, store negatives in a cool, dry place. Digital copies can be transferred to your phone, cloud storage, or social media platforms for easy sharing.
Developing a Fujifilm disposable camera is simple thanks to its standard 35mm film format. Whether you choose a local photo lab or an online mail-in service, proper handling and professional processing ensure the best image quality. With the option to receive digital scans, you can easily enjoy your Fujifilm disposable camera photos on modern devices while preserving the nostalgic film look.
How to Get Disposable Camera Photos on Your Phone
Disposable cameras capture memories in a classic film format, but viewing those photos on your phone requires a few extra steps. Fortunately, modern photo labs and scanning options make it easy to convert film images into digital files that you can save, share, and edit on your smartphone.
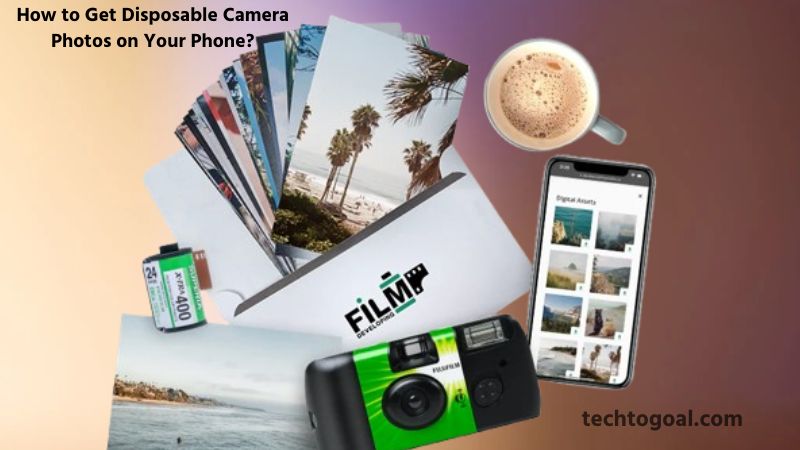
- Develop the Disposable Camera Film First: The first step is to develop the film inside the disposable camera. Film must be chemically processed before it can be viewed or digitized. You can take the camera to a local photo lab or big retail store, or send it to an online film-developing service. Once the film is developed, the images can then be scanned into digital format.
- Choose Film Developing with Digital Scans: When submitting your disposable camera, always select the option for digital scans in addition to prints. Photo labs scan each negative and convert it into a digital image file (usually JPEG). These files are essential for transferring photos to your phone.
- Receive Photos via Email or Download Link: Most online and local photo labs now deliver digital photos through email, cloud links, or customer portals. Once you receive the download link, simply open it on your smartphone and save the images directly to your photo gallery.
- Use a USB Drive or CD from the Photo Lab: Some labs provide digital photos on a USB flash drive or CD. If your phone supports USB-OTG (common on Android devices), you can plug the USB drive directly into your phone and transfer the photos. For iPhones, you may need a Lightning or USB-C adapter.
- Scan Film Negatives at Home: If you developed the film yourself, you can digitize photos using a film scanner or scanning app. Dedicated film scanners offer the best quality, while smartphone scanning apps can provide a quick and affordable alternative for casual use.
- Use a Photo Lab App for Easy Access: Many modern photo labs offer mobile apps that allow you to view, download, and manage scanned film photos directly on your phone. This is one of the easiest ways to access disposable camera photos without using a computer.
- Transfer Photos from Computer to Phone: If you receive digital files on a computer, you can transfer them to your phone using cloud storage services like Google Drive, iCloud, or Dropbox. Upload the images on your computer and download them on your smartphone in seconds.
- Edit and Share Your Disposable Camera Photos: Once the photos are on your phone, you can enhance them using photo-editing apps while preserving the film aesthetic. From there, sharing on social media or backing them up to the cloud becomes effortless.
Getting disposable camera photos on your phone is simple once the film is developed and scanned. Whether you choose a professional photo lab, online service, or home scanning method, digital film photos let you enjoy the nostalgic look of disposable cameras with modern convenience. With just a few steps, your analog memories can live permanently on your smartphone.
Where Can I Get Disposable Cameras Developed?
If you’ve recently finished using a disposable camera, the next step is finding a reliable place to develop the film. While digital photography dominates today, many labs and services across the The USA still offers disposable camera film development. From local photo labs to online mail-in services, there are several convenient options depending on your budget, timeline, and quality expectations.
📌Read More👉How Long Do Security Cameras Keep Footage?
Local Photo Labs
Local photo labs are one of the best places to get disposable cameras developed. These independent labs often provide higher-quality processing and careful handling of film.
Many local labs develop 35mm color film, which is the most common format used in disposable cameras. While prices may be slightly higher than big retail stores, you usually get better image quality, faster turnaround, and knowledgeable staff who understand film photography.
Big Retail Stores (CVS, Walgreens, Walmart)
Large retail chains such as CVS, Walgreens, and Walmart still offer disposable camera development services in many locations. You simply drop off your camera at the photo counter, and the film is sent to an off-site lab for processing. This option is convenient and widely available, but turnaround time can take 1–3 weeks, and image quality may vary depending on the lab used.
Online Mail-In Film Developing Services
Online film labs are becoming increasingly popular for disposable camera development. Services like The Darkroom, MPix, and Indie Film Lab allow you to mail in your disposable camera. They develop the film, scan the photos digitally, and send them back via download or USB. This option is ideal if you want high-quality scans, professional processing, and home delivery.
Professional Film Photography Labs
Professional film labs specialize in analog photography and provide premium development services. These labs are commonly used by photographers who value accurate colors, sharp scans, and archival-quality results. Although more expensive, professional labs are an excellent choice for important memories, travel photos, or artistic film work.
College or Community Darkrooms
There are darkrooms at several universities, art schools, and community organizations that provide instruction or services related to film developing. In some cases, they may develop disposable camera film for a small fee or allow you to develop it yourself under supervision. This option is budget-friendly and educational, though availability depends on location.
Drugstores vs. Online Labs: Which Is Better?
Drugstores are best for convenience and affordability, while online labs are ideal for quality and digital delivery. If you want quick access and simple prints, a local store may work well. If you want professional scans, color correction, and long-term storage, an online film lab is usually the better choice. Things to Check Before Choosing a Film Developing Service
Before handing over your disposable camera, confirm:
- Whether they still develop 35mm film
- Turnaround time
- Digital scan resolution
- Print options
- Return of negatives
- These factors help ensure you choose the best service for your needs.
There are many reliable places to get disposable cameras developed in the USA, including local photo labs, major retail stores, online mail-in services, and professional film labs. The best option depends on your priorities—whether that’s convenience, cost, speed, or photo quality. No matter which route you choose, developing a disposable camera is a rewarding way to relive captured moments and enjoy the charm of film photography.
Advice for Improving the Performance of Disposable Camera Film Development
- Store the Camera Properly Before Development: Always keep your disposable camera in a cool, dry place after shooting and before development. Heat and humidity can damage the film, cause color shifts, or reduce image sharpness. Avoid leaving the camera in a car or direct sunlight for long periods.
- Develop the Film as Soon as Possible: For the best image quality, develop disposable camera film as soon as you finish shooting. Over time, undeveloped film can lose contrast and color accuracy, especially if stored improperly. Faster development helps preserve details and natural tones.
- Handle Film Carefully in Low Light: When removing film at home, always work in complete darkness or a light-tight changing bag. Even brief exposure to light can ruin your photos. Gentle handling also prevents scratches, fingerprints, and bending damage.
- Use Fresh and Correct Chemicals: Old or incorrectly mixed chemicals can lead to underdeveloped, overdeveloped, or blotchy negatives. Always follow the recommended chemical ratios and temperatures for color (C-41) or black-and-white film to achieve consistent results.
- Maintain Proper Development Temperature: Temperature control is critical, especially for color film. Keep chemicals at the recommended temperature (usually around 102°F / 39°C for C-41). Incorrect temperatures can cause color casts, graininess, or uneven development.
- Avoid Over-Agitation During Development: While agitation helps distribute chemicals evenly, over-agitating the film can increase grain and reduce sharpness. Gently agitate according to instructions to maintain balanced exposure and cleaner images.
- Rinse and Dry Film in a Dust-Free Area: After development, rinse the film thoroughly and let it dry in a clean, dust-free environment. Dust particles can stick to wet film and appear as permanent spots on scanned or printed photos.
- Scan Film at High Resolution: If you want digital copies, scan negatives at high resolution for better detail and flexibility in editing. By maintaining colors, highlights, and shadows, high-quality scans give your disposable camera photos a more polished appearance on phones and screens.
- Avoid Over-Editing Digital Scans: Disposable camera photos are loved for their natural, nostalgic look. Avoid heavy editing or excessive filters, as this can remove the authentic film character. Minor brightness and color corrections are usually enough.
- Choose a Reliable Lab If You Don’t Develop at Home: If home development feels risky, choose a trusted photo lab experienced with disposable cameras. Professional labs use calibrated equipment and proper chemical processes, ensuring consistent and high-quality results.
Common Mistakes When Developing Disposable Camera Film
Opening the Camera in Bright Light: One of the most common mistakes is opening the disposable camera before the film is fully rewound. Film is extremely sensitive to light, and exposing it prematurely can ruin your photos with overexposure or light streaks. Always ensure the film is safely rewound into the canister before removing it from the camera.
Using Incorrect Chemicals: Using the wrong type or concentration of chemicals for developing film can cause faded images, uneven development, or complete loss of photos. Always follow the recommended chemicals for the specific film type, such as color or black-and-white, and double-check measurements before starting the development process.
Incorrect Temperature During Development: Film development requires precise temperature control. Water or chemical solutions that are too hot or too cold can damage the emulsion on the film, resulting in blurry, uneven, or color-shifted images. Use a thermometer and maintain the temperature according to the film’s instructions.
Rushing the Development Process: Rushing through the development steps, such as shortening chemical baths or skipping agitation, can result in streaks, uneven exposure, or incomplete development. Patience is key; allow each chemical step to process for the recommended time.
Touching Film With Bare Hands: Handling film with bare hands can leave fingerprints, oils, and scratches on the surface, which will appear as blemishes on the final images. Always wear lint-free gloves or handle film by the edges.
Inadequate Washing and Fixing: Failing to properly rinse and fix the film can leave chemical residues, which may continue to react with the film over time, leading to fading or discoloration. Rinse thoroughly and follow the recommended fixing process to preserve your images.
Drying Film Improperly: Hanging film in a dusty area or touching it while wet can result in spots, scratches, or warped negatives. Dry film in a clean, dust-free environment, ideally using film clips, and avoid direct sunlight until completely dry.
Ignoring Film Type Differences: Different disposable cameras may use different film types, such as Fujifilm, Kodak, or generic color/B&W film. Using a one-size-fits-all approach can lead to incorrect chemical choice or development time, ruining your photos. Always check the film brand and type before starting.
Reusing Chemicals: Reusing developing chemicals multiple times can weaken their effectiveness, resulting in faded or inconsistent photos. For the best results, use fresh chemicals for each batch of film.
Skipping Testing or Practice: Jumping straight into developing your first disposable camera without testing can lead to irreversible mistakes. Beginners should consider practicing on an old roll of film to get familiar with the process and reduce the risk of ruining valuable memories.
The Price In The USA For Creating Disposable Camera Film
The cost of developing disposable camera film in the USA can vary depending on where you choose to develop the film, how many photos you want printed or scanned, and whether you use a local lab or an online service. Understanding these costs helps you decide the most convenient and budget-friendly option.
Average Cost at Local Photo Labs: Local photo labs typically charge between $15 and $25 to develop a disposable camera. This price usually includes film processing and standard 4×6 photo prints. Some labs may charge extra for digital scans or faster turnaround times. While local labs are convenient, they can be slightly more expensive due to in-store handling and limited package options.
Cost at Big Retail Stores: Large retailers like pharmacies and department stores often offer disposable camera film development for around $12 to $20. However, turnaround time can be longer, sometimes taking one to two weeks. In many cases, prints are included, but digital copies may cost extra or require an upgrade.
Online Film Developing Services: Online film developing services in the USA generally cost $10 to $18, depending on the package. Many online labs include high-resolution digital scans, with optional photo prints at an additional cost. Shipping fees may apply, but online services are popular for their quality scans and consistent results.
Cost of Developing at Home: Developing disposable camera film at home can cost as little as $5 to $10 per roll after the initial setup. However, you need to invest in equipment and chemicals upfront, which can cost $50 to $100 or more. Home development is cost-effective for frequent film users but less practical for one-time use.
Additional Costs to Consider: Extra charges may include rush processing, higher-resolution scans, photo enlargements, or mail-in shipping fees. Some labs also charge separately for removing film from the disposable camera casing.
In the USA, the cost of developing a disposable camera typically ranges from $10 to $25, depending on the method you choose. Local labs offer convenience, online services provide better digital options, and home development offers long-term savings for film enthusiasts. Choosing the right option depends on your budget, time, and how you plan to use your photos.
Why Disposable Cameras Are Still Used in the United States
In an age dominated by smartphones and high-resolution digital cameras, it may seem surprising that disposable cameras are still popular in the USA. However, these simple, single-use film cameras continue to attract a wide range of users, from teenagers to professional creatives. Their ongoing appeal is driven by nostalgia, simplicity, affordability, and the unique photographic experience that digital devices cannot fully replicate.
Nostalgia and Retro Appeal: One of the biggest reasons people in the USA still use disposable cameras is nostalgia. Disposable cameras remind many users of the 1990s and early 2000s, a time when photography felt more intentional and exciting. The grainy film look, light leaks, and imperfect colors create a vintage aesthetic that has become trendy again, especially among younger generations.
Unique Film Aesthetic: Disposable cameras use 35mm film, which produces images with natural grain, soft tones, and unpredictable results. Unlike digital photos that can be edited endlessly, film photos feel more authentic and emotionally engaging. Many people in the USA prefer this raw, unfiltered look for personal memories, social media content, and creative projects.
Simplicity and Ease of Use: Disposable cameras are extremely easy to use, making them ideal for beginners. There are no complex settings, menus, or screens; just point, shoot, and advance the film. This simplicity appeals to users who want to enjoy the moment without worrying about camera settings or battery charging.
Perfect for Events and Travel: In the USA, disposable cameras are commonly used at weddings, parties, road trips, festivals, and vacations. They are lightweight, affordable, and easy to share with guests. Since there is no fear of damage or theft, people feel more relaxed using them in crowded or outdoor environments.
Encourages Mindful Photography: With a limited number of exposures, usually 24 or 27 shots, disposable cameras encourage thoughtful and intentional photography. Users take time to compose each shot instead of snapping hundreds of photos. This mindset makes each image feel more meaningful and memorable.
Popular Among Teens and Gen Z: Disposable cameras have seen a resurgence among Gen Z and teenagers in the USA. Many young people enjoy disconnecting from screens and experiencing photography in a more tangible way. Developing film and waiting for prints adds excitement and anticipation that digital photography lacks.
Affordable Entry into Film Photography: For those curious about film photography, disposable cameras offer a low-cost entry point. Users can enjoy shooting on film without investing in expensive film cameras or lenses. This makes disposable cameras especially appealing to students and casual photographers.
Limited Distractions, More Presence: Unlike smartphones, disposable cameras have no notifications, apps, or distractions. This allows users to stay fully present in the moment, making disposable cameras a favorite choice for meaningful experiences and memory-making.
Widely Available and Easy to Develop: In the USA, disposable cameras are widely available in pharmacies, supermarkets, and online stores. Film development services are also accessible through local labs and mail-in services, making the entire process convenient and beginner-friendly.
Despite the dominance of digital photography, disposable cameras continue to thrive in the USA because they offer something truly different: authenticity, simplicity, and emotional value. Their nostalgic charm, unique image quality, and mindful shooting experience make them more than just a trend. For many Americans, disposable cameras are not about convenience or perfection; they’re about capturing real moments that feel timeless.
FAQs
Can I develop disposable camera film at home?
Yes, you can develop disposable camera film at home with the right chemicals, equipment, and darkroom setup. Beginners can also use at-home film development kits to simplify the process.
How long does it take to develop a disposable camera?
The development time depends on the film type and processing method, usually ranging from 30 minutes to 2 hours. This includes developing, rinsing, fixing, and drying the film.
What supplies do I need to develop disposable camera film?
You will need film reels, a development tank, chemicals, a thermometer, a timer, gloves, and a clean drying area. Some kits include all necessary items for beginners.
How do I remove the film from the disposable camera?
First, make sure the camera is fully rewound. Open the camera carefully in a dim or dark environment and gently remove the film roll without exposing it to light.
How do I prevent my photos from getting ruined during development?
Avoid light leaks, incorrect chemical use, temperature mistakes, and touching the film with bare hands. Following the correct steps carefully ensures good results.
Is it cheaper to develop disposable camera film at home or at a lab?
Developing at home may save money in the long run but requires an initial investment in chemicals and equipment. Professional labs offer convenience and high-quality prints but cost more per roll.
Conclusion
Developing disposable camera film is a rewarding process that allows you to bring your captured memories to life while gaining a deeper understanding of analog photography. Whether you choose to develop film at home or use a professional lab, following the correct steps, such as safely removing the film, using the right chemicals, and handling the negatives carefully, ensures the best possible results.
With a little patience and attention to detail, you can enjoy high-quality prints or digital scans of your photos, preserving your moments for years to come. Embracing disposable camera development not only gives you a tangible connection to your memories but also adds a fun, creative twist to the photography experience.