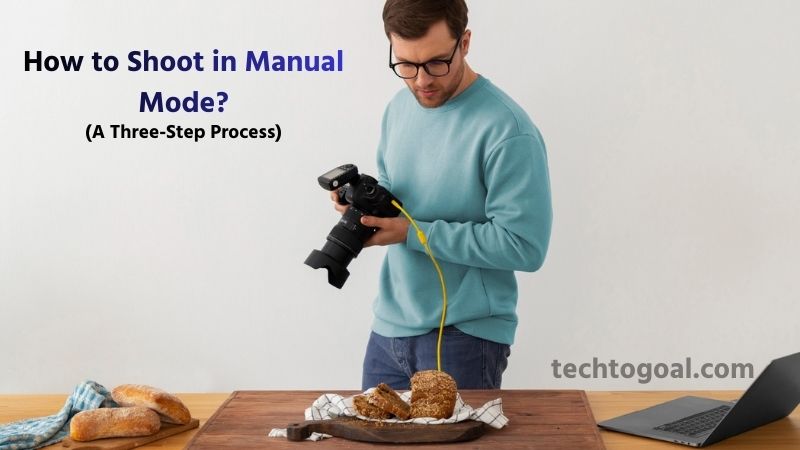
How to Shoot in Manual Mode: At the very least, photography still provides the chance to be vigilant, proactive, and in control in an increasingly automated environment.
Although first daunting, shooting in full manual mode offers greater integration into the entire photo-making process, creative control, and accurate metering in challenging light. You can create your best photos using manual photography if you give it enough time.
This is a manual photography guide covering everything from the fundamentals to more complex methods.
What is manual photography?
Simply put, manual photography is the history of photography. It’s that easy and fundamental. Both amateur and professional photographers have been able to measure a scene and modify their settings for years. Therefore, using a digital camera for manual photography transports us back to the days of film (or plate).
Light meters were eventually added to the camera, and autoexposure features emerged by the 1970s. After that, autoexposure camera modes were improved and added to practically all cameras available.
One may argue that the inexpensive, widely used point-and-shoot cameras of the 1980s and 1990s, which anybody could use, were the pinnacle of Auto mode. However, cell phones stole that show, and their complete usability only increased the appeal of manual photography.
Why Shoot in Manual Mode?
The manual selection of exposure settings is beneficial to all serious photographers, from purists to pros. In essence, it’s the most reliable method for taking pictures that you want.
📌Read More👉 How to Clean Camera Sensor?
A photographer will be able to identify circumstances where manually adjusting exposure is vital after they comprehend how aperture impacts a picture and how light meters can often become confused. Additionally, knowing how to take pictures by hand will make it easier for you to use full auto or half auto mode when you decide to.
The purpose of your camera is to fulfill your demands. A study of exposure is crucial to learning how to operate and control a camera because photography is essentially the exposure of light onto a light-sensitive surface. Photographers must understand the ideas underlying exposure while using manual photography.
The additional justification for overriding The essence of photography is more closely related to auto mode. In addition to providing a film-like shooting experience, manual photography demands more of the photographer: more time spent examining a picture and its lighting, more consideration of what should be in focus or left blurry, and more process involvement.
We all know that we achieve better results when we take our time and slow down when composing and taking pictures. Even though we are making longer, more deliberate decisions, we are doing so more quickly as manual shooting becomes instinctive over time. Locate a subject, measure the light, adjust the “correct” exposure, focus, take a picture, and move on.
What is manual mode in photography?
You have total control over your camera settings when using manual mode. You can modify every parameter your camera provides once it is in manual mode. Most significantly, you can independently modify the three main exposure variables when shooting in manual:
- ISO
- Aperture
- Shutter speed
Your photos’ overall brightness, or exposure, is determined by the ISO, aperture, and shutter speed taken together. By modifying the sharpness, depth of field, and general quality of your files, they also have a significant impact on your images.
Manual mode is extremely potent because of this. You can precisely adjust how light or dark your photos look in Manual. Additionally, you can maintain the great quality of your low-light images, produce various depth of field effects, and guarantee precise clarity.
This contrasts with a number of other modes, like semi-automatic modes, which let you change some parameters while your camera selects the rest, and fully automated modes, which don’t let you change any camera settings.
Nevertheless, even while manual mode is great for a lot of different kinds of photography, it’s not always the ideal choice. Later on, I’ll go over the situations in which you’ll want to select an alternative (such as the widely used Aperture Priority mode).
But before we get into the specifics of shooting in manual, let’s take a closer look at the three main exposure settings. You won’t be able to use manual mode efficiently if you don’t understand the exposure triangle.
ISO
In short, ISO regulates how sensitive your camera is to light. You can therefore improve your camera’s light sensitivity by changing the ISO, which will result in a brighter image.
Let’s say you are shooting at night and the results are too dark. You can increase your ISO while working in manual mode, which will instantly brighten your photos.
Conversely, you can lower the ISO to get a darker image if you’re shooting on a sunny day and wish to lower your exposure.
Unfortunately, ISO does have a major disadvantage. The ISO cheat sheet below shows that your photos get noisier the higher the ISO. Rarely does noise appear attractive, and it’s a simple way to destroy an otherwise excellent photograph. Additionally, there are additional methods for increasing image exposure, which I’ll discuss shortly.
Because of this, I usually advise leaving your ISO at its default setting (usually ISO 100, but I’ve also used cameras with base ISOs of 50, 160, or 200). The only exception is when you absolutely need to increase the ISO (for example, when you’re shooting in low light and can’t afford to change the exposure of the image).
Aperture
An opening in the lens is called an aperture. The exposure that results from a wider aperture is brighter because it allows in more light (see the aperture cheat sheet below):
Keep in mind that photographers refer to aperture sizes using f-stops. A larger aperture is indicated by a smaller f-stop, and a smaller aperture is indicated by a larger f-stop. (I know it’s confusing, but you’ll quickly get the hang of it!)
Thus, you get a brighter image with an aperture of f/1.4 since it lets in a lot more light. A darker image is produced by an aperture of f/22, which allows in very little light.
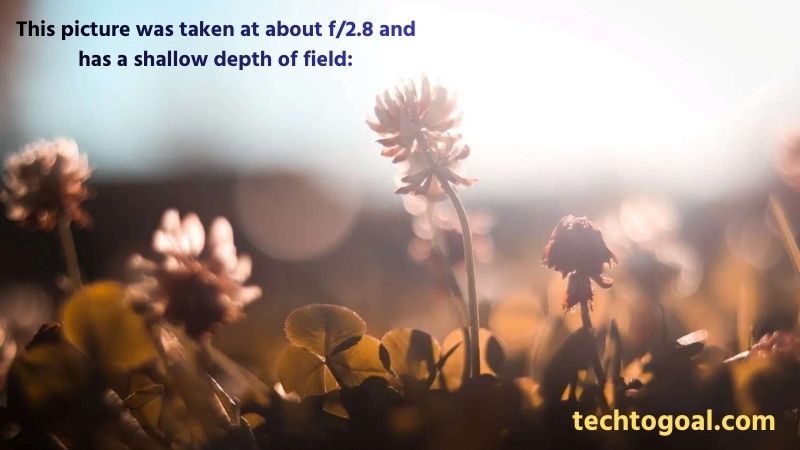
The depth of field, or the window of focus within the picture, is likewise controlled by aperture. The window of focus narrows as the depth of field decreases with increasing aperture.
This picture was taken at about f/2.8 and has a shallow depth of field:
And this picture, which was taken at about f/11, has a deep depth of field:

Can you see the difference? Although part of the flower is still sharp, the wide aperture in the first picture guaranteed an extremely hazy background. The tiny aperture in the second picture maintained the shot’s sharpness from foreground to background.
Therefore, you can utilize manual mode to dial in a low f-number if you want a smooth, fuzzy backdrop. Additionally, you can dial in a high f-number if you want a photo that is sharp throughout.
Shutter speed
The exposure duration of an image, or how long the shutter is open to let light reach the sensor, is known as the shutter speed. As a result, a faster shutter speed results in a darker final image because less light reaches the camera sensor.
The sharpness of the image is also determined by the shutter speed. While a moderate shutter speed (like 1/10 s) frequently results in motion blur, a fast shutter speed (like 1/1000 s) will typically freeze the action:
To get crisp photos, it usually pays to use a higher shutter speed. However, a slower shutter speed is the best option when you want to produce motion blur for artistic effect.
Additionally, your subject will determine the shutter speed you need to take sharp pictures; slower subjects can be tack-sharp at shorter shutter speeds, while faster subjects demand faster shutter speeds. (However, you’ll need to be aware of blur caused by camera shake at very lower shutter speeds, usually about 1/100 s and below!)
How to use Manual mode: A Three-Step Process
You can individually change your ISO, aperture, and shutter speed in manual mode to obtain a final image that is either well or badly illuminated.
📌Read More👉 What is a Flock Camera?
The mode dial on the top of your camera must often be adjusted in order to begin using manual mode. You should set your camera to “M” for manual, but there will probably be a number of other settings on the dial, such as “A” or “Av” for aperture priority mode and “P” for program mode.
The objective is to carefully adjust your variables for the desired outcomes once you’ve switched your camera to manual mode. However, how do you go about doing this? What is the most effective method for figuring out the proper manual mode settings?
Although there isn’t a single right way to change settings in Manual, here’s my detailed guidance:
Step 1: Set your aperture based on desired depth of field.
Is a small depth of field what you want? or a great depth of field?
To begin, dial in the aperture you want. Choose a wide aperture if you want a fuzzy background. Choose a narrow aperture if you want a crisp background. Focus only on the aperture and its depth of field effects; ignore the overall exposure of the image.
Step 2: Set your shutter speed for sharpness
Next, ask yourself:
How quickly is my subject moving? What shutter speed is necessary to maintain sharpness?
In this case, you may guess based on past experiences or consider applying the useful reciprocal rule if your subject is totally motionless. (I rarely go below 1/125 s or so when shooting still subjects without a tripod.)
Additionally, you might need to try a few different approaches until you achieve tack-sharp shots if your subject is moving. Keep in mind that while some objects, like small birds in flight, require a shutter speed of 1/1600s or more, relatively quick subjects (like joggers) can be successfully photographed at roughly 1/250s to 1/500s.
Of course, you can reduce your shutter speed to 1/30 s and higher if you’re looking for artistic blur or if you’re taking pictures of a still subject using a tripod! After setting your shutter speed, move on to the next step:
Step 3: Set your ISO
By now, you should have chosen an aperture based on aesthetic considerations and adjusted the shutter speed to achieve the ideal level of sharpness.
The only thing left to do is perfect the exposure, and if at all feasible, use your ISO (though you might also need to adjust your shutter speed and aperture along the way).
Set your ISO to the lowest level first. As previously said, this is often ISO 100; however, depending on your camera, it may be ISO 160, ISO 200, or ISO 50.
Next, just aim your camera at the scene you wish to capture and pay close attention to the exposure bar located at the bottom of your viewfinder. You must raise your ISO until you obtain a centered exposure bar if the bar is displaying underexposure (skewed to the left).
As an alternative, you can widen the aperture or reduce the shutter speed if you’re concerned about high-ISO noise effects. Just keep in mind that while a wider aperture may reduce the depth of field, lowering the shutter speed will raise the possibility of a blurry photo.
In order to achieve a balanced exposure bar, you must either increase the shutter speed or reduce the aperture if the bar is displaying overexposure. It doesn’t really matter what setting you change as long as you maintain any desired artistic impact.
Therefore, increase your shutter speed if you’re using a wide aperture for a narrow depth of field. Additionally, reduce your aperture and maintain the shutter speed if you’re utilizing a slow shutter speed for artistic motion blur.
Common Mistakes to Avoid
Shooting in manual mode opens the door to endless creative possibilities, but beginners often make a few common mistakes that can affect their results. Being aware of these pitfalls will help you learn faster and take better photos with confidence.
- Ignoring the Exposure Meter
- Using the Wrong Shutter Speed
- Keeping ISO Too High or Too Low
- Forgetting How Aperture Affects Depth of Field
- Not Reviewing Photos After Each Adjustment
- Relying Only on the Screen Brightness
- Changing Too Many Settings at Once
- Not Practicing in Different Light Conditions
- Overcomplicating the Process
- Ignoring Stability: No Tripod When Needed
Should you always use manual mode?
In many circumstances, manual mode is excellent. It will help you become a better photographer and take crisp, creative, well-exposed pictures.
However, there are many situations in which you’ll want to switch to a different camera mode, such as Program mode, Aperture Priority, or Shutter Priority. To assist you, here is a brief breakdown:
Manual mode is good if…
- The lighting circumstances in which you are working are constant (for example, you are taking pictures in a studio or a room with continuous ambient light).
- You want total control over all of your exposure factors.
- For artistic effects, you may want to underexpose or overexpose your images.
You have the time to meticulously modify your settings when taking slow, deliberate pictures (like landscapes).
Manual mode is best avoided if…
- Your subject is shifting between the sun and shade, or the light is changing quickly (for example, you’re taking a picture of a bird darting between trees).
- Your other settings are less significant than the aperture or shutter speed.
- When you’re taking action photos, your main concentration is on perfecting the focusing (your specific exposure settings take a backseat).
The various exposure settings are unfamiliar to you as a novice.
Other shooting modes
As you can see from the lists above, manual mode works well when you have time to experiment with your camera knobs and you require control over your settings. However, if you’re working with fast-paced situations and shifting light, or if you’re just a novice photographer, you should steer clear of manual shooting.
Generally speaking, you should switch to a semi-automatic mode in these situations.
While your camera chooses the shutter speed, you can adjust the aperture and ISO using the Aperture Priority mode. It works well when you want to adjust the depth of field but don’t want to spend a lot of time adjusting the shutter speed. If you want to start experimenting with different settings but aren’t quite ready for manual mode, it’s also an excellent transitional mode.
Similar to aperture priority, but in reverse, shutter priority mode allows you to adjust the ISO and shutter speed while your camera chooses the aperture. It’s helpful when you don’t really care about the aperture and want to choose a specific shutter speed for artistic reasons.
You can use your camera’s exposure compensation option to change the exposure in addition to controlling the ISO in program mode. When switching off Auto, it’s a fantastic transitional mode.
FAQs
What is manual mode on a camera?
Manual Mode is a camera setting that allows you to control shutter speed, aperture, and ISO yourself instead of relying on automatic adjustments.
Why should beginners learn to shoot in manual mode?
Manual Mode gives full creative control, helping you understand exposure and improve your photography skills over time.
What is the exposure triangle?
The exposure triangle refers to the relationship between shutter speed, aperture, and ISO, three settings that work together to determine brightness and image quality.
How do I choose the right shutter speed?
Choose faster shutter speeds for freezing motion and slower speeds for capturing motion blur or shooting in low light.
What aperture should I use in manual mode?
Use a wide aperture (low f-number) for blurred backgrounds and a narrow aperture (high f-number) for sharp, detailed scenes.
How do I set ISO properly?
Use the lowest ISO possible for clean images, and increase it only when shooting in low light.
What settings should beginners start with?
A good starting point is:
- ISO 100–400 (daylight)
- Aperture f/4–f/8
- Shutter speed 1/125 s or faster
Is manual mode good for all types of photography?
Yes—Manual Mode is useful for portraits, landscapes, night photography, and any situation where you want consistent, predictable results.
Conclusion
You are now prepared to utilize manual mode in your photography after reading this tutorial. You are familiar with the fundamentals, including how to turn your camera to manual and how different settings may affect your photos.
Go get your camera and practice a little. Gain an understanding of the many factors. Take lots of pictures and see what you can make!
(Remember to grab the cheat sheets that are included throughout the article as well.)
It’s your turn now: When will you start using manual mode in your pictures? Please share your thoughts in the comment section below!